The forms for managing line objects are:
Cable button
Conduit button
Cable
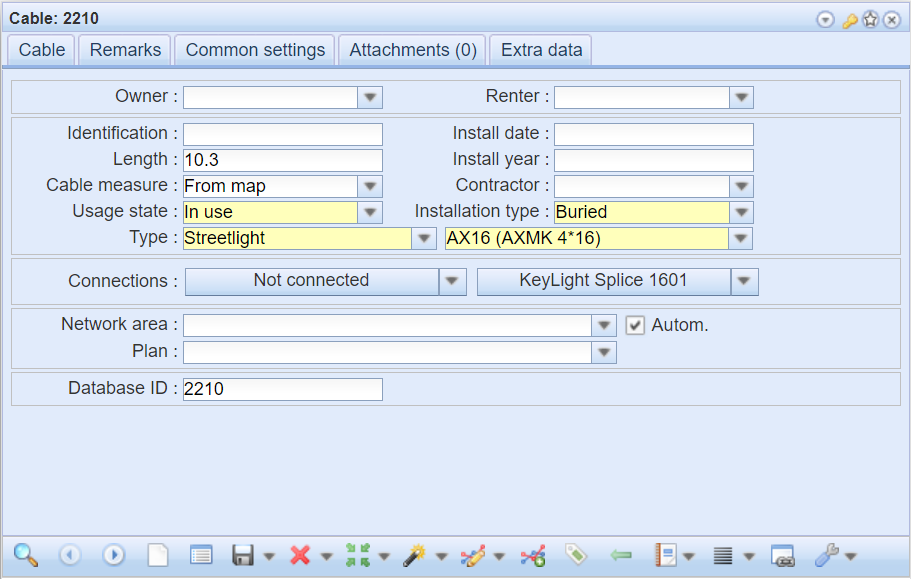
The Cable  form is used for managing cables in the system. You can add, modify, and delete cables in the system. For more information about the common functions of the form, see Buttons on object forms.
Adding a cable
To add a new cable, fill in the required information on the Cable  form. The required information includes Usage state, Installation method and Type. You can connect the cable to a Network area and Plan an and assign other relevant details to the cable, related to, for example, the measurement method, installation or ownership.
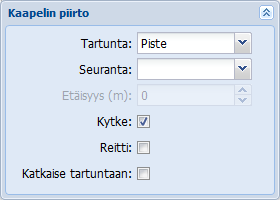
To add a cable to the map, Click the Create new button, which opens the Cable drawing window. Make the required choices regarding cable digitization, as described in the chapter Creating a new line object. You can also use the Connect option to connect the cable to a point object by snapping to it while drawing. The Route option creates a conduit for the cable for the distance you digitize. The Split at snap option splits the cable at the poles where you use snapping (the Shift key).
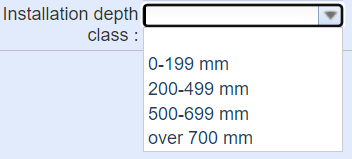
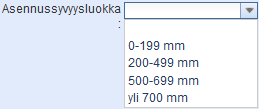
The Common tab displays the Installation depth class, which can be used to determine the installation depth of the cable.
Splitting cables at poles
It is possible to make a split in cable digitizing at a pole by checking the Split at poles option, found in the Edit  tool’s submenu. You can use this feature to modify an existing cable. When you activate the Split at poles function, both the Pole form and the Split at poles window will appear.
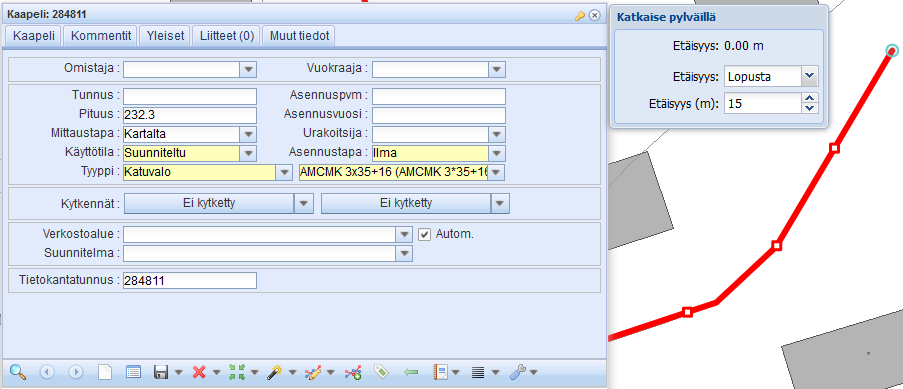
On the Pole form, you can retrieve or fill in the details of the pole using which the cable will be split. In the auxiliary Split at poles window, you can choose the distance (m) of the pole spacing and whether to start splitting the cable at the poles at the beginning or end of the cable (Distance: From the beginning/end).
Use the left mouse button to split the cable so that the poles appear at the split points. To cancel the operation, right-click with the mouse.
Connecting cables
The cable can be connected to premises, splices, poles, or streetlights either when creating the cable or with the separate Connect cable function, when the cable has been retrieved to the form.
The cable may be connected at the beginning and at the end. The center of the Cable form contains the connection details for the beginning and end of the cable.
In the figure below, the cable is connected from the beginning to the streetlight and from the end to the pole.

Connection when creating a cable:
A new cable can be connected to a pole during its creation phase, for example. When digitizing a cable, use the Snap function, i.e., hold down Shift and click the pole to snap the beginning or end of the cable to the object. When pressing the Shift key, a larger blue circle is drawn around the cursor, indicating the snapping area. In this area, the program will search for the object to connect to. Release the left mouse button, and the object will be snapped. If more than one object is found, the object selection list will appear, from which the user selects the object to connect. If the connection is successful, the following text appears in the bottom bar of the map window: Snapping completed. Snapped to object Pole (ID). The cable gets the coordinates of the object to which it was connected as its starting point or end point. End the digitizing with the right mouse button.
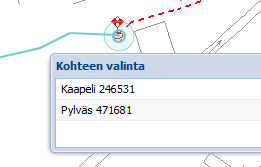
The cable is digitized from node to node, for example from a pole to a pole, a streetlight, premises or a splice. The cable will be split at these nodes. Between the nodes, the cable must be a continuous line. Once the digitizing has been done as described above, network following and short circuit calculation as the network branches will succeed.
Connecting after the creation of the cable:
If the cable is not connected from the beginning or end, the column data is Not connected.
On the menu on the right side, select Connect cable. After this, select the object on the map to which the cable should be connected.

Disconnecting objects
To disconnect an object, select the Disconnect connection on the menu on the right side of the column.

Conduit
The Conduit  form is used for managing conduits in the system. You can add, modify, and delete conduits in the system. For more information about the common functions of the form, see Buttons on object forms. The Conduit
  form differs in appearance and property information from other forms. The form buttons and conduit creation work as on other forms, only the processing of ducts connected to the conduit and cables connected to the ducts is form-specific.
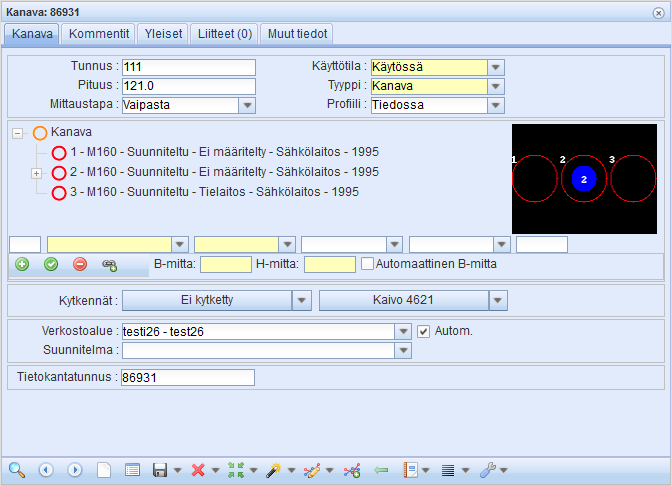
On the form, you can view both a list and an illustration of the ducts and cables connected to the conduit.
Several ducts can be added to a conduit, and several cables can be connected to ducts. A cable can also be located directly in a conduit (in the trench next to the ducts). The Common tab displays the Installation depth class, which can be used to determine the installation depth of the conduit.
A conduit can be connected to other objects on the network via the Not connected menu on the Conduit form. To connect, select Connect conduit from the drop-down menu. To access the native form of a connected object, click Edit. To remove an existing connection, select Disconnect connection the drop-down menu.

The properties of ducts and cables in a conduit
In addition to the information on the properties of a conduit, the Conduit form lists the ducts and cables that the conduit includes. To see information about the cables in a duct, click the  symbol in front of the duct. To hide the information, click the
  symbol in front of the duct. For ducts, the information includes the duct number (displayed in the illustration in the top left corner of the duct), duct type, usage state, owner, renter, and installation year. For cables, the property information includes the type, state, owner, and installation year, if provided on the form.
In the figure below, the information on ducts (a red circle) and cables (green dotted line) in a conduit can be viewed on the Conduit form.

To activate duct data for editing, left-click the duct in the list. Data on the B and H measures is now also visible, expressed in millimeters. The B measure indicates the horizontal position of the duct in the conduit counted from its left end, i.e. if the B dimension of a duct is 0, the duct is at the left end in the illustration. The greater the B measure, the further from the left end of the image the duct is located. The B measure is calculated from the left end of the duct and is usually positive, i.e., a duct is not placed outside a conduit.

The H measure indicates a duct’s vertical location in a conduit, as measured from the ground level. In other words, the H measure is a negative figure, if the cable is underground. The greater the negative H measure, the deeper and lower the duct is located on the map. Ducts and cables do not have to be located in the conduit at the same depth.
Ducts and cables in illustrations
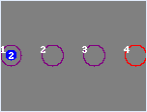
The Conduit form also illustrates the location of ducts and cables in a conduit using an illustrative figure. Ducts are presented as hollow circles, with the duct number, assigned to the duct when creating it, displayed in the upper-left corner. The color of the duct depends on its state: a planned duct is red, a purple duct is in use. If a duct is selected and its data is active in the fields, the duct is shown in blue.
| Figure A. The usage states of ducts are displayed in different colors. The cable number indicates the number of cables. |
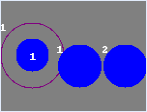
| Figure B. A cable (blue symbol) can be installed directly in a conduit, in which case the cable number is displayed in the cable’s top left corner. |
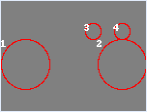
| Figure C. Ducts can have different sizes and installation depths. |
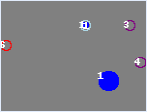
| Figure D. Also cables can have different heights. The duct selected on the list is shown in blue in the illustration. |
Cables are shown with a blue symbol in the illustration, and the number inside them reflects the number of cables. If a cable is installed directly in a conduit, and not in a duct, the cable’s sequence number, which is automatically assigned and cannot be edited, is displayed in the top left corner of the cable. The location and size of ducts and cables is illustrated in proportion to each other, meaning that a duct of the same size may be illustrated in various sizes in different illustrations depending on the conduit’s size and the number of ducts and cables in the illustration.
Creating ducts and editing them in conduits
When you add a new duct to a conduit, the required information includes duct type, duct state, and the B and H dimensions of the duct. Once these have been added to the form, a new duct can be added to the conduit with the Add new duct  button. The information of the duct appears on the list and on the map. In addition to the required information, you can also enter information about the duct number, owner, renter and year of installation on the form.

To update the properties of a duct, you must first activate the information for that duct by clicking the duct on the list with the left mouse button. Make the desired changes and then save them with the Save changes  button. To delete a duct from a conduit, click Remove ducts
  . Click Save
  to save any changes you have made.
To add multiple ducts of the same type, check the Automatic B-measure checkbox. After the first duct has been added to the conduit, the B measure is automatically changed for the next duct to be added. After each addition of a duct, the B measure increases so that the next duct is positioned to the right of the first one in the illustration. The size of the distance between the ducts depends on their diameter: the larger the diameter, the wider the distance.
Adding cables and modifying them in conduits
A cable to be connected to a duct must first be retrieved to the Cable form. You can retrieve a cable to a form, for example, by using search criteria or by picking a cable from the map with the Pick from map  button. Once the desired cable is on the form, it can be connected to the duct using the Connect cable
  button. If the cable you selected is more than 100 meters from the conduit and duct, the program will issue a notice and the cable cannot be connected. To disconnect a cable connected to a duct, use the left mouse button to activate the cable as active on the Conduit form. Then click the Remove ducts
  button to disconnect the cable without a confirmation. Click Save
  on the form to save change.
Duct data is processed on the Conduit form, but viewing and editing the cable information is done on the cable’s own form. To open the form, right-click a cable on the list, so that you can either locate the cable with the Locate option or open the Cable form with the Modify option.

