This section discusses system features that are not directly related to the other categories.
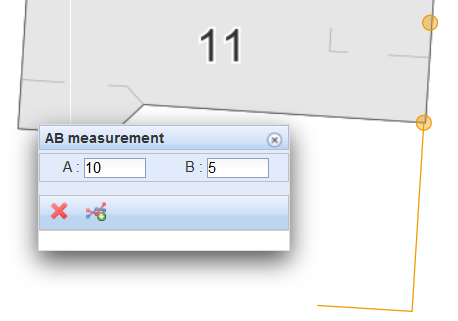
AB Measurement
With the AB measurement  tool, you can create measurements on the map. You can use AB measurement to measure a point on the map based on some specific line.
In the main menu, click AB measurement  to open the tool. On the displayed AB measurement form, enter the A and B measures in metres and click Create to activate the map placement function. First you enter two points in the tool to create a line that is used as the basis for creating the AB measurement on the map. When you have entered the points, use your mouse to rotate the measurement direction in 90-degree steps. Click the left mouse button to accept the measurement.
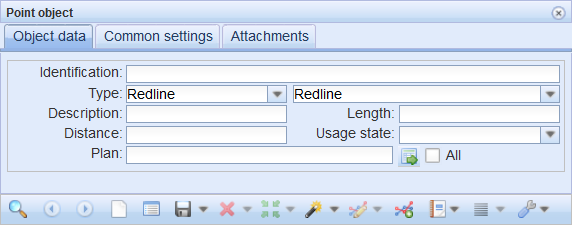
Point object
Point objects  are objects independent of the networks, such as traffic signs. The Point object
  tool can be found in the toolbar at the top of the map view. You can add items freely on a map using the Create
  function.
Exporting objects to external file formats (the Export function)
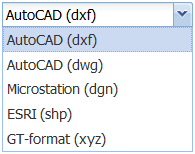
You can export KeyAqua objects to AutoCAD (dwg, dxf), ESRI (shp), Microstation (dgn), and GT Format (xyz) formats. You can also export diagram objects, area objects, and the area borders of plans to these formats. (Licence customers can use this function if the application server is allowed to open connections.)
Use either the Info form or the object forms to export network and annotation data to one of the formats listed above.
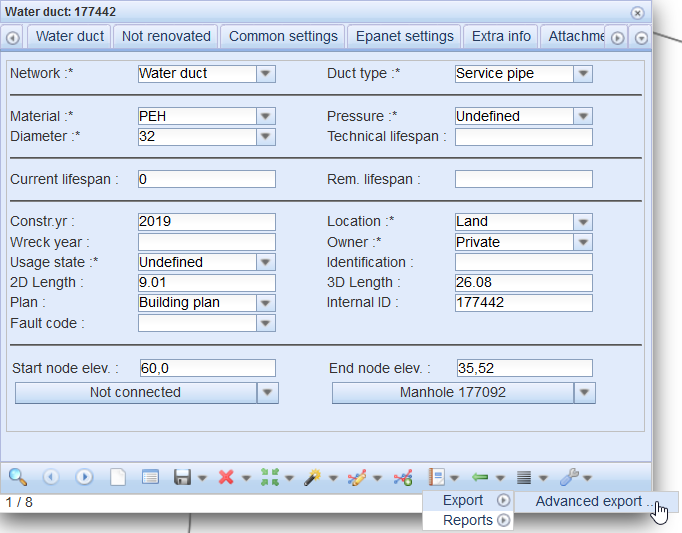
- In the drop-down menu for Export
 , in the Export menu, select Advanced export... to export the objects to another file format.
 - On the Export settings form displayed, select the export Format.
- Enter a description of the export.
- Select the projection applicable to the file that you want to create.
- Select whether annotations are exported.
Note! Email addresses are defined/linked to user IDs through the admin user interface. If the intention is that a user does not have rights to use this function, the email address field must be left empty.
Admin users can edit the email address to which the link for downloading data is sent.

Click  Export to accept the data export. The system displays a notification that your request is being processed.
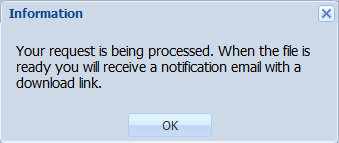
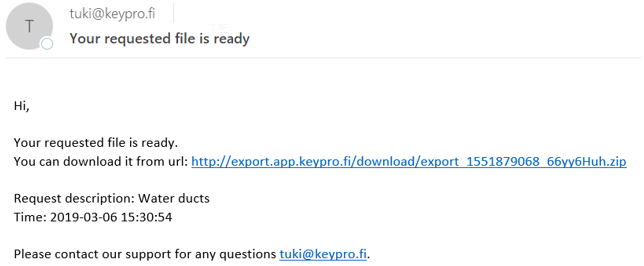
When the file has been processed, the system will email the user a link for downloading the file.
Node ducts and elevations
The Node ducts and elevations form is used to view and update the elevation data for the selected node and the ducts connected to it. In the case of a sewer network node, you can create a printout called a Manhole survey card. The manhole survey card is used to display the data content and connections of the node and the ducts connected to it. To retrieve a node to the form, use the Pick  tool and define the required object on the map. If the area you define includes several nodes, a list of nodes will be displayed, and you can choose the node that you want.
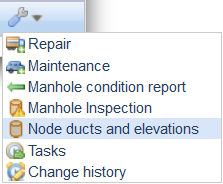
You can open the Node ducts and elevations form from the drop-down menu for Common in the toolbar at the top of the map view or from the menu for Other tools on the Sewer nodes form.
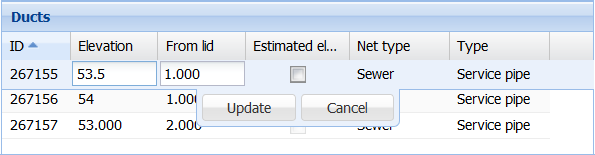
The Node ducts and elevations form consists of three sections: the Map window and the Node and Ducts tables. The directions of the ducts connected to the node and the names of the ducts are displayed in the Map window. The Node and Ducts tables present the property attributes of the objects in question.
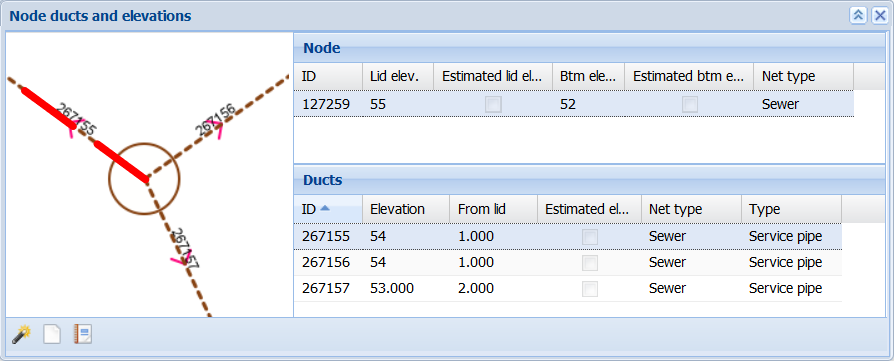
You can edit the elevations of objects connected to the node by double-clicking the object row. You can then edit the values on the selected line. Click Update/Cancel to update or cancel the changes you made.
To download and print the Manhole survey card and the condition-related information in PDF or XLSX format, click Manhole survey card  . To hide ducts from the Ducts list on the Manhole survey card, click the duct row with the right mouse button and select Hide. The duct will no longer be displayed on the Manhole survey card list and printout, but it will not be removed from the database. The manhole condition form is described in the chapter Manhole condition.
Manhole condition report
The Manhole condition report  form can be opened from the Other tools
  menu at the bottom of the Sewer manhole form. To add a condition report, click
  Add condition.
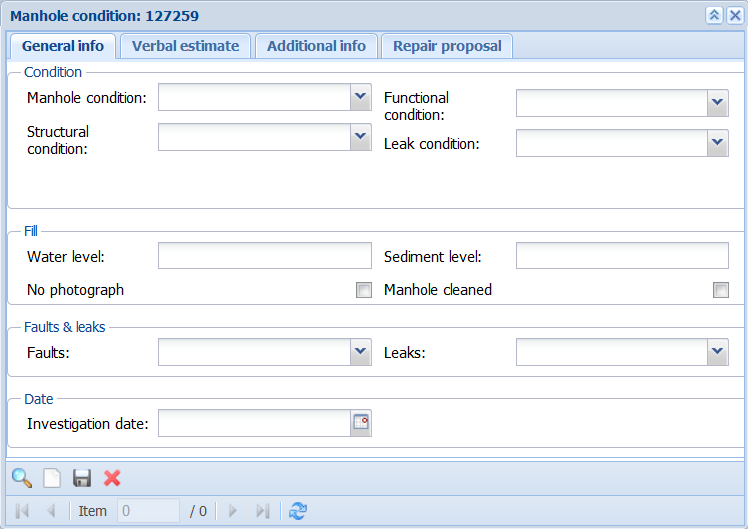
In addition to general data, you can also save comments, additional information, or repair suggestions on the Manhole condition form. The information saved on the various tabs of the form can be printed on the Manhole survey card. You can print it from the Node ducts and elevation form (see the section Node ducts and elevation).