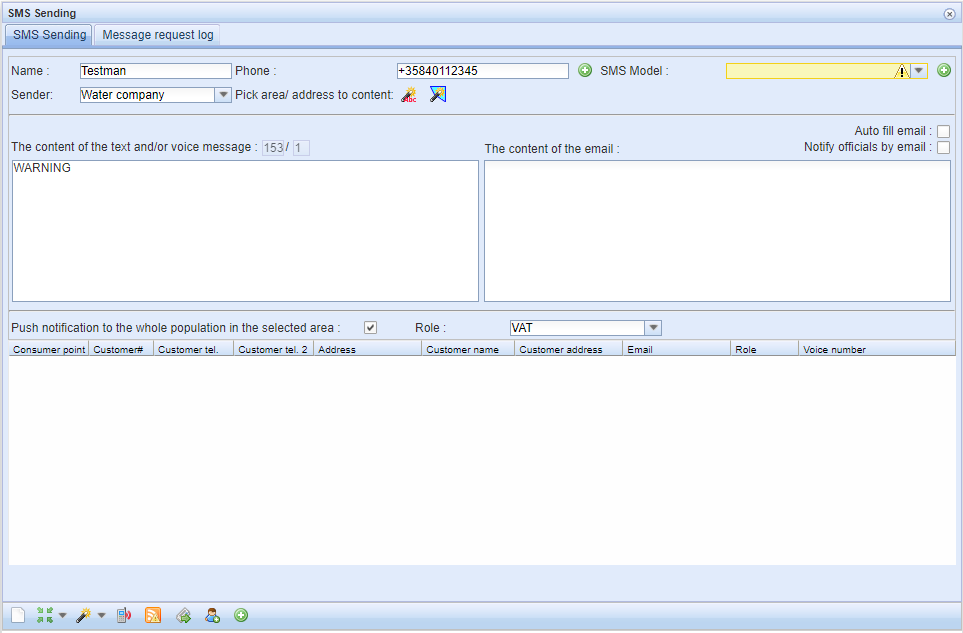
KeyAqua's SMS Sending service is used to send notifications (e.g. leakage or maintenance situations) to the customers of a water supply plant that can be found in KeyAqua. You can send a notification to a maximum of 500 recipients at a time.
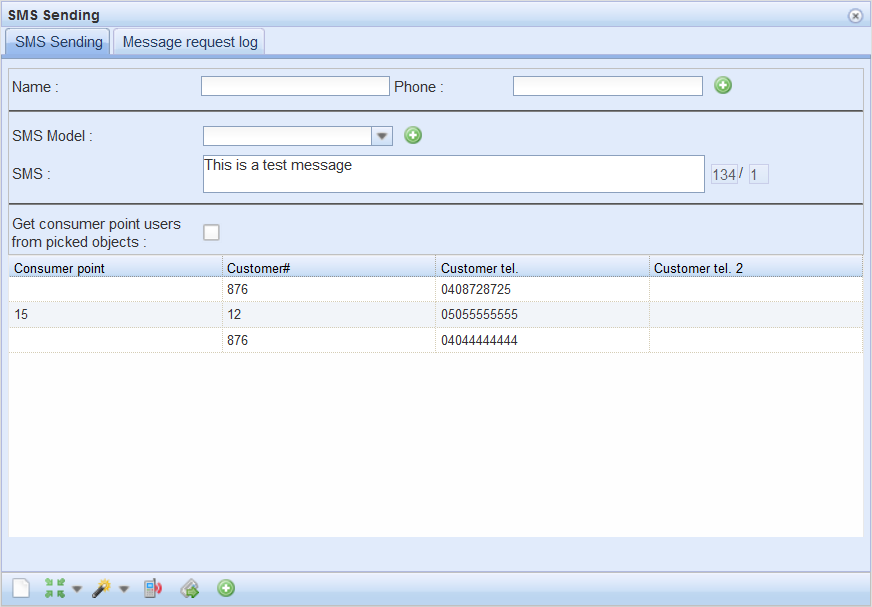
The SMS Sending form
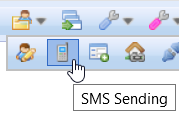
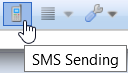
The SMS Sending service is available in the main toolbar in the drop-down menu for Customer/Consumer Point:
The form consists of two tabs: SMS Sending and Message request log. SMS messages are sent through the first tab. Add customers/phone numbers to the form for sending the text message. Enter your message in the SMS field and click Send SMS. Information on sent messages is stored on the Message request log tab.
Adding customers to the form
The following paragraphs describe the various ways to collect the target phone numbers to the SMS Sending form. There are various ways to create a target group: Each group of new phone numbers is added to the existing phone numbers on the form. If a phone number is already included in the list for SMS sending, only one SMS will be sent to it.
Adding individual customers
You can add a customer/phone number to the target group by using the top section of the SMS Sending tab

To add a customer, complete the Name and Phone fields and click the Add new customer  button next to these fields. Phone number information is mandatory. Adding a name will help you distinguish one phone number from another on the target list, but it is not necessary.
Picking customers from the map
To pick objects to the form directly from the map, use the Pick  tool and the options in the related drop-down menu.
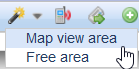
The tool is used in the same manner as the Pick tools on other forms. Use the tool to select Consumer points and the customers connected to them from the map. A customer may be connected to a consumer point as either an owner or an invoice recipient.
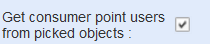
When the Get consumer point users from picked objects checkbox is selected, it means that the Pick tool retrieves to the list the users of the consumer point in question. A user can be, for example, a person living in an apartment of the apartment building that is the consumer point.
Importing from the Customer/Consumer point/Consumer point user form
Customers can be imported to the SMS Sending form from the Customer and/or Consumer point forms. You can retrieve Customers to these forms by using the available tools for searching and picking. When you have added the target group to the form, you can transfer it to the SMS Sending form by clicking the SMS Sending button on the form.
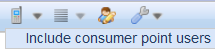
On the Consumer point form, this tool also provides the option Include consumer point users in the drop-down menu. This functions in the same way as the Get consumer point users... selection described in the previous section. In other words, it will add the consumer point users to the SMS Sending form.
Using Consumer point user form to send SMS
Consumer point users are not the owners/administrators of the Consumer point. They are, for example, tenants or other family members. Consumer point user  form can be found from the Customer/Consumer point
  menu from the main toolbar.
Consumer point users  form has many fields which affect the way the SMS is received.
- Voice number: The number on the field is for receiving voice messages:
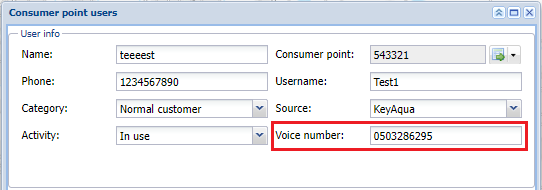
1. Notifications
There are three option to notify the consumer point user, by SMS, email or voice number. You may also choose all of them if necassary:

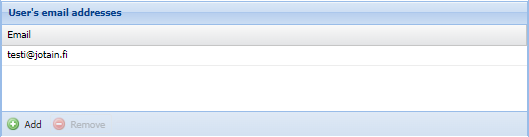
2. User’s email addresses
It is possible to send a message written in the SMS  form to the saved email address:
3. Send SMS
When all the information has been filled in, open the SMS sending  form by pressing Send SMS
  The information of the Consumer point user will be transferred to the recipient list of the message:

Saving default recipients
Sometimes there is a need to send messages to the same target group more than once. In this situation, it makes sense for you to save the target group as Default recipients.
Save as Default recipients:
- Pick potential Default recipients to the SMS Sending
 form:
form:

- Click Insert grid to database
 button from the toolbar of the SMS Sending
  form.
form. - Then Upload file
 and check the Default list box to save the default recipients:
- Save your work and close the Upload file
 form.
form. - Click Default recipients
 button in the SMS Sending
 form. The recipients are then added as the receivers of the SMS.
Note, you can create several default recipients lists. Once you click the Default recipients  button from the SMS Sending
  form, every file that has been marked as Default list in the Upload file
  will receive the SMS.
Read more about the Upload file form: Saving a target group.
Network follower and group display
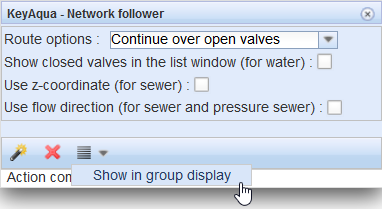
Another way to add customers to the SMS Sending form is to use the Network follower and Group display tools.
The consumer points found by the Network follower can be exported to the SMS Sending service by using the Group display tool. For network following to take into consideration the consumer point, it must be connected to the network that is being followed (a water, sewer, or rainwater connection). The consumer points are moved to the group display by selecting Show in group display in the drop-down menu for List  .
.
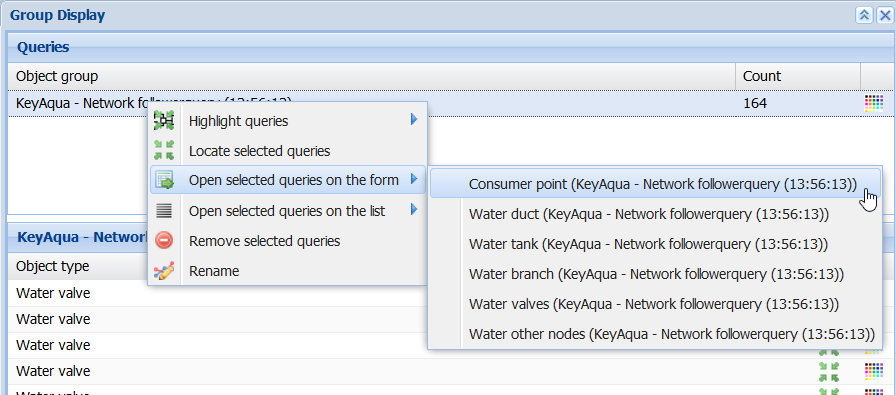
A Network follower query added to the group display will include all the objects covered by the Network follower. The next step is to transfer consumer points from the group display to a separate form. To do this, right-click the group and select Open selected queries on the form àConsumer point.
In addition, you can create groups in the group display by other means than the Network follower tool, for example, through picking or searching objects or through themes. Further information is available in the chapter Group display.
Importing recipients from an external file
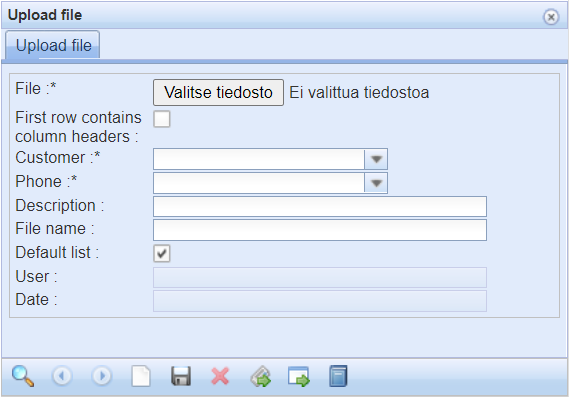
You can import a group of recipients to the SMS form from an external CSV file. On the SMS Sending form, click Upload file  to import. This opens the Upload file form with no pre-filled fields.

- Click Browse to search a local disk for the file to be loaded in the File field.
- In the Phone and Customer fields, you must specify the CSV columns in which the names and phone numbers of the target persons can be found. For example, the format of the CSV file can be:
| Name | Address | Number |
| Example person 1 | Manhattan street 99 | 0401234567 |
| Example person 2 | Manhattan street | 100;0501234567 |
Note! CSV files must use UTF-8 encoding. You can ensure this, for example, by saving the file with the Save as function of the Notepad program and by selecting UTF-8 in the Encoding field.
This example uses the following selections on the Upload file form:
form:
- The first row contains column headings
- Customer: In column 1 of the file
- Phone number: In column 3 of the file
When you have completed the selections on the Upload fileform and selected the files, click Upload file  to save the data included in the file in the database, or add them directly from the file to the target list on the SMS sending form by selecting Import the data from the database
  from the toolbar.
Customer roles
After selecting the recipients in the SMS Sending  form, you can select the actual recipients from among them. Selection refers to filtering a set of customers based on the role assigned to the customer. The roles are:
- Owner = The owner of the Consumer point.
- Tenant = A tenant who pays rent.
- Resident = Consumer point user, for example, occupant of an apartment building.
- Not defined = Customer role is not determined.
Select Push notification to the whole population in the selected area if you want to send a SMS to all the roles.

To filter recipients, turn off the Push notification to the whole population in the selected area setting, then select the desired customer roles. The recipient list below will be updated according to your selection.

Writing and sending messages
When you have created a recipient group on the SMS Sending form, you can write and send messages. Enter your message in the SMS field and click Send SMS  .
.
Take into consideration:
Sender drop-down menu: You can select the right organization as the sender for the message from the drop-down menu. It is possible to edit and choose different senders in the admin interface. The sender's name can only be 11 characters long and words cannot contain special characters. If no selection is made, the sender is predefined.
Multiple same phone numbers/email addresses: If the same phone number appears in the list more than once, the message will be sent to this number only once. The number can repeat if, for example, the same Consumer point has been picked several times, or the number appears to the customer as another telephone number.
If the same phone number appears more than once in the object list, the message is sent to this number only once. For example, the number can be repeated if the same Consumer point has been picked several times on the form, or the number appears as another phone number for the customer. If the customer does not have a saved phone number (Customer tel. or Customer tel. 2 columns are empty), they will not be sent a text message.
Length of the SMS
When you write an SMS, please note that the maximum number of characters in one SMS is 160. If the message has more characters, it will be sent in several parts. The figures displayed next to the message field provide information on the number of messages  . The latter number is the number of messages, whereas the first number is the number of used characters.
For example: There are 50 target persons and 3 messages required for the text. This means that 3 * 50 = 150 messages will be sent.
You will see a notification of a successful SMS sending in the Info window: SMS sent.
If a specific number occurs several times on the target group list, the SMS will be sent only once to this number. A number can be repeated, for example, if the same consumer point has been picked on the form several times, or if the number is a secondary phone number for a customer. If no phone number has been saved for a customer (the columns Customer tel. and Customer tel. 2 have no information), no SMS will be sent to the customer.
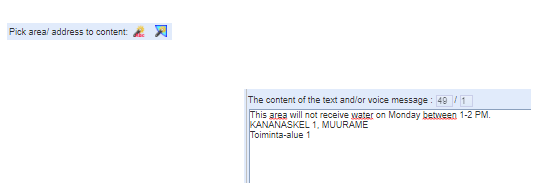
Pick an area/address
It is possible to add addresses and areas to a message by using the Pick address and Pick area tools. In this case, the end of the message will have area and/or address information, which you have assigned by cropping on the map.
Sending a message to email
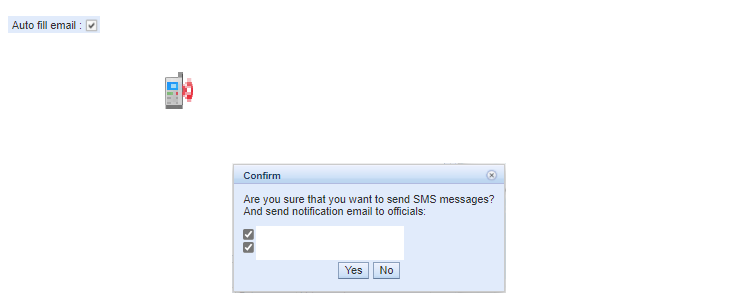
You can also send the messages to email. Check the Auto fill email  -box and the content of the SMS message is copied to the email as well. Email is sent to recipients who have stored an email address in the Customer or Consumer point forms.

Notifying officials
The text message you typed in can also be sent to the email address of the local officials. The contact information of the officials is saved in the admin interface. When you send a text message, the Confirm window will remind that the message is send to the officials if you have the Notify officials by email  check box active.
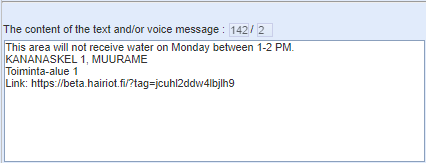
Linking Alerts to SMS (this function is subject to a separate order)
After adding a message and contact information to the SMS form, click Alerts  to start.
Note that this function us subject to a separate order. If it’s not activated the button is not shown.
The Description fields in the Alerts  form is filled based on the SMS message created on the SMS form. In addition, the number of customers applied for the SMS form has been transferred to the Alerts
  form.
form.
- Create an Alert, like instructed in the Creating an Alert chapter.
- Once the Alert has been created and saved, its linked to the The content of the text and/or voice message field:
- Send SMS by clicking the Send SMS
 button from the toolbar.
Two phone numbers for a customer
The Customer form lets you save two phone numbers (e.g. for work and home) for the same customer. When the numbers have been saved and the 2 SMS numbers checkbox has been selected, an SMS is sent to both the customer’s numbers. On the SMS Sending form, phone numbers, in this case, will be displayed in the Customer tel. and Customer tel. 2 columns.

SMS templates
The text in the SMS field can be saved as a template for future messages. Create the text for the template in the SMS field and then click Add new model  . This will open an SMS Model form. Enter a name for it in the Model name field.
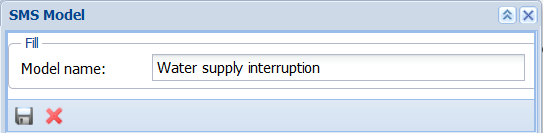
To save the template, click Save  . The SMS template will now be available on the form through the drop-down menu for SMS Model.
Deleting SMS templates: In the SMS Model menu, select the template you want to delete. Click Add new model  . The template name will be displayed on the SMS form, and you can delete it by clicking Delete
  .
.
Saving a target group
You can save the target groups on the SMS Sending form for later use. This function can be used, for example, when you want to send an SMS on the start and end of maintenance work to the same people. When you have saved the target group, you do not need to re-create it to send the second message.
To save a target group, click Insert grid to database  at the bottom of the form. This will save the target group directly and the Upload file form will be opened with pre-filled information (Virhe. Viitteen lähdettä ei löytynyt.).
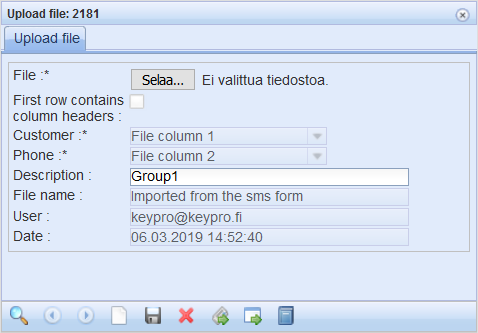
We recommend that you add a Description of the file for searches that will be carried out later.
To export a target group to an external file, click Write the file from the database  .
.
Message request log
Information on sent text messages is displayed on the Message request log tab of the SMS Sending form. You can search the log using the tools at the top of the tab, either by SMS content or by date sent.
You can find the SMS State and SMS delivery status columns from the Message request log tab. Here you can follow the progress of the delivery.
- SMS State shows the current state of the message.
- SMS Delivery Status column tells you real-time status of the delivery. The status is indicated in percentage. When you click a column, it updates the percentage. The upload is complete once it reaches 100%.
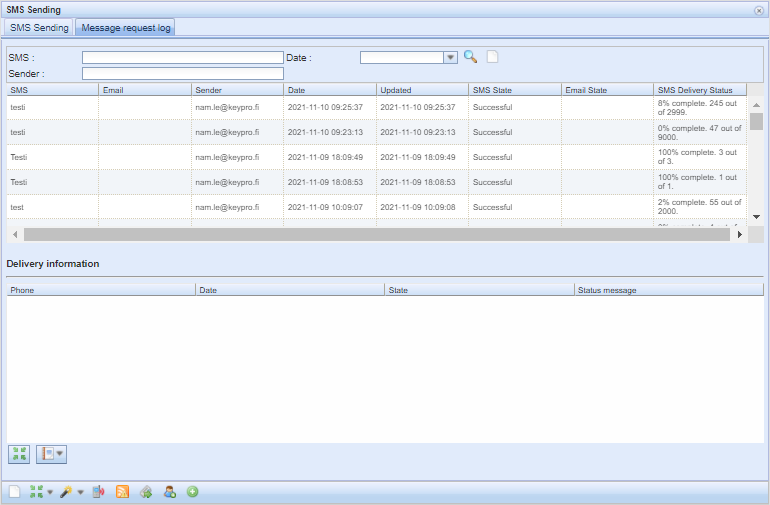
Click a message in the upper section of the tab to view the detailed delivery information in the lower section. This data can be exported from one program to another using the Locate consumer points  and Export
  tools. The Locate consumer points tool highlights the consumer points on the map in red or green according to successful or failed delivery.
Mass sending SMS
KeyAqua's SMS sending form enables you to send messages to a large number of people. Mass sending feature is activated when more than 2,000 Consumer point users are transferred to the SMS sending form. This means it is activated automatically and you don’t have to do it manually. SMS sending feature allows you to send up to 200,000 SMS messages to recipients at once.
- When you have saved the data of more than 2,000 users to the Access Point Users
 form, click the Send SMS
  button to export it to the SMS sending form as usual.
 - The system will ask you to verify this action. After that, an info message will pop-up and tells you that the limit of recipients is greater than the set limit.
- Click the Ok button to continue. The same message will appear if you choose to collect the recipients by using the Pick
 tool.
tool.
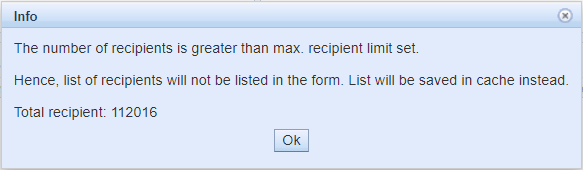
- When the number of recipients is greater than the max, the User info will not appear in the SMS sending form and it remains empty. The list of User info will be saved in cache instead and you can continue using the form normally.
The speed of sending SMS
Approximately 30 messages can be sent per second. The connection speeds presented below in the table are estimate but give a good direction on the speed of mass sending SMS. However, connection speeds can be affected by poor internet connection.
Number of messages | Time |
2000 | Approx. 1 minute |
10 000 | Approx 6 minutes |
100 000 | Approx 1 hour |
ALERTS (this function is subject to a separate order)
Click Alerts  to open a separate form that is used for managing the affected alert areas and alerts. On the Alerts
  form, you can specify and save information about planned construction sites, distribution breaks, and other planned disruptions, as well as their start and end times. The form is used to record information about the category and status of the alert and the network type. The form can be used to determine the number of customers affected by the alert.
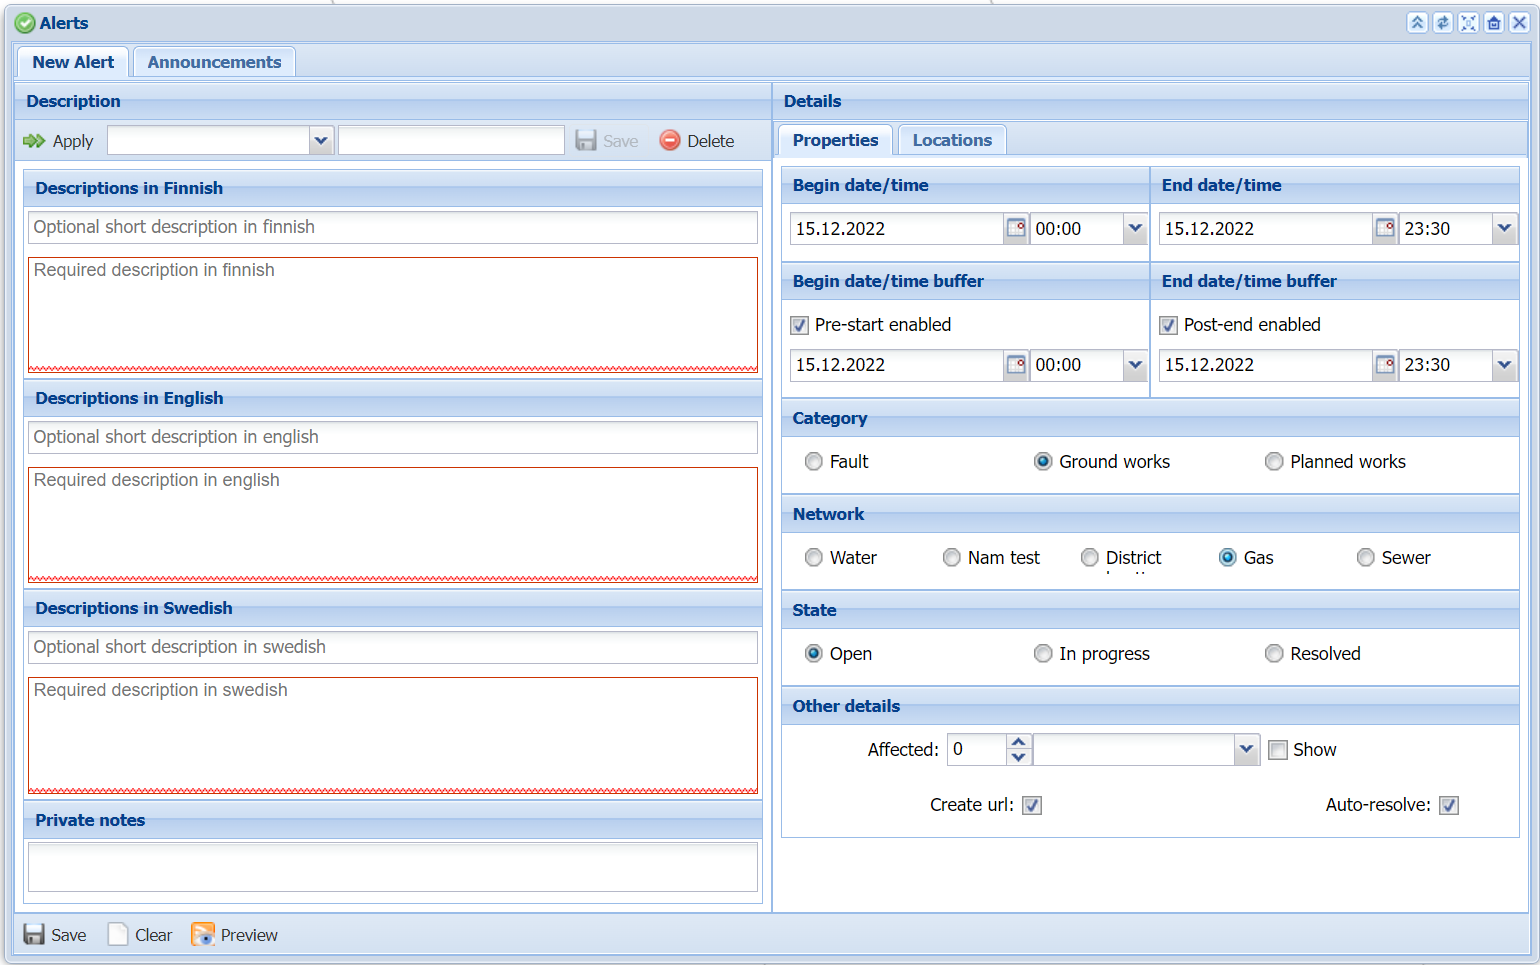
Creating an alert
- Create a new message or search for a pre-saved message template, as in the chapter. Creating a new message and a message template
- Enter more detailed specifications for the alert in the Details tab. Read more in chapter Details.
- Give the alert a location like instructed in chapter Locations.
- Press the Save
 button in the lower left corner to save a new alert.
 - The created alerts can be found from the Announcements tab.
- By pressing Clear
 you can clear the form from all the info.
Creating a new message and a new message template
You can write alert messages in the Description section of the New Alert tab. You can report in Finnish, English and Swedish, because the public alert information website supports these languages.
NOTE! The Finnish description is also copied to the English and Swedish fields. You can translate the text to match those languages
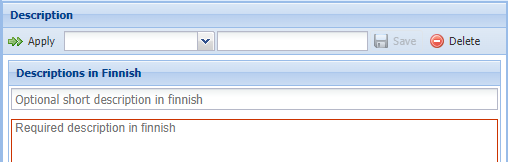
- Write a headline for the message (this field is optional).
- Enter the description text in the fields below. It is not possible to save the form without filling in the required description message field. If you do not want to save the message template, continue without saving and move to Details.
OR:
- To save a new message template, enter a name for the message template and press Save
 :
: 
- To delete the Alert, simply press Delete
 .
.
NOTE! If you have started creating an Alert via the SMS form, the Description fields are automatically filled in according to the typed text message. Read more in the section Häiriötiedotesivuston linkittäminen tekstiviestiin (Erikseen tilattava toiminto).
You can write confidential or private information about the Alert to the Private notes field. It can only be seen by your organization and cannot accidentally be published to the customers or citizens.

Details
In the Details section, the information related to the alerts is specified.
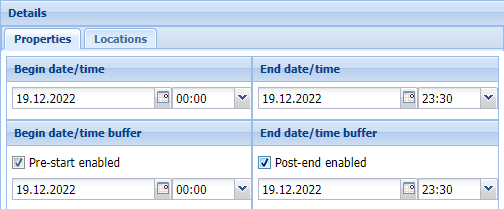
The Begin date/time buffer + Pre-start and End date/time buffer + Post-end: Define the start and end dates of the alert in the calendar and time menus.
If you select the checkboxes Pre-start enabled and Post-end enabled, the date and time fields are also activated. With the Pre-start enabled, you may inform customers about faults, ground works or planned works in advance. You can also inform after the alert by selecting the Post-end enabled check box, in which case the information will be displayed for the period you selected.
Category and Network
Choose the right category fort the alert. Options are Fault, Ground works tai Planned works. Also choose the network type for the alert:
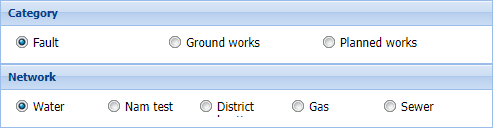
State
Define the state of the alert. Is it Open, In progress or Resolved:

Alerts which are in Open and In progress state are shown on the map. However, if the alert is in Resolved state it will not be shown on the map.
Other details
You can give more details about the alert in the Other details section.
In the Affected field, specify the number of customers who will be affected by the construction, disruption or supply interruption. The Show checkbox determines whether or not the information is published in the alert website.
The Create URL checkbox creates a link to the alert for the notification. The link allows customers to see the alert message and maps on a separate alert information website. For further information on alerts, please see the Notifications on disruptions chapter.
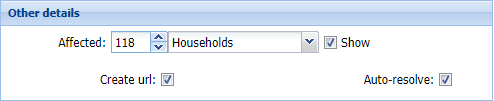
NOTE! If you have started creating an alert through the SMS form, the number of objects will be automatically replenished according to the number of recipients of the text message. For more information, see Linking an alert to SMS.
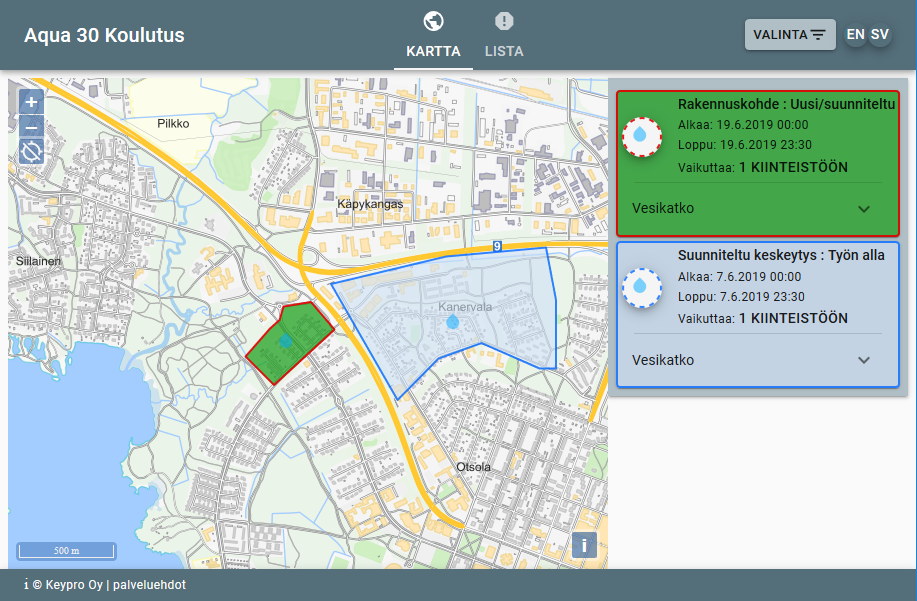
Locations
Use the Locations section to define the location of the disruption, construction, or supply interruption on the map. Open the Locations menu from the bottom-right corner of the Alert  form.
form.

 Point:Click on the map to add a point object location for the alert within your operational area. You can add several point objects.
 Polygon:Click on the map to add a polygon-type location for the alert within your operational area. You can add several polygons.
 Pick:Pick an existing area geometry from the map.
Don’t show existing alerts menu
- Don’t show existing alerts: Alerts are not displayed on the map.
- Show active alerts: Active alerts are displayed on the map.
- Show all alerts: All alerts that have been created are displayed on the map.
You can modify  a location, locate
  it, or delete
 it.
it.
Editing and deleting templates
- Choose a template from the drop-down menu based on its description:
- Click
 Apply to have the template information completed in the fields below for you to edit.
OR:
Click Delete  to delete the template.
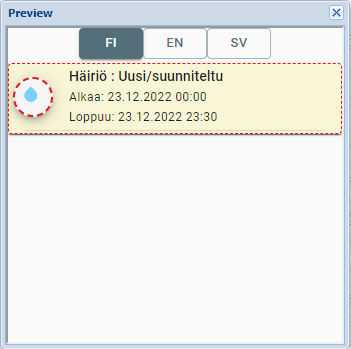
Preview
At any stage of creating an alert, you can preview the alert message you have made by pressing the Preview  button at the bottom of the form.
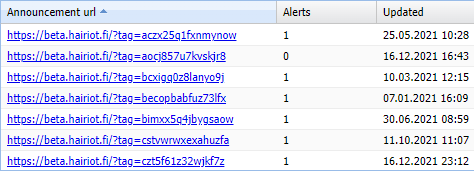
Saved alerts
The alerts are stored on the Announcements tab. The table presents the alert description, category, type, status, begin date, end date, and the date the alert was updated. If the alert is connected to a SMS service, the alert will begin with a symbol .
.
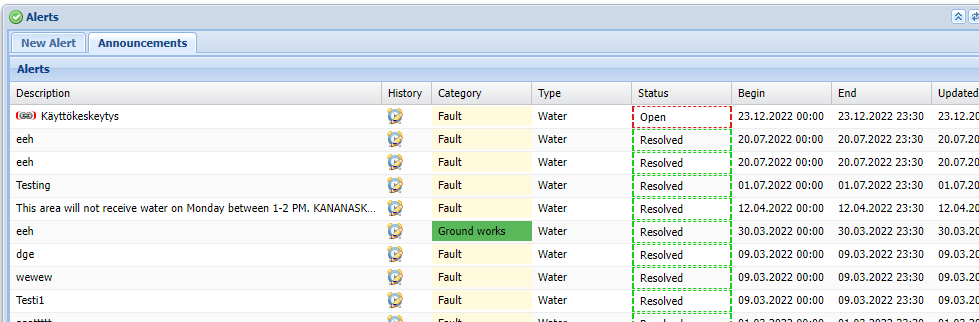
Each category type (Fault/Ground works/Planned works) may be assigned a background color that is used when displaying the information on the alert information map. Similarly, the alert state (open/in progress/resolved) can be assigned a color that is also used when displaying information on the alert information map.
Edit alerts
Select the alert you want to edit and click  Edit alert. The warning will open on a separate Edit alert tab, where you can edit the information. When you are ready, click Save
  to save changes.
Deleting alerts
Select the alert(s) you want to delete. Click Delete  . The program will ask you to confirm the deletion.
Resending an alert
It is possible to send a new text message to those alerts that have been connected to the SMS service, for example, due to the end of the disturbance or its continuation. Right-click on the alert row with the  symbol and select Send a new SMS
  . The program will take you to the SMS
  form, where you can format and send a new SMS to your customers.
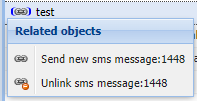
The Unlink sms message  option removes the SMS link from the alert.
New URL
You can create a new URL for one or several alerts. Use the Shift or Ctrl key to select the alert rows for which you want to create a new URL. Then click  New url.
This is a useful function when you want to link more than one alert so that they are available through the same link.
Linking
You can add additional alerts to the selected alert link. In the Links section, click the link to which you want to add existing alerts. Use the Shift or Ctrl key to select from the Alerts list the alerts that you want to link. Click  Link.
Link.
Unlink
If you have created a link to an alert and want to remove it, click  Unlink. If the function is not available, the alert has no linking.
Links section
In the Links section, you can see the alert links, the number of alerts, and the dates for alert updates.
Delete Select a link and click Delete  to delete the link. The program will ask you to confirm the deletion. After the deletion of the link, the alert will no longer be displayed on the public alert information website.
FilteredUse the Filtered menu to select whether the Links section displays only the link for the selected alert (Filtered) or the links of all alerts (All).
Quick buttons on the form
The quick buttons in the top-right corner of the Alerts form include the following functions:
You can minimise the form to the Favorites bar by clicking  .
.
The Reload config  button is useful when the Alert form cannot connect to a server. In this case, you can see the
  symbol in the top-left corner of the form. The settings have been reloaded when you can see the symbol
  .
.
The Zoom to operational area button centers the map to your operational area.
Click Show tenant url  to open an alert map, which displays all alerts with the status Open and In progress.
Click  to close the form.
Sharing information about alerts
The Alerts tool is linked to a separate public website on which the actual information sharing takes place. The link to the Alert information website can be published on the websites of operators. Alerts can be customer and operator-specific with information including the affected services, the start time, the estimated repair time, the affected area, and phone numbers for on-call technical support.
Customers located in the affected areas can also be informed by using text messages, which can include a link to the alert information website. Further information is available in the Linking alert information sites to text messages chapter.