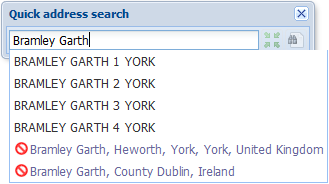
Quick address search
Use the Quick address search  tool in the toolbar to locate addresses on the map. For example, if you want to view a cable located on a specific street, you can go to the location in question by using the quick address search and locate the address by clicking the Locate
  button. Enter the complete address in the text field or select it from the list of search results.
You can also update multiple objects at the same time by using object-specific forms. More information on mass updates is provided in the chapter Mass update of addresses.
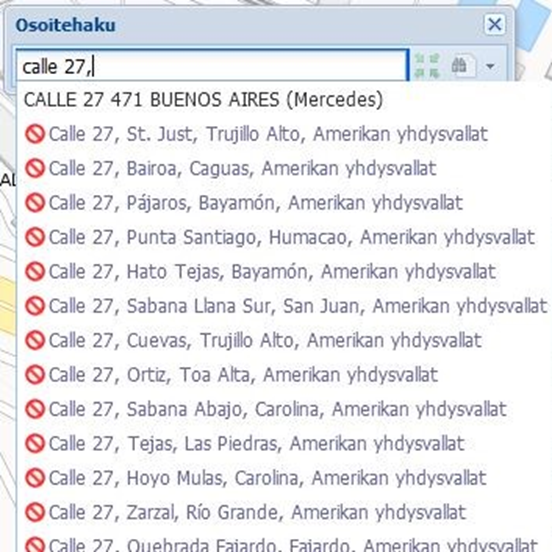
It is usually enough if you enter four characters in the text field, as the addresses matching the search criteria are listed below the search field. However, Quick address search  supports "," a comma when you need to separate the street name and the street number from each other. For example, the database might have an address named "Calle 27 471" with the street name "Calle 27" and the street number "471". If you only type "Calle 27" in the search box, address search will find you all the streets named "Calle" with a street number "27" like in a normal search.
You can browse through the pages using the arrow buttons, go directly to the first or last page, or enter the page number in the Page field. Select the required address using the left mouse button. Click Address  to open the form used for editing the address. Note that the Address
  tool does not list addresses that have no location attached. Such addresses can be searched on the actual address form (Address
  ).
).
Click Services to view a list of the services related to the address with the following options:

If an address belongs to some service area, the services provided by the area are listed. If an address is the address of telecom premises, the services provided by the telecom premises in question are listed. If an address is the installation address of a circuit, the services provided by all the telecom premises in the connection chain are listed. If an address is related to a service, the services are listed.
The Service address premises function retrieves all the telecom premises to the form with device services to which the address in question has been connected. Use the arrow buttons  on the telecom premises form to browse through the results.
Address search in the database
In addition, you can use the Address  tool to search, locate and update address information and add new addresses. When you click the button, the Address form is displayed. On this form, enter the address you want to search and click Search
  to have the program search the database for addresses matching the search criteria.
Alternatively, you can use the Pick from map  tool and its functions to search for an address. Your application may include the Existing area option, which enables addresses to be searched in existing areas, such as a service area (maximum number of address lines is 100,000).
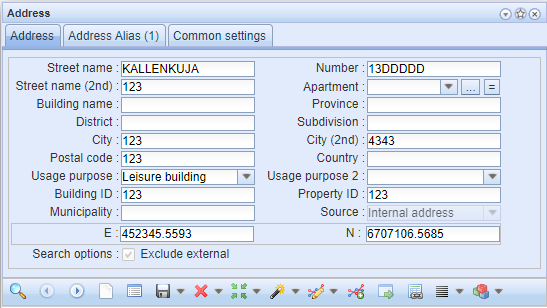
You can use all the fields on the form as search criteria. For example, a search based on a city will return all the addresses in that city as search results. You can use % as a wild card character that replaces a part of a search term. In this case, the search results include all addresses matching the text that precedes the % character. You can limit the number of search results by selecting the Exclude Digiroad checkbox. The Digiroad material is then not available, and only addresses added in KeyCom are retrieved to the form. The number of results fulfilling the search criteria is displayed in the bottom left corner of the form. Use the arrow buttons 
 to browse through the search results. Click Locate
  to center the map on the address you found.
TIP: You can import the address you found to an object form that includes the Update to form  button applicable to the Address form.
Adding an address to the database
If an address is not yet in the database, and you want to add it there, use the Address  form to create an address. Street and City are mandatory property attributes. When you have entered this information on the form, click Create
  , and then click the left mouse button to create the location information on the map. Alternatively, you can click Save
  to create the address.
Apartment information for an address
The Address form includes a field for information on an apartment. Click Apartment...  to add this information. On the Apartment form displayed, you can add and update information on the apartment identifier, purpose of use, and floor areas.
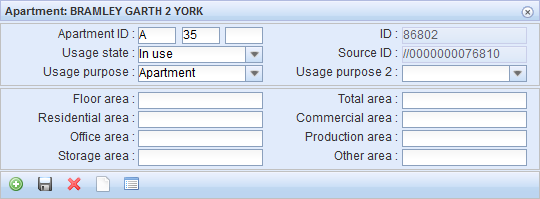
You can view the property values of an apartment on the Apartment form. No other information except the apartment ID is displayed on the Address form.
The apartment ID displayed on the Address  form is added, for example, in the following format: A and 1, that is A as the identifier for the entrance door of the building and 1 as the apartment number. When you have added the required information on the form, click Add
  to make the apartment information available for selection on the Address form and to simultaneously save the information in the database. The apartment ID you added can now be selected in the drop-down menu for Apartment. Click Save
  to save the Apartment information on the Address form. The example information is now displayed in the format A1. You can later update the information on the Apartment form by clicking Update
  . You can delete information by clicking Delete
  .
.
Objects related to an address
Click List related objects  to view the Related objects: The address list listing objects located at the address in question. The list includes the following information on the objects: type, object, and description. Open the object form by first clicking the left mouse button and then the right button over the target row, and then select Show on the form.
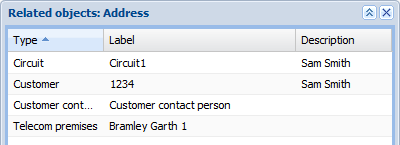
Service areas for an address
When you want to view the Service areas related to an address or addresses, go to the drop-down menu for List and click Show service areas for all. The displayed Address service area form includes all the service areas related to the address or addresses. Service areas are discussed in more detail in the chapter Service area.

Passed services for an address
The address form includes the Passed services  tool. With this tool, you can view the apartments, service providers and services for the selected address. The Passed services form also enables you to create new passed services and disconnect existing services.
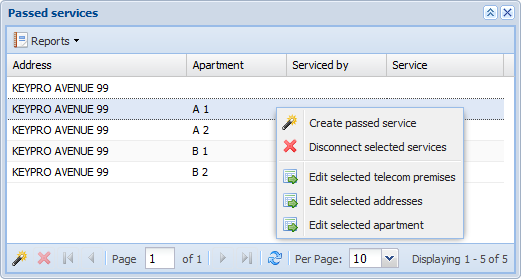
Select rows from the list on the Passed services form and click the right mouse button to access the menu:
Create passed services – creates a new passed service, such as a broadband connection.
Disconnect passed services – disconnects existing services for the object.
Edit selected telecom premises – opens the Telecom premises form for the selected object group.
Edit selected addresses – opens the Address form.
Edit selected apartment – opens the Apartment form.
Use Passed services for all function in the drop-down menu for Passed services  to create passed services for all addresses that have been retrieved to the Address form.
Creating passed service
Click Create passed service  to open the Passed services creation form.
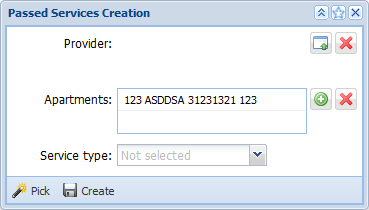
Click  Pick to define the provider and pick the required telecom premises from the map. The telecom premises information will then be displayed in the Provider field.
Click Pick apartments  to add new apartments to the list with the help of an Address-form. To remove apartments, click Remove apartments
  button.
In the drop-down menu, select the available service type and click  Create. The program will display a notification of the successful creation of a passed service, and the new address and related services will be displayed on the Passed services list.
Disconnecting passed service
When you want to disconnect a service, use the  Disconnect selected services function. The program will ask you to confirm that you want to disconnect the services. Click Yes to disconnect the passed service. The service will then no longer be included in the list on the Passed services form.
Address alias
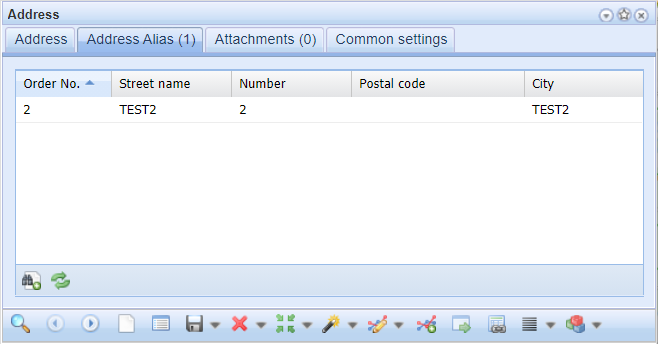
Sometimes there might be two different addresses for a street. In addition to official address, there might be an Address alias. You can add information about the Address alias to its own form. First, open the Address  form via the toolbar. Open the Address Alias tab and click Add Address alias
  form (Virhe. Viitteen lähdettä ei löytynyt.). You can still change the details by right-clicking the section.
Attached documents on the Address form
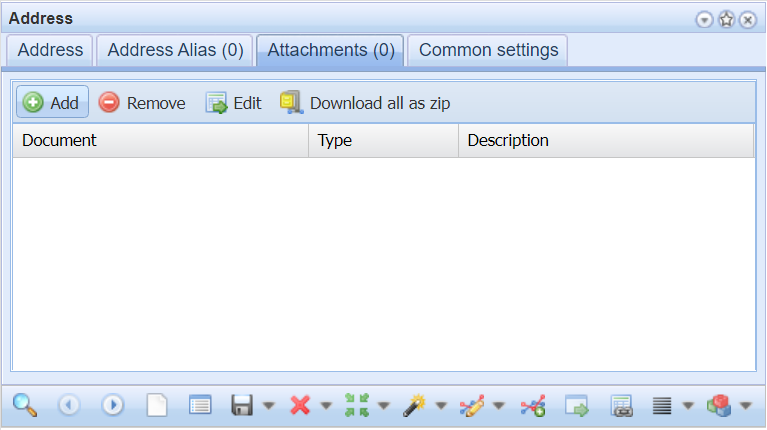
Via the Attachments tab, you can view documents attached to the Address  form. The title of the tab indicates the number of attached documents for the object. The attachments can be files or URL links, and they are listed based on type. If the object form does not have any external documents, the Attachments tab includes no information. Click
  Add External documents - to open the Add External documents form , where you can download the documents. Read more about External documents.
