District heating cable form
The District heating cable  form can be used to retrieve or update information about cables and add new ones. The form for managing district heating network’s alarm cables is opened with the District heating cable button. The creation of a new cable starts with filling in the required information on the form. Required fields are marked with an asterisk (*) on the form. After completing the fields on the form, click Create new
  to create the object on the map. The Drawing options window will appear.

Cable measurements
The Measurements tab displays information related to cable measurements.
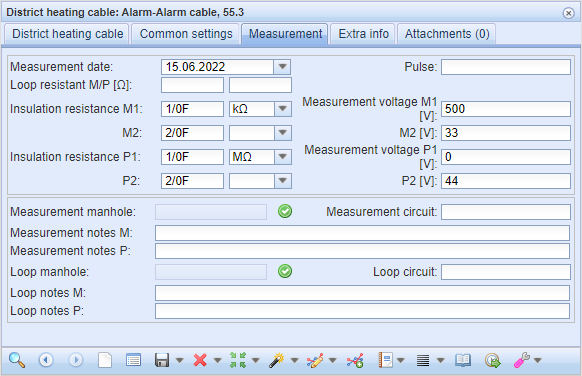
To save measurement data, complete the required fields and click Save. You can use the Open manhole  buttons to view information about the measurement and looping manholes.
Note! Whenever you save information on a tab and click Save, the information is stored in the Change Log.
Click the Measurement log  button to open the Measurement change log form, which provides a list view of the measurements saved.
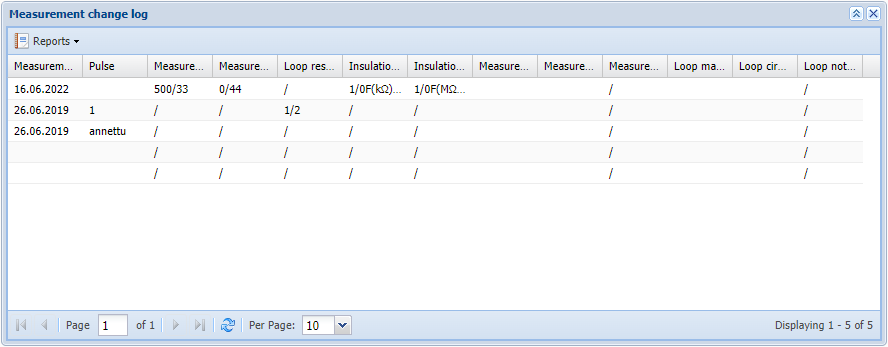
To generate an Excel report from the change log, click the Reports – List Report button.
Digitizing cables
Cable are digitized on the map in the same way as district heating conduits. To automatically place the cable start and end at the same location as existing objects, use the Snapping function in the Drawing options window. To do this, hold down Shift when clicking the left mouse button on the desired object. If snapping was successful, the bottom bar will read Snapping completed. If Snapping failed is shown at the bottom bar, it is not possible to snap to the object in question. You can also use the Following function in the Drawing options window to follow existing objects either partially or fully. Finally, end the cable digitization by first clicking the left mouse button at the end point of the duct and then the right mouse button. If the end of the cable is also placed in the same position as an existing object, hold down the Shift key, click the left mouse button, and then click the right button. The cable’s location and property values are saved in the database.