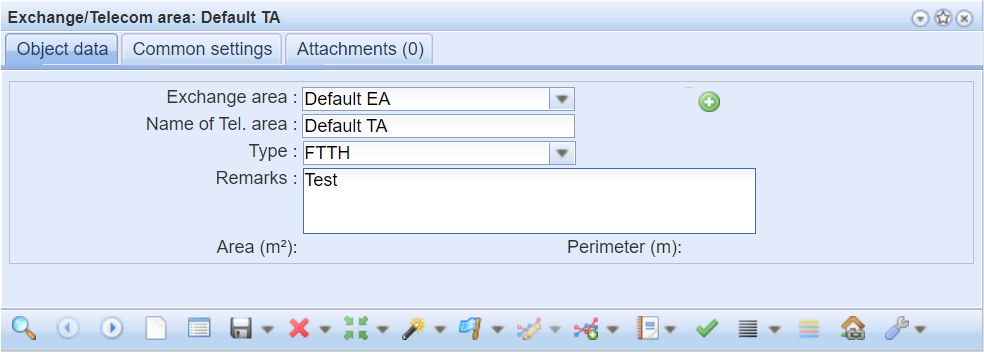
In the KeyCom tools, click Exchange/Telecom area  to open a form for managing exchange areas.

To create a new exchange area, take the following steps:
- In the drop-down menu, select Exchange/Telecom area.
- If you cannot find the area in the menu, click Add new exchange area
 to create a new area.
 - On the form that is displayed, enter the name of the new exchange area and click Add.

When you have entered the name of the telecom area, click Save form  or Create
  to create the exchange area on the map. If you try to create an exchange area with a name that already exists, the program notices this and uploads it to the form without creating a copy.
In the Type field, different network solutions can be defined on a customer-specific basis. Defaults are FTTH and FWA networks.
If the network area has been given a location, it can be automatically selected for the object forms. The objects must be geographically located within the network area. On the object form, select the Autom. check box, after which the area information is updated when saving. If the network area has not been given a location on the map, it must be selected manually by pressing the Open form button  and searching for the correct network area.

Set as a default area
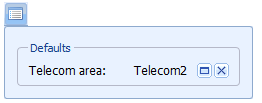
To set an exchange/telecom area on the form as the default area, click Set as default telecom area  . After this, when you click Defaults
  on object forms, the default area is automatically entered in the Area field. Read also the chapter Managing settings defined by a user.

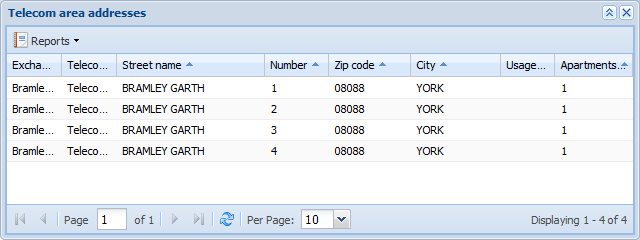
Exchange/telecom area addresses
To list the addresses located in the exchange/telecom area , go to the drop-down menu for List  and select Exchange/telecom area addresses. The List function is discussed in more detail in the List chapter.
Click the right mouse button to use the context menu for the Exchange/telecom area addresses list to go to the exchange/telecom area and address in question.

Linking an object to an exchange area
Use the objects’ own forms to add objects to an exchange area.
- Open an object form.
- Retrieve the object you want to add to the form (Retrieving information to a form, or Picking objects from the map), or fill in the information on the new object.
- Select the Autom. checkbox next to the Area field to automatically define the area based on location, or enter the required area in the Area field (Using the predictive search field.

- Click Save form
 .
.
View the exchange area’s objects in a group display
- Click Show current in group display
 to open the exchange area’s objects in a group display. More information on the group display is available in the chapter Group display.
 - Note! The Show in group display function in the drop-down menu for the List button displays the search results in a group display if you have retrieved more than one exchange/telecom area to the form.