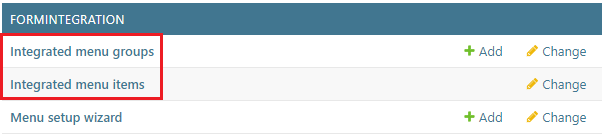
Form integration tools can be found under FORMINTEGRATION.
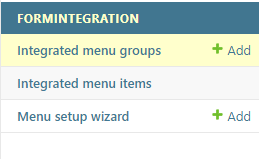
With form integrations, the admin user is able to configure a custom menu in the top toolbar. For the menu, the user is able to define groups and items that are available in the Menu setup wizard functionality.
Menu setup wizard
Before using the Menu setup wizard, make sure the desired object types have been activated in order to choose them when creating a new menu group. Open Extra data selections and check the Activate checkbox next to a form name in order to activate it in the Menu setup wizard.
The Menu setup wizard itself is used for creating groups and defining items (actions) for these groups. In the KeyCom user interface, the groups are presented under the Menu button in the top toolbar. A menu group is a placeholder for menu items, which are always external links.
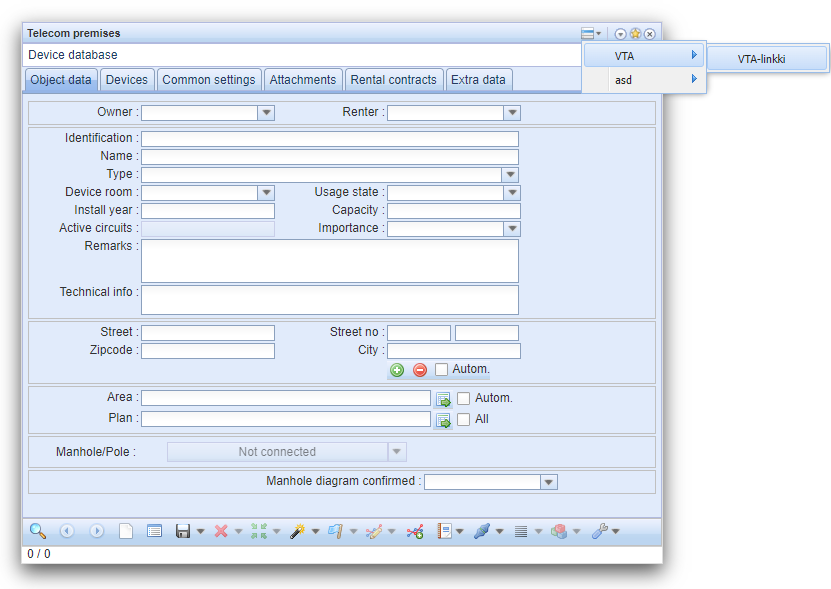
The menu setup process
The Menu setup wizard is accessible under subsection Formintegration: 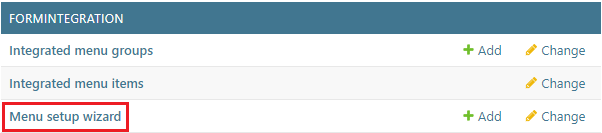
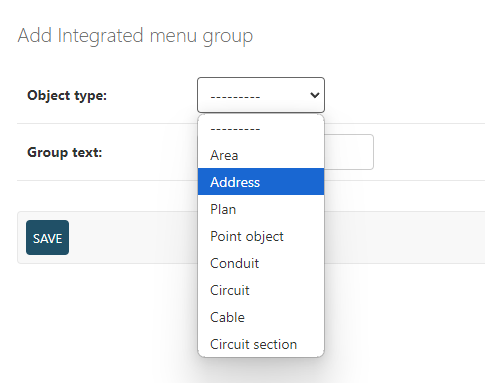
- At first, you must select a group, which the actual item with a click-action will be added. You can either select an existing group from the drop-down menu, or create a new group with the plus
 -button, that opens up a new page for creating the group:
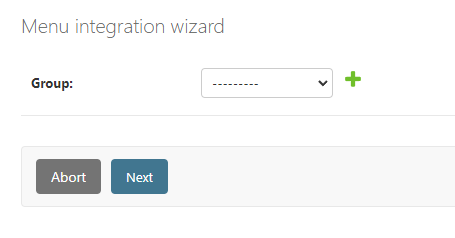
- If you chose to create a new group, you must choose the object type to which the menu and group will be bound to. Only those object forms can be chosen which have Extra attribute value's (EAV) enabled for them. If you chose an existing group from the drop-menu, you can skip to step 3:
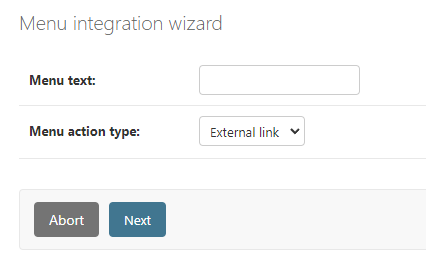
- When you have chosen the group you wish to use, the Next button will take you to the page where you can choose the name and action type for the menu item. A single group can have multiple menu items. Currently, only action type External link is available:
- You must then enter the URL that you wish to be opened into a new browser tab. The URL field supports both Dojo & Ext field identifiers as placeholders. The placeholders are defined with curly brackets, which should wrap the ID of the form field from which to take the value from:
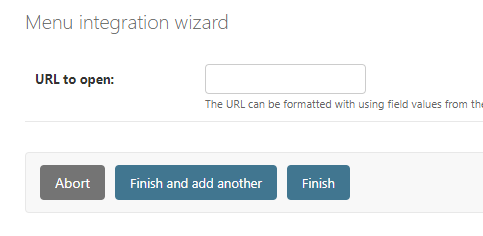
- Lastly, you can finish the process or use the Finish and add another function to save your current progress and run the Menu setup wizard again. Abort can be used at any stage of the process and it will take you back to the admin index page.
Editing the menu groups and items
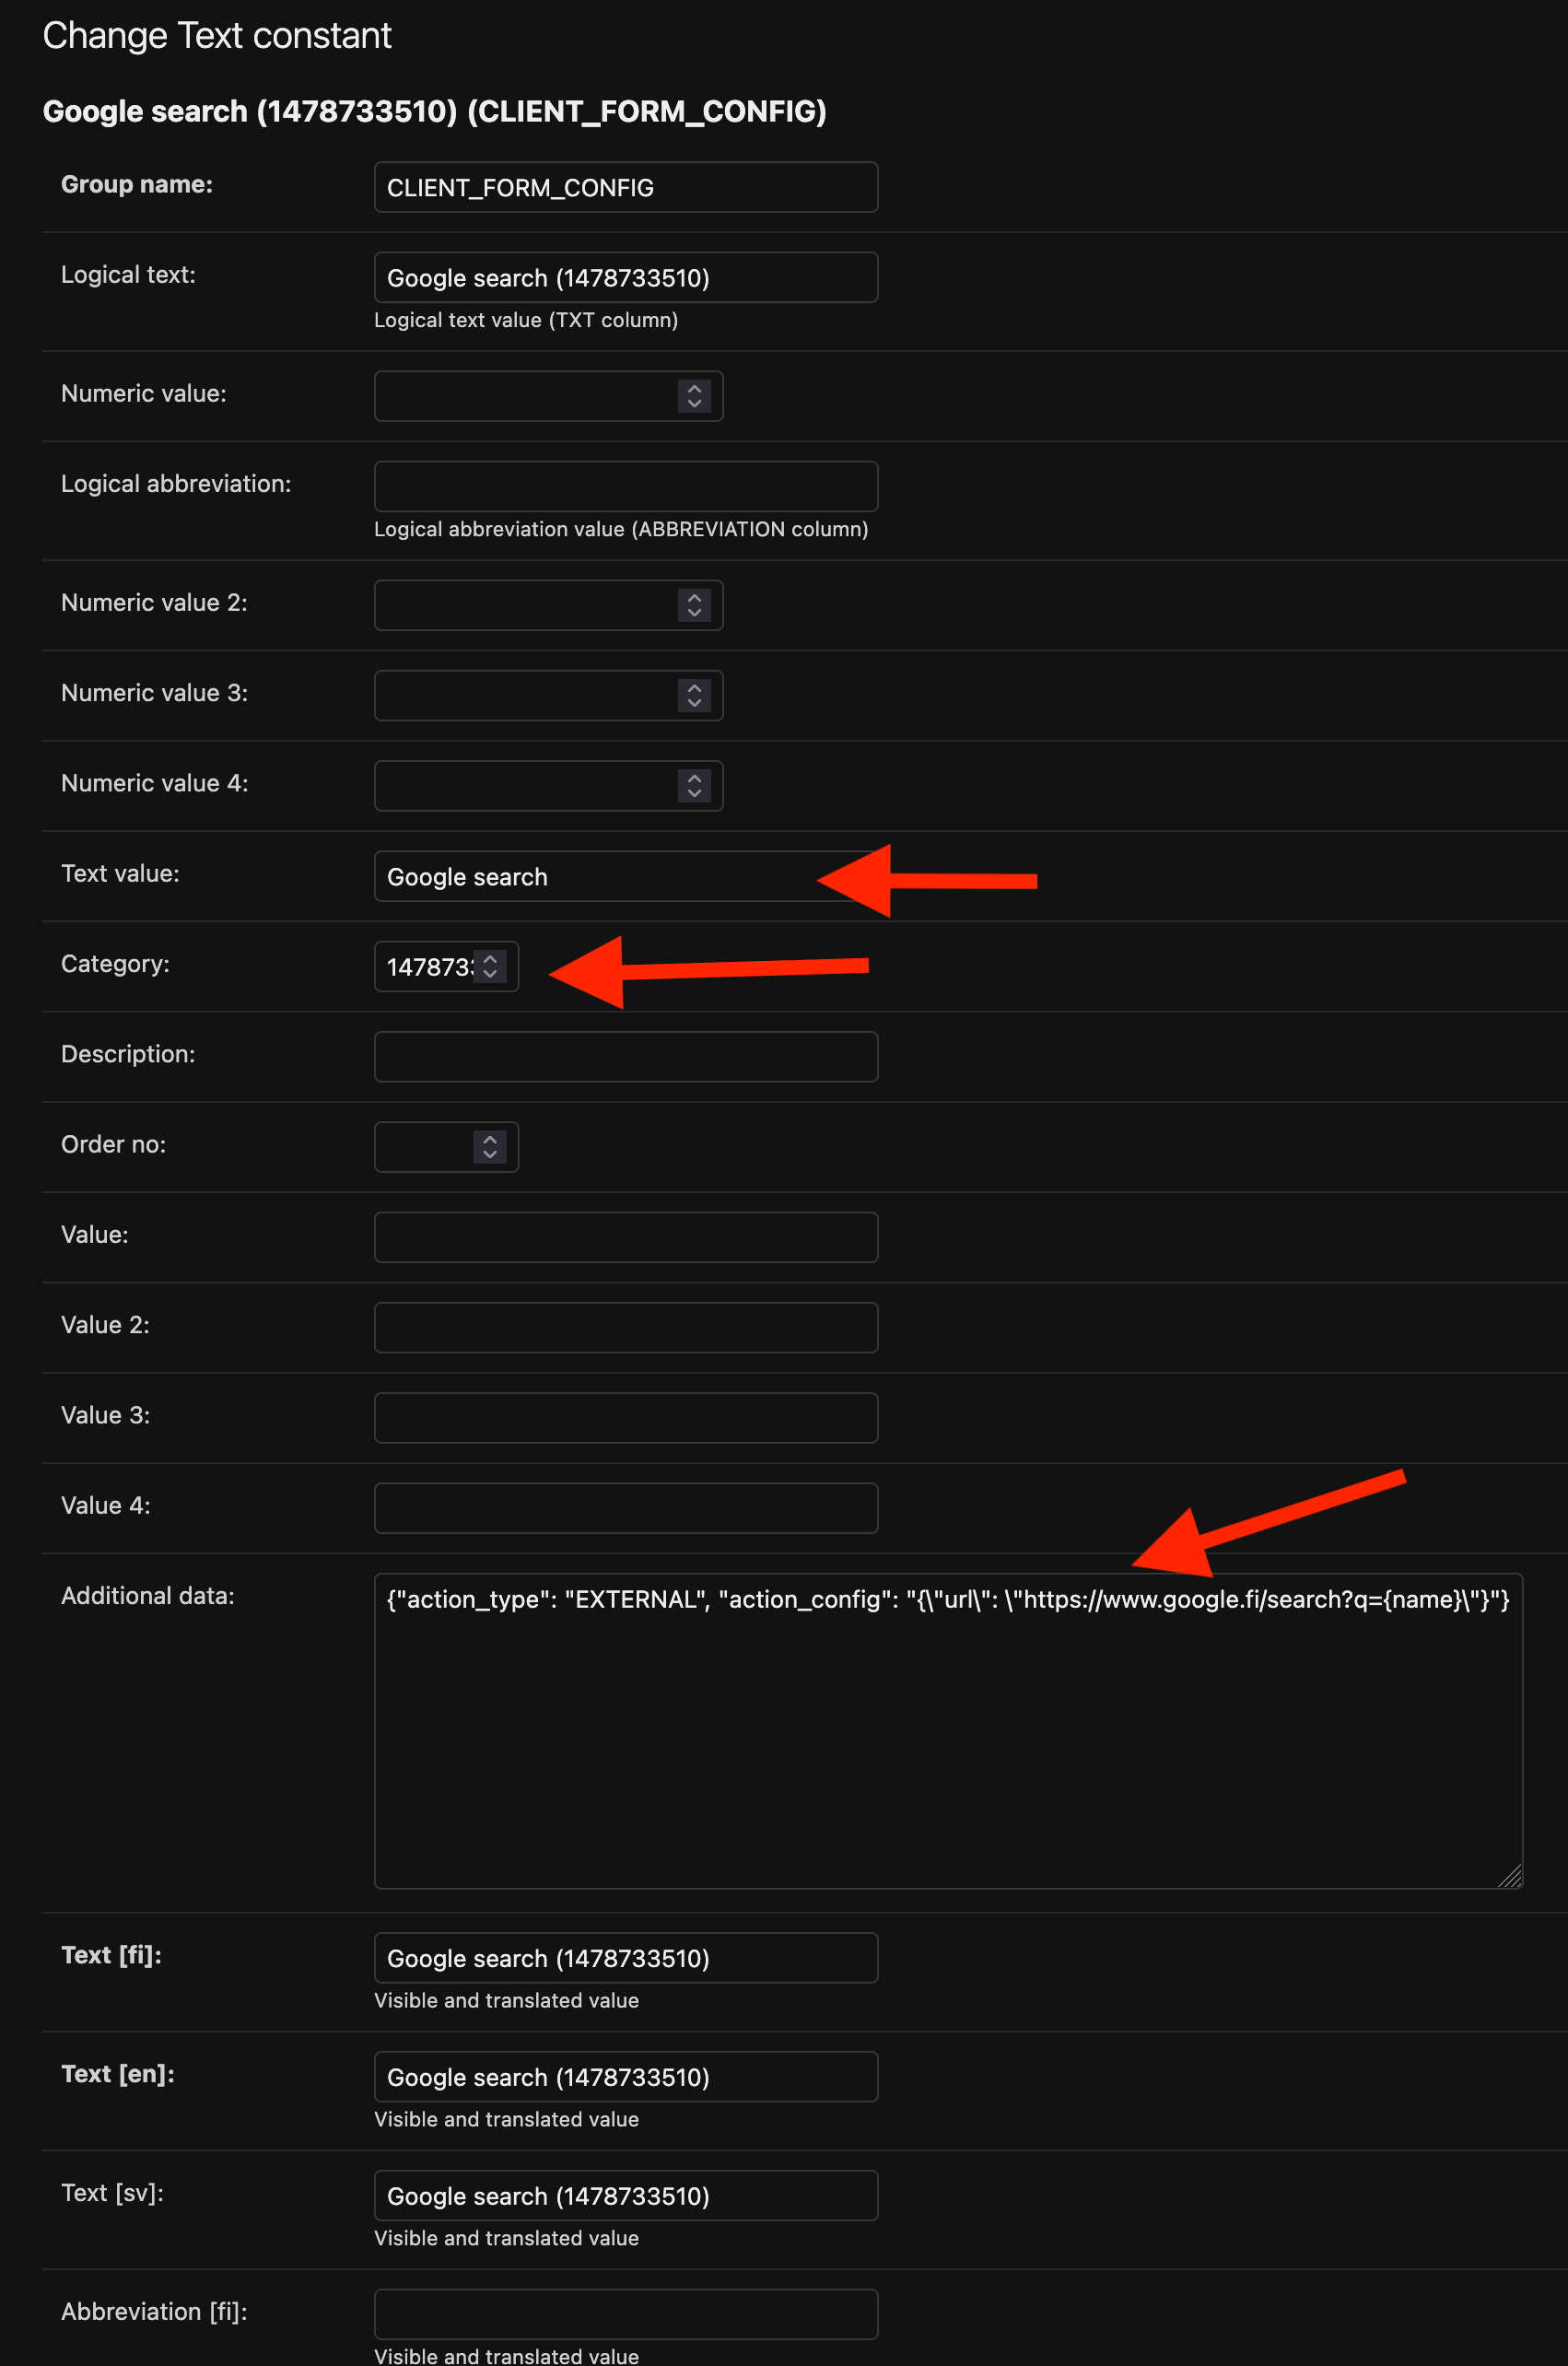
You can later edit and delete the complete menu integrations in the text constants group CLIENT_FORM_CONFIG and individual menu groups in the text constants group CLIENT_FORM_GROUP. The item name is saved in Text value field, the Group ID is saved in category field and the action details are saved in the Additional data field which are needed for action to be executed in the system.
Deleting menu groups and items
You can later view and edit existing groups and items by opening them under the FORMINTEGRATION subsection.
- Open a list of previously determined menu groups or items.
- Choose the groups/items that you want to delete.
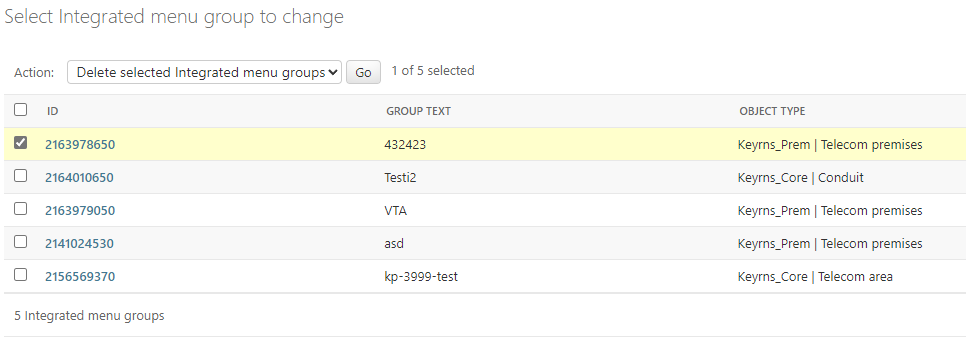
- The select Action: Delete selected Integrated menu groups and Go.
KeyIntegrations
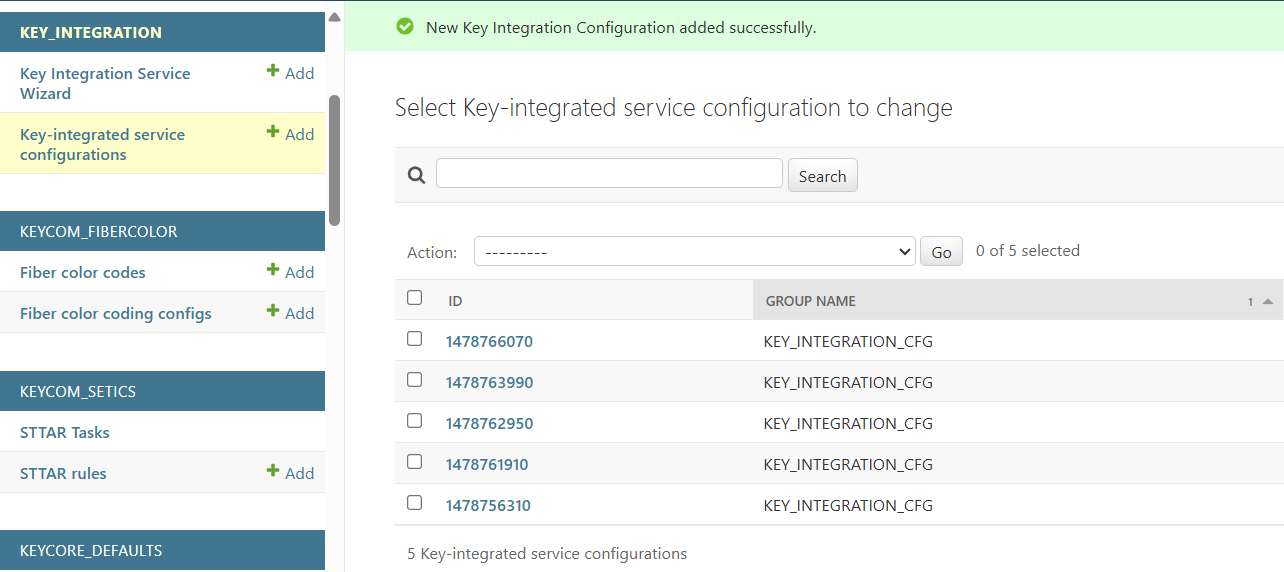
KeyCom supports integrations with external services via a configurable JSON objects. The integration enables automated data exchange using standard web methods (e.g., GET, POST) and supports dynamic parameters and multiple authentication types (Token, JWT, Digest, Basic). The configuration is stored and edited in the Additional data field of a text constant with the group name KEY_INTEGRATION_CFG. The list of configured integrations can be opened in the Key-integrated service configurations menu.

Configuring KeyIntegrations
To simplify setup, a KeyIntegration service wizard is available in the admin interface. This wizard provides a form for creating service configurations, making it easy to define how external services are called and authenticated. The JSON-configuration produced by the wizard defines the external service URL to be called and the nature by which it will be called (web method, parameters, body and authentication method).

Setting up a new configuration
- Start by defining a mandatory method to be used when calling the external service. Supported methods are: GET, PUT, POST, PATCH and DELETE.
- Also fill the second mandatory field Endpoint, which is the full URL of the external service.
- You can optionally define:
- Params: the query string that will be used in the call, without query separator.
- Body: the content of the request body, which can be either plain string or a dictionary-like object.
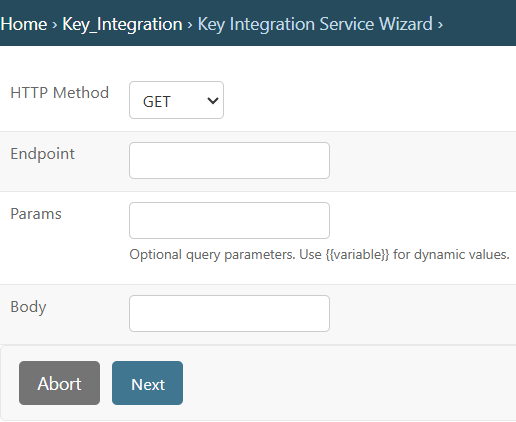
- Then click Next to proceed.
- In the next window, select the desired authentication method from the Authentication Type drop-down menu. Supported types include Token, JWT, Digest and Basic. Then click Next.
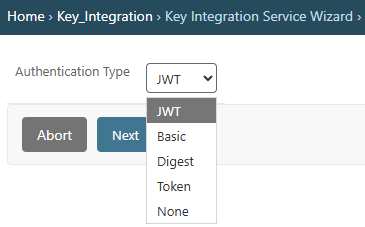
- After selecting the authentication type, the wizard adjusts the form to show only the relevant fields for that method. For example:
- Token will prompt for a fixed token value.
- JWT will guide you through setting up a token retrieval endpoint, pre-authentication method, credentials, and optional body.
- Digest and Basic will request username and password credentials.
- Finally, click Finish to save the configuration. The newly created configuration will now appear in the Key-integrated service configurations list, where it can be reviewed or edited as needed.
Dynamic values and parameters
The Body and Params fields in the JSON configuration can include dynamic placeholders that are automatically populated based on user input.
Dynamic values are written using double curly brackets, like this:
"id={{cable_id}}"
{{cable_id}} is a dynamic parameter. When the integration is called, the system looks for a field named cable_id in the call query parameters and replaces the placeholder with the actual value provided by the user. This mechanism works the same way in both the Params and Body fields, allowing flexible and user-driven service calls.Configuring for form Menu
To enable the use of an external service configuration through a form menu, a new menu entry must be created. This links the form to the configured integration. For detailed steps, refer to the section The menu setup process.