Use the Print tool for print series and quick print. Print series refers to printouts that consist of one or several parts, whereas Quick print enables you to quickly create a printout of the map.
Quick print
From the upper-right corner, click Printto access the Quick print function. In the Print settings, you can define settings related to paper size and the display settings for the detailed information to be included in the printout.
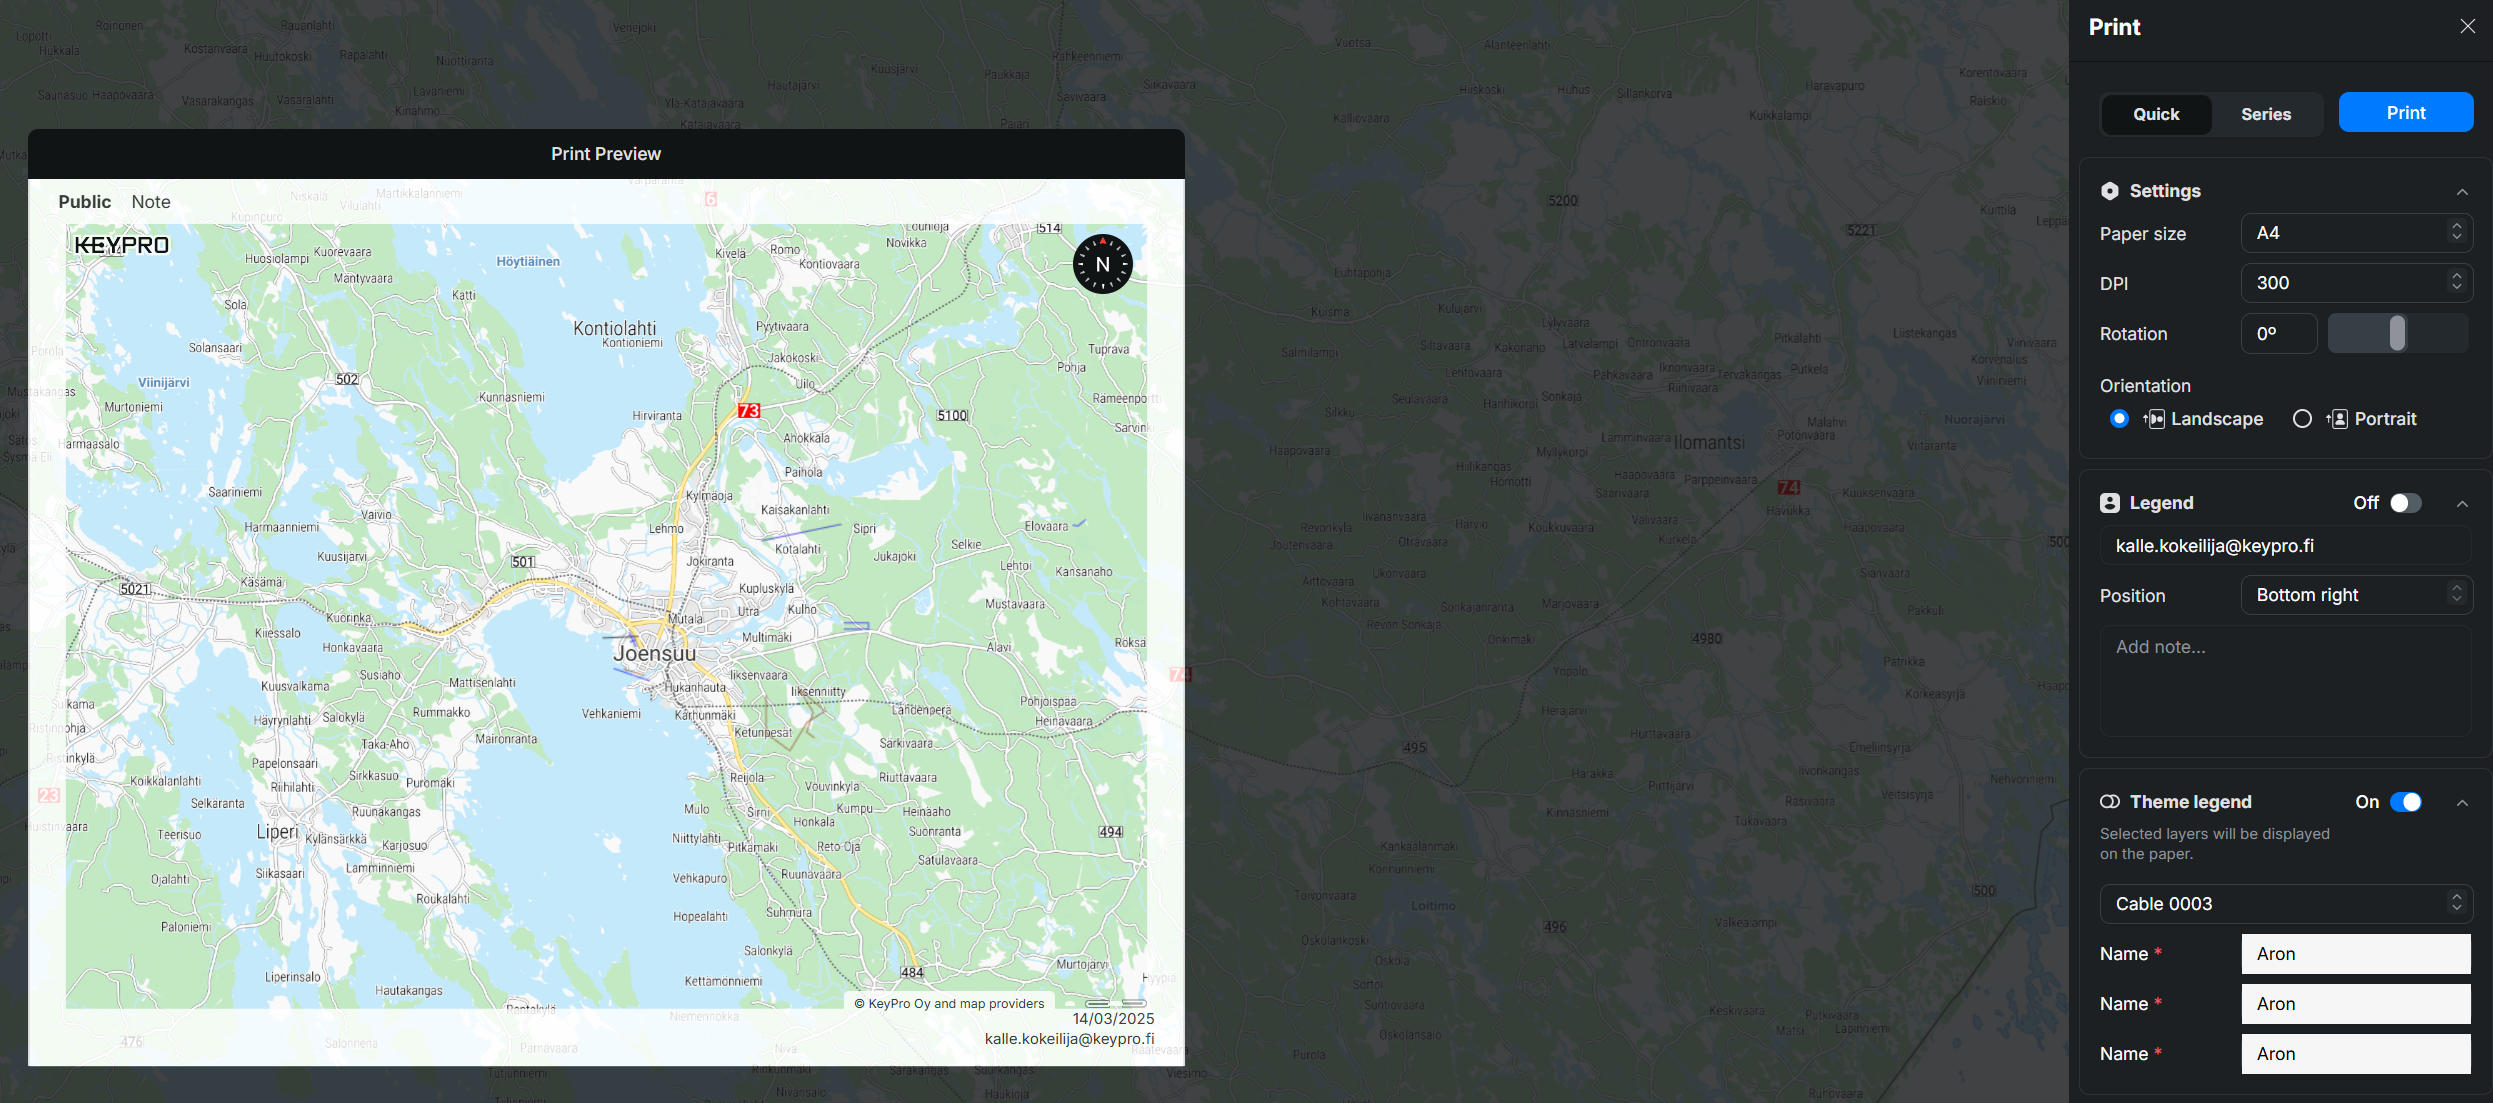
- Start printing by filling in the information. The fields Paper size and DPI must be completed to match the paper and printer you are going to use. Paper size means the physical size of the printing paper.
- You can include a print Legend and a Theme legend on the printout. You can also define their location on the printout:
- The Legend refers to the map legend, which includes information on the paper type, scale, person creating the printout, and date of printing. You can add your own text in the Add note... field.
- You can include a Theme legend on the printout by going to the Layers list and activating those theme levels that you want to include. In the drop-down menu for the theme legend, select the location of the legend. The Theme legend on the printout will include the same information as the Themes – Show legend window.
- The borders of the print area move along when moving the map. In the Orientation options, you can adjust the orientation of the print area on the page. The changes you make are applied immediately to the frame shown on top of the map.
- Click Print to have the browser provide the file in PDF format for downloading.
Print series
Use the Print series function when you need to generate multiple frames in a predefined sequence. This is useful for printing larger areas that cannot be covered by a single frame.
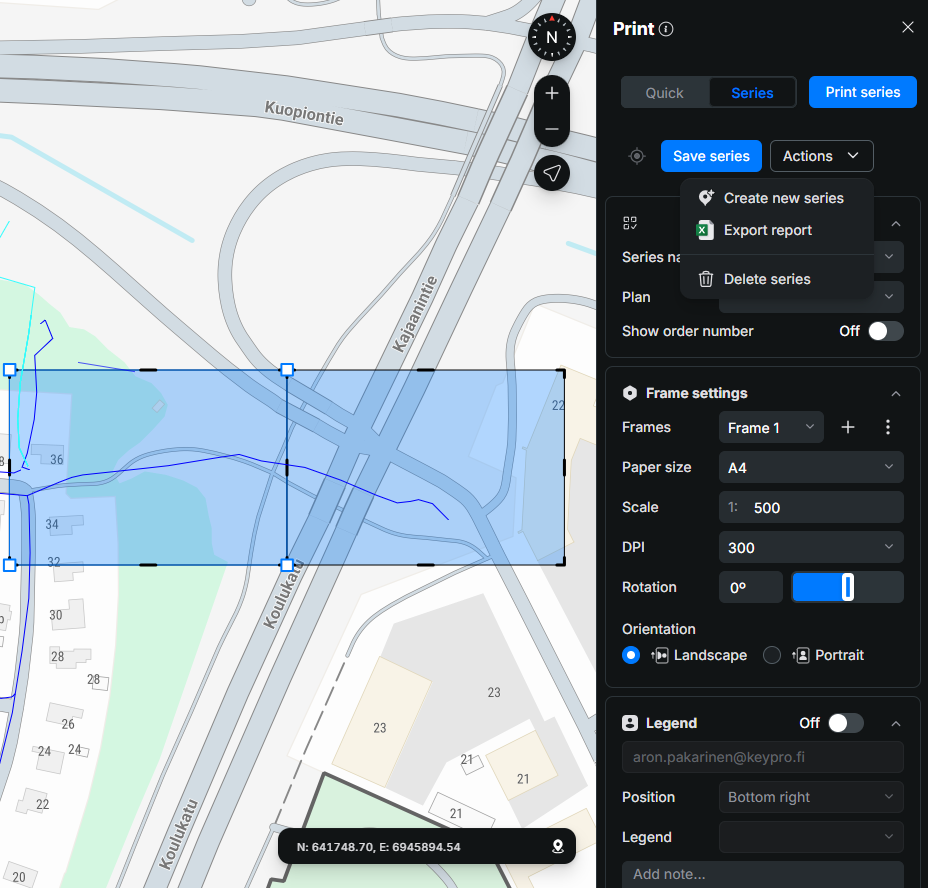
To search for existing print series, enter the name in the Series name field or open the drop-down menu. To print the series click Print series.
To generate an Excel report of the selected print series, click Export report.
Creating a new print series
- Open the Printpane from the upper-right corner of the map view and enable the Series tab.
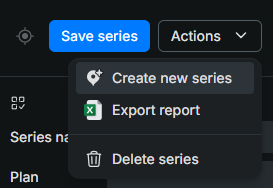
- To start creating a new print series, open the Actions drop-down menu and select Create new series. This action also clears the pane and any previously selected print series.
- Enter the name for the series in the Series name field.
- Enable Show order number if you want frame numbers to be displayed in the printouts.
- To start adding frames, save your work first by clicking Save series.
- In the Frame settings section, configure the print frames:
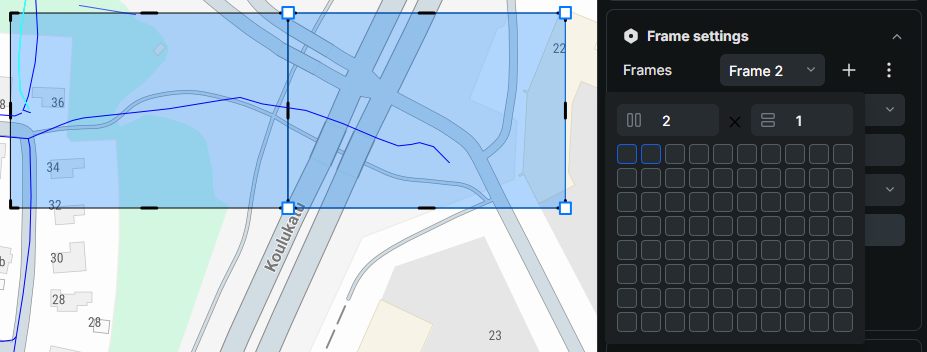
- Frames: Add a new frame using the + button. In the table that opens, each frame represents a single print area and produces one print output. For example, a 2 × 1 layout creates two adjacent print frames.
- Paper size: Select the paper size for the printouts.
- Scale: Define the print scale.
- DPI: Select the print resolution.
- Rotation: Specify the rotation angle for the frames.
- Orientation: Select Landscape or Portrait.
- Frames: Add a new frame using the + button. In the table that opens, each frame represents a single print area and produces one print output. For example, a 2 × 1 layout creates two adjacent print frames.
- You can later select frames either by clicking them on the map or by choosing them from the Frames drop-down menu. Once selected, frames can be printed or deleted using the available options
 .
- If required, enable Legend and configure its settings, including the legend position, nature of legend, and additional notes.
- Click Save series to save the print series.
- Click Print series to generate the print output.