The Survey tool allows you to save and convert field‑measured survey data into the system. Using Surveytool, survey files—such as duct and point object measurements—can be read directly from measurement equipment output formats (e.g., T3 PIH, T11). The imported data can then be used to create network objects, analyze collected geometries, or generate reports.
You can activate the Surveytool from the Tools menu within the KeyAqua Nexus tools.

Managing surveys
The Surveytool includes a Surveys tab where all existing surveys are displayed. This allows you to quickly browse, open, and manage previously created survey files. The list also supports Filtering by Mapper information.
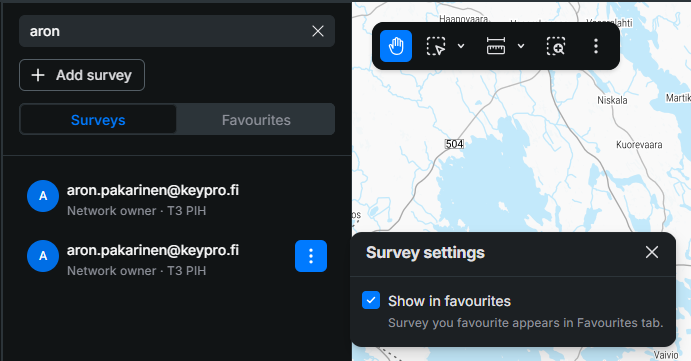
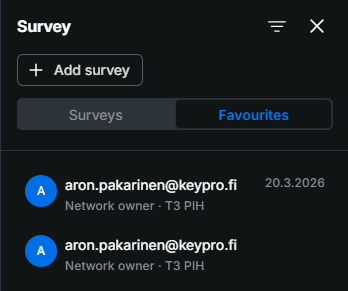
You may also add them into your Favourites tab by clicking the three dots next to a survey and selecting Show in favourites.
Importing a new survey file
Importing a survey file allows you to bring field‑measured points and line strings into the system for processing and mapping.
- Open the Surveytool
- In the Toolsmenu, select Survey.
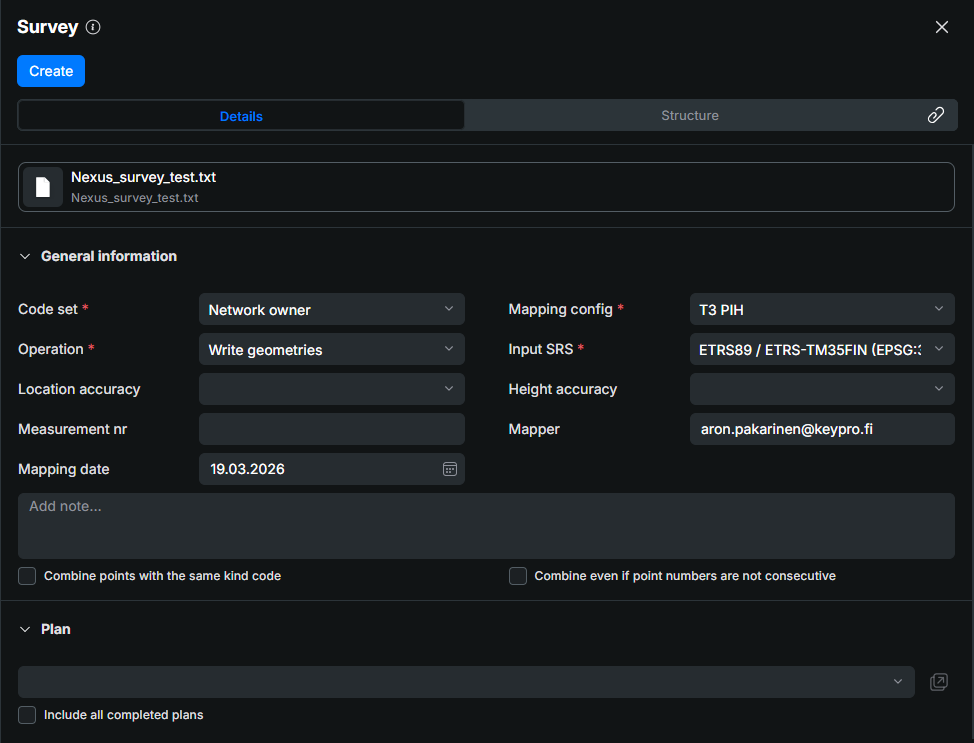
- Click + Add survey and select the file from your computer, the selected file appears at the top of the presented pane that opens.
- The Surveypane opens with Details and Structure tabs.
- In the Tools
- Fill in Details information
- Code set: Choose the code set used in the survey file.
- Mapping config: Select the format that matches the file structure (e.g., T3 PIH, T11, or other admin-defined mappings).
- Operation:
- Also create objects — automatically create network objects such as ducts, manholes, valves, etc.
- Write geometries — import measurement geometries to the Surveys layer only.
- Input SRS: Choose the file’s coordinate system.
- Height accuracy (optional): Set height accuracy.
- Location accuracy (optional): Set location accuracy.
- Measurement nr: Enter the measurement identification number manually.
- Mapper: Filled in automatically with the currently logged‑in user. Free to edit.
- Mapping date: Filled in automatically with the current date. Free to edit.
- Set geometry combination options:
- Combine points with the same kind code to form lines from consecutive points.
- Combine even if point numbers are not consecutive to allow non‑sequential line creation.
- Configure a plan:
- (Optional) enable Include all completed plans if relevant.
- Convert the survey file
- Click
 (top left).
 - The system processes and saves the converted file.
- Any structural errors or warnings appear in the results list for review.
- Click
Survey results
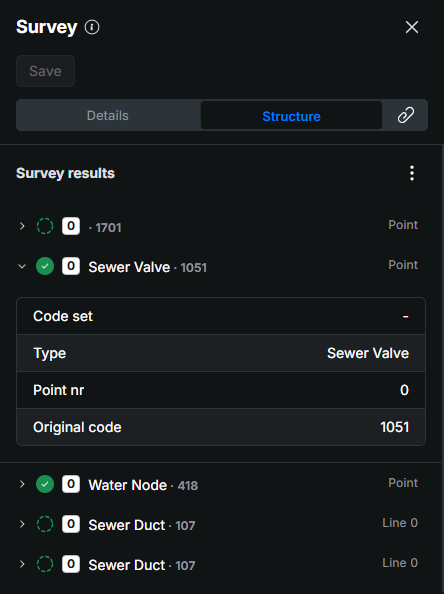
After a survey file is created and processed, the results are displayed in the Structure tab of the Surveytool. This view presents all imported survey items in a list, where each item can be expanded to show detailed information about the measurement.
Each result item has a status icon indicating whether a KeyAqua Nexus network object has already been created from that survey geometry.
- A green checkmarkindicates that the item has been successfully created as a network object.
- A dashed-line circle
 indicates that the item has been imported but no network object has been created yet.
When expanded by clicking the > symbol, each result displays the following information:
- Code set– the selected code set
- Type – the interpreted object type (e.g., Sewer Branch)
- Point nr – the point number from the survey file
- Original code – the survey kind code extracted directly from the file