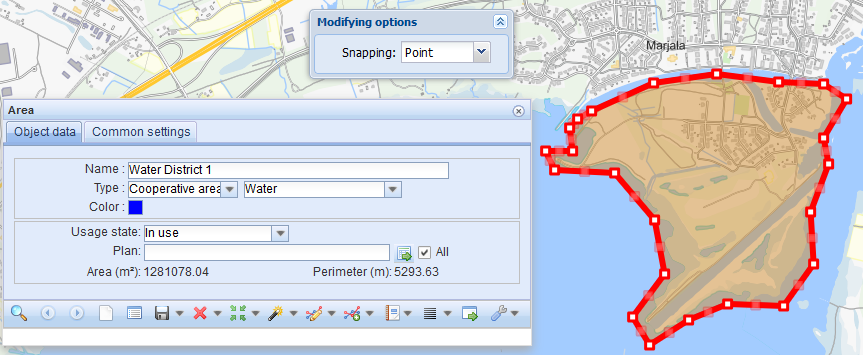
To add an area with the required shape on the map, go to the main tool bar at the top and click Area  . You can add an area on the map, for example, for a print-out. You can define the name, type, colour,and usage state of an area, and you can attach it to a plan. To start the creation of an area, click Create
 . Move your mouse pointer across the map and click the left mouse button to enter points at appropriate locations. Enter the final point by first clicking the left mouse button and then the right mouse button. The area is automatically saved in the database.
The area in the illustration has been selected for modification. The points of the area have been highlighted.
Adding a point buffer
- In the drop-down menu for Create
 , select Create point buffer.
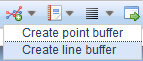
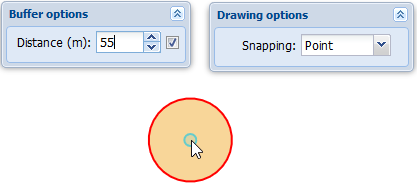
- Position the center of the point buffer on the map. You can use the Snapping options Point and Nearest. Hold down the SHIFT key and click the left mouse button to snap.
- Move the mouse pointer to define the distance.
- Finalise by clicking the left mouse button. The area is now saved.
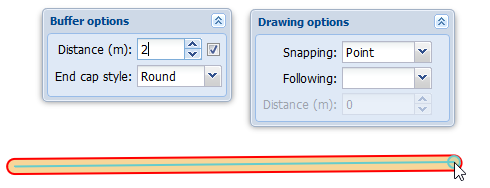
Adding a line buffer
- In the drop-down menu for Create
 , select Create line buffer.
 - Define the distance in metres, or deselect the checkbox next to the Distance field.
- Select the End cap style for the line’s end points: round, flat, or square.
- Draw the line on the map.
- If you cleared the checkbox for distance, define the distance by moving the mouse.
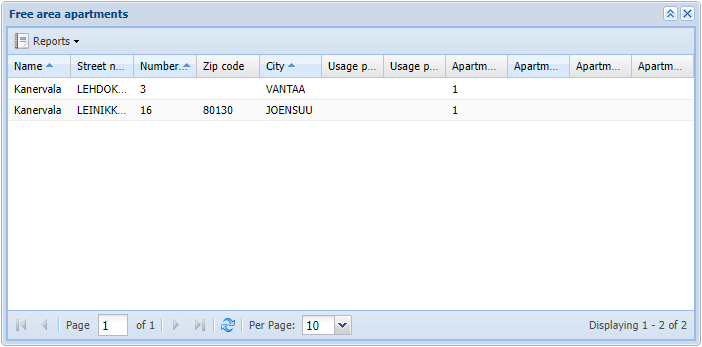
Addresses and apartments in an area
To list the addresses located in the area, go to the drop-down menu for List  , and select Free area addresses or Free area apartments. The form type displayed is similar to the form in the List chapter. The Free area apartments form provides information on the number of apartments at the addresses. To create a list report on the apartments or addresses in the area, select
  Reports – List report. Right-click to edit an area, address, or apartment on the appropriate form.
Adding a line
You can freely add lines of various size and colour on the map, for example, for a print-out. To do this, click Line . The buttons on the Line form
  function like the buttons on other forms, as described in the chapter Buttons on object forms. For example, you can search existing lines on the map by clearing the form and clicking Search
  . You can also locate and highlight lines. You can modify the colour or thickness of the lines you searched and picked from the map. Click Save form
  to apply the changes to the map. The Lines layer is activated in the Layers selection when the Create
  and Pick
  tools are used.
The line in the illustration has been selected so that it can be modified. The points of the line are highlighted.
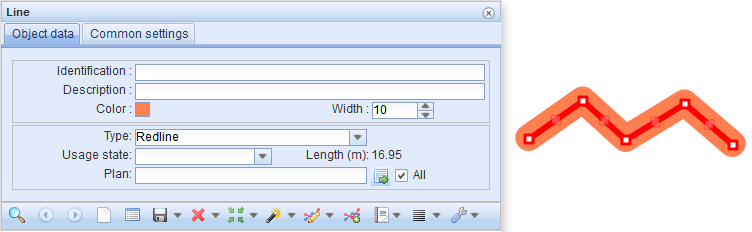
If you want to create a new line, first select the colour and thickness. To start the creation of a line, click Create . Then move your mouse pointer across the map and click the left mouse button at the appropriate location to create the starting point of the line. To create the end point, first click the left mouse button and then the right one. The line is automatically saved in the database. When you click the Create button, the Drawing options dialogue box is displayed. The functions of this dialogue box have been described in the chapter Creating a new object.
You can define the usage state of a line, and you can attach it to a Plan. Click Save form  to save changes.
You can reposition the line by clicking Modify  . The line in question is then highlighted on the map. When you click the line using the left mouse button, the line can be modified. You can move the line’s points by dragging them while holding down the left mouse button. Create more points by dragging the dimmed squares that are located between the actual line points. When you move these squares, you create more points. When you modify a line, you can also use the Snapping functions Point and Nearest. Click Save form
  to save changes.
Adding text
To add text on the map, such as comments or observations, use the Text tool in the toolbar at the top of the screen. Apart from the Create and Modify functions, the Text
  form functions as described in the chapter Buttons on object forms.
- Open the Text form by clicking Text
 in the main toolbar.
 - In the text field, enter the text you want to add.
- Select the Colour, (font) Size, and other information. Note that the placement scale does not affect the size of the text – only the font size does.
- Click Create
 in the form’s toolbar.
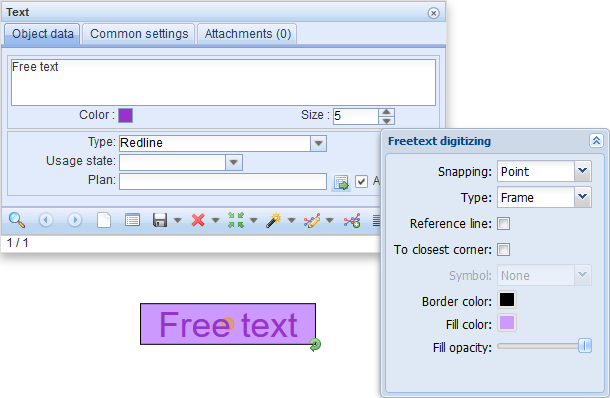
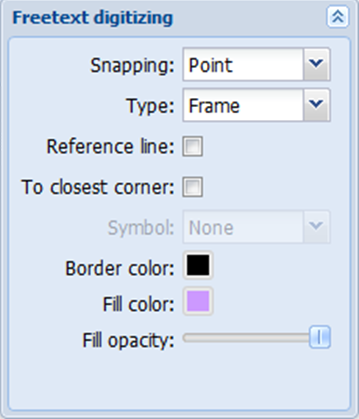
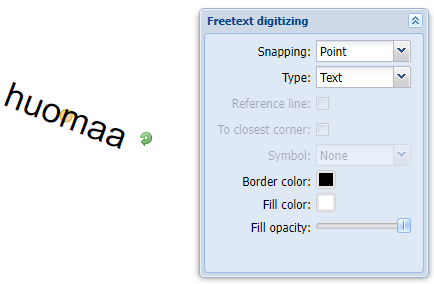
 - In the Freetext digitizing dialogue box that is displayed, select Type.
- Text: only text on the map.
- Frame: text with frames.
- Select the Border colour.
- Select the Fill color.
- Adjust the opacity using the Fill opacity selector.
- Line: underlined text.
- Select the Border colour (colour used for underlining).
- Line: underlined text.
- Position the text at the appropriate location on the map.
- Use the
 tool to rotate to the appropriate angle.
TIP: You can edit the text, colour, and size at any time when creating text.
- Complete the process by right-clicking, or click Save form
 on the form.
Note! The drawing options you selected are session-specific. With this, adding texts using the same style will be quicker.
Adding text with a reference line on the map
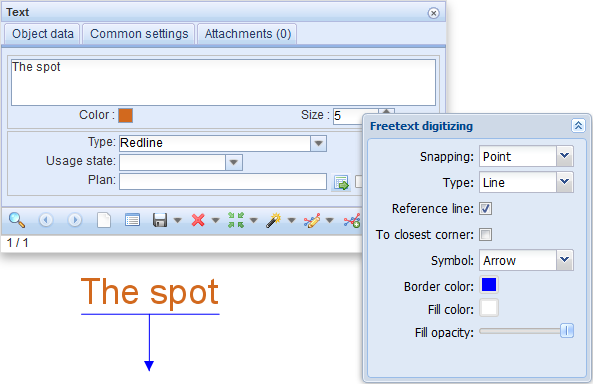
Steps 1–5 as described above, but select Frame or Line as the type.
- Select the Reference line checkbox.
- Select the To closest corner checkbox if you want to connect the reference line to the nearest corner instead of the nearest point.
- Select Symbol
- None: the line has no symbol.
- Arrow: The line is an arrow pointing to a point.
- Circle: see the chapter Adding text with a circle reference line on the map.
- Position the starting point of the reference line on the map and move the mouse to see the line attached to the text.
- Position the text at the appropriate location.
- Rotate using the
 function.
 - Complete the process by right-clicking, or click Save form
 on the form.
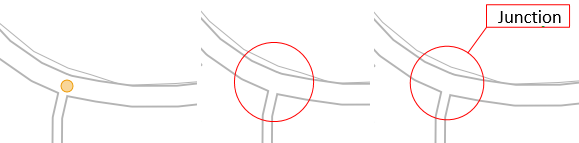
Adding text with a circle annotation line on the map
Steps 1–8 as described above, but select Circle as the symbol.
- Position the center of the point buffer on the map.
- Move the mouse to define the size of the circle.
- Accept the size by clicking the left mouse button.
- Position your text on the map.
- Rotate using the
 function.
 - When you are done, click the right mouse button or click Save form
 on the form.