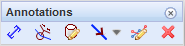
You can add information on map objects, such as ducts and nodes (material, diameter, construction year etc.), to the map view. The Annotations  tool can be found in the toolbar at the top of the map view. You have real-time visibility to the information content of an annotation that is created on the map, and the content of the annotation changes if the annotation includes information that is updated on an object form. The various annotation tools are presented below.
Duct annotation
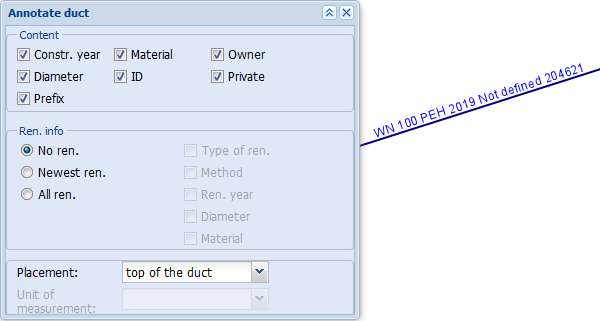
To start creating a duct annotation, click Annotate duct  . Use the Annotate duct form to define the information content of the annotation and to select the presentation method. To add an annotation to the map, select a duct on the map for which you want to create an annotation and point at the location in which you want to place the annotation. You can define the information content of an annotation by selecting the required checkboxes.
Renovation information in an annotation
To add all the renovation-related duct information to an annotation, select All ren. If you select Newest ren., only the most recent renovation will be included in the annotation. The type of renovation, method, year of renovation, diameter, and material can be added to the annotation if you select Newest ren. or All ren.
Annotations are placed according to the duct geometry. To change the placement of an annotation, modify the settings for Placement. The various placement methods are presented below:
- Above the duct – The annotation is placed at the specified point and above the duct.
- On the duct – The annotation is placed at the specified point and on the duct.
- Below the duct – The annotation is placed at the specified point and below the duct.
- In line with the duct – After the duct has been selected, specify the point at which the annotation is to be placed in line with the duct geometry.
- On annotation line – The location of the annotation is displayed using an annotation line. After you have selected a duct, draw an annotation line to a location on the map that enables the annotation details to be read easily.
- Height info – Placing annotations with height info. First, select the object that you want to annotate on the map. After the selection, a window appears with the duct elevation information, which changes when you move your mouse pointer on the duct. Select the appropriate point on the duct with the left mouse button and then click on the map to define the placement of the annotation.
Node elevation annotation
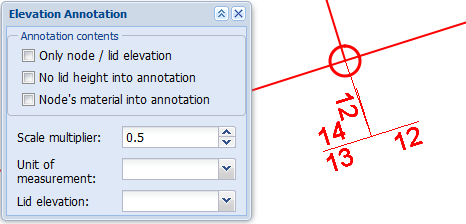
With the Node elevation annotation  tool, you can add details to the geometry such as the elevation of a node’s lid or ducts that are connected to the node. To add an annotation, click the node with the left mouse button and then click the location in which you want to place the annotation. For example, in the case of a node, the annotation will be divided into as many sections as there are ducts that connect to the node. The annotation’s direction indicates the duct that the annotation is related to. The duct elevation details will be displayed under the annotation, and the elevation of a node’s lid above the annotation.
Click Node elevation annotation  to open the Elevation annotation dialogue box, in which you can select the information content and define the settings for presenting the annotation on the map. With the scale multiplier, you can specify the length of the annotation lines.
In the example figure below, the scale multiplier and elevation data for two ducts connected to a node are below and the elevation annotation for a node’s lid is above the annotation.
Annotate node
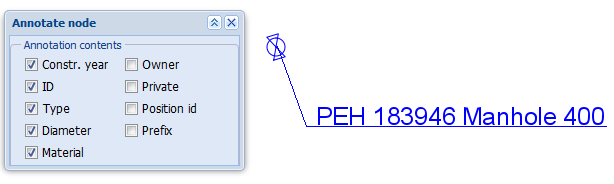
Use the Annotate node  tool to add annotations for nodes. Click Annotate node
  to open the Annotate node dialogue box. Select the information you want to include in the annotation. On the map, point at the object you want to annotate and place the annotation on the map.
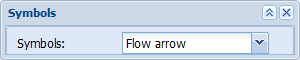
Symbols
Symbols  provide more information on KeyAqua objects on the map. To activate the symbol placement, click Symbols
  . Select the symbol from the drop-down menu for Symbols and then point at the object and location on the map.
Flow direction:
You can add a flow direction symbol for ducts. The flow direction is determined on the basis of the duct’s elevation data (from the higher point to the lower) or the order of digitization (if no elevation data has been specified). You can change the flow direction with annotation tools. The flow direction symbol for the rainwater network will be created on the side of the duct where the mouse cursor is when the placement of the symbol is defined.

Non-specific location:
If you want to emphasise that the object’s location on the map is not precise, you can add the Non-specific location symbol ~.
Edit annotation
To edit annotations, first click Edit annotation  and then select the annotation on the map. Select the annotation by clicking the annotation line with the left mouse button or define the area by holding down the left mouse button.
Annotations consist of several parts, such as lines and text. When you define the annotation with the Edit annotation tool, a list of the defined annotation objects is displayed. The list lets you select items with the object in question highlighted on the map, making it easier to find the correct annotation. When the correct annotation has been selected, you can activate the editing tool by double-clicking the annotation or by clicking it with the right mouse button and selecting Edit from the menu. This will activate the editing mode for a line or point object and you will be able to save the changes with the right mouse button.
Deleting an annotation
To delete annotations, first click Delete annotation  and then select the annotation on the map. Select the annotation by clicking the annotation line with the left mouse button or define the area by holding down the left mouse button. In addition, you can delete several annotations at once by defining the area. All annotations in this area will be deleted.