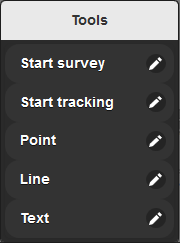
Drawing tools
Click Tools to view the available functions.
Adding text to the map
- In the Tools menu, click Text.
- Complete the Text field with the required information and change the font size as necessary.
- Click OK to accept.
- Position the text at the appropriate location on the map. You can reposition the text as required.
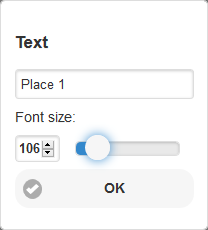
- Define the text and font size before positioning the text on the map.
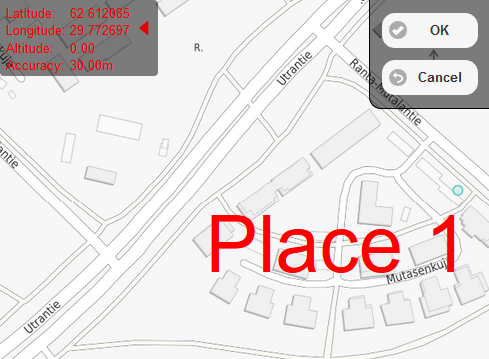
- Accept the text’s position and click OK or click Cancel to cancel the changes.
Drawing lines
- Click Line.
- Enter an identification and description for the line. Click OK to accept.

- Position points on the map.

- To stop drawing and save the line, click OK.
Creating points
- In the Tools menu, click Point.
- Complete the Identification and Description fields and click OK.

- You can add an identification and description for the point.
- Position the point on the map.
- Accept the point’s position and click OK to save.

Drawing lines by using the tracking function
- To save a route you travel, go to the Tools menu and click Start tracking.
- Complete the Identification and Description fields and click OK.
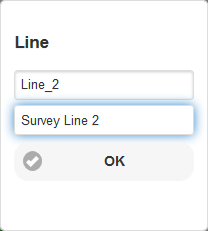
- Travel along the route you want to draw on the map as a line.
- To pause drawing the line, click Pause.
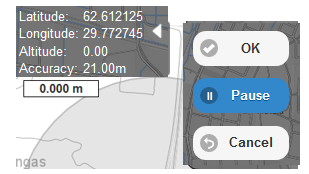
- To continue drawing, click Resume.

- To pause drawing the line, click Pause.
A straight line will be drawn between the points at which drawing was paused and resumed. This enables you to pause tracking, navigate around an obstacle located on the route and then resume tracking so that the route passes through the obstacle.
Stop tracking and save the line by clicking OK. A tracking line has been drawn on the map.

Start survey (this feature is subject to a separate order)
The Start survey tool enables you to save line and point objects when you are out and about. In the Tools menu, click Start survey.
Viewing and editing saved survey files
- In the Tools menu, click Start survey.
- Click ... in the displayed view.

- View the available surveys in the displayed view and use the search field to filter the surveys.
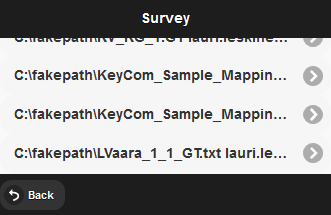
- Click a row to select the required survey.
- The selected survey file will open in a new window on the display:
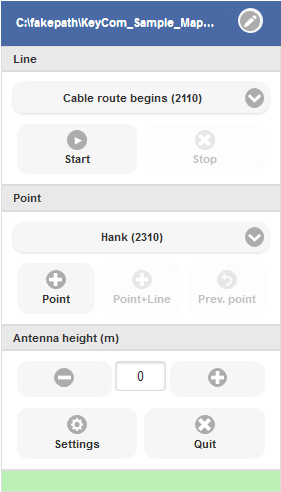
Tip: You can edit survey files by using the tools.
Survey forms
With the Survey form, you can create new surveys and edit, search and delete existing surveys. This is how you save a new survey:
- In the Tools menu, click Start survey.
- On the displayed form, click
 to start a new survey.
 - Enter the required information on the Survey form:
- Name is a mandatory field and this information is required in order to save the survey.
- Click the Plan field if you want to link the survey to a plan. On the displayed list, select the required plan or click Back.
- You can enter additional information in the Mapper, Date and Description fields.

- Click Save to save the survey. When you have saved the survey, you can add items. See the instructions in the Creating surveys chapter.
- To clear the form, click Clear. To delete the survey, click Delete. Click Close to close the form.
Survey items
To view line and point objects related to the survey, click Items.

Creating surveys
First, save the basic survey information in the KeyMobile application, as instructed in the Survey form chapter. Information on the saved survey will be displayed, and you can add survey items in this view.
Tip: The changes you have made will be displayed in the green bar at the bottom of the form, for example: 

Line
The functions of the Line section enable survey procedures for line objects such as ducts and cables. A line object consists of survey lines and points. Select the required survey item from the drop-down menu.
Click Start to start line object surveying. If you have activated the Use interval function in Settings, points will be saved immediately after you click the Start button. The Start button will then be replaced by a Stop button. Click Stop to pause the saving of points.
- If Time interval has been selected, the survey point of a line object will be saved in accordance with the defined time interval.
- If Distance interval has been selected, the survey point of a line object will be saved whenever the defined distance interval figure is reached.
- If NO interval has been activated, the first survey point will be saved when you click Start. After this, the button will be replaced by a Point button, which is used to save the next survey point of the line object.

Click Stop to stop measurements being made for a line object. Further information on functions related to intervals is provided in the Survey settings chapter.
Point
The functions of the Point section enable you to save point objects such as manholes and masts. Select the required survey item from the drop-down menu.

There are three ways of saving point objects:
- Clicking the Point button will add a survey point for the selected survey item.
- Point+Line will create a survey point for the selected point object and add a line for the active line object.
- Prev.point adds a survey point in the same location with the previous saved survey point. This enables multiple survey points to be added to the same location.
Antenna height
The Antenna height (m) section is used to define the antenna or measuring device height from the ground. This tool is particularly useful in situations in which the height of a measuring device changes before the survey has been completed.

Survey settings
Click Settings to define the survey settings.

On the Settings form, you can define either a time or distance interval for line objects. If you choose to apply an interval, the survey points for a line object will be recorded automatically in accordance with one of the Use interval options:
- Time interval (s): Survey points will be added for a line object in accordance with the time frame specified in seconds.
- Distance interval (m): Survey points will be added for a line object in accordance with the specified number of metres.

The settings for point objects are defined in the Point recording time (s) and Quality threshold (m) fields:
- Point recording time (s): The survey point is calculated based on all measurements made within the specified recording time. The shortest possible recording time is one second. If this option has not been selected, survey points will be recorded immediately without the average value being calculated. When the application is making calculations, the remaining time will be displayed on your device’s screen.
- Quality threshold (m): The Quality threshold field is used for defining the minimum accuracy of survey points. If the accuracy of your device is not as good as the defined accuracy, the application will notify you of this when a survey point is being created. You can, however, add a point, or you can choose not to add it. The survey will then resume automatically.
The Create network objects option creates network objects in connection with the creation of survey items. The logic of network object creation is the same as in the browser application.
The Save button is used to save the selected options as the default settings for your username. If you do not save the settings, the settings you defined will be available for the duration of your KeyMobile session.
Click Close to close the survey’s Settings.
Viewing objects – Info
- Click Info
 .
. - On the map, click the location with the objects you want to view.

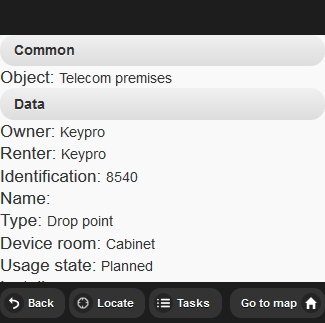
The objects at the selected location on the map will be listed on an Info page.

The network objects at the selected location are listed on an Info page.
Note! Only objects that are visible on the map will be included in the Info list. If the display scale is large, point objects with a small placement scale will not be displayed. Examples of such objects are splices, telecom premises and manholes. In order for an object to be included in the list of objects, check the display scale and that the required map layer is active.
To view more detailed information on a row, click on the row.
Locating objects
- Select an object as instructed above.
- Locate the object on the map by clicking Locate.

- Click OK to return to the object data.
Tasks
Viewing tasks related to objects
- Select an object as instructed in the Viewing objects – Info chapter.
- Click Tasks to open the task list. Completed tasks are displayed on the list with a green background.
- To view the task information, click on the row in question.
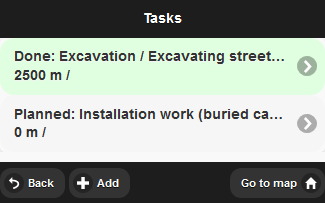
- Click Back to return to the task list.
Editing tasks related to objects
- Open the task details as instructed in the Viewing tasks related to objects chapter.
- Edit the fields as necessary.
- Click Save.

Adding a task for an object
- Select an object as instructed in the Viewing objects – Info chapter.
- Click Tasks to open the task list.
- Click Add.
- Enter the required information for the task.
- Click Save.

Address search
- Click Search
 to start address search.
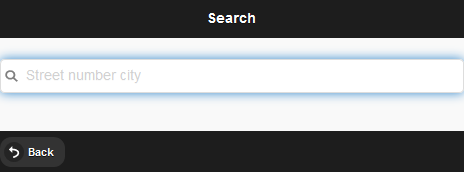
- Enter an address or part of an address into the address field.
- Click Enter or tap on a point outside the field.

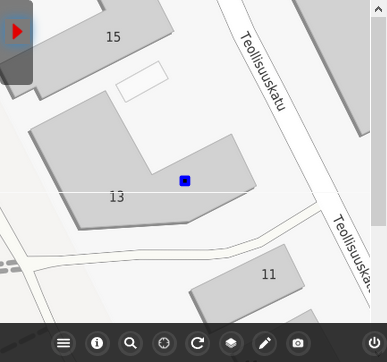
- On the list, click the required address to select it and to see the address highlighted on the map that is centred on the address.
Locate and Follow
The Locate button has a menu with two functions: Locate and Follow.

If your device has a GPS chip, these functions will use it to locate you. If the device does not have a GPS chip, your location will be determined based on the telecommunications network. Location accuracy is usually not as good as when GPS positioning is used. The estimated location accuracy is displayed on the map as a circle, and this information is also included in your location data.
Centring the map on the device location (Locate)
- Click the Locate button.
- In the displayed menu, choose Locate to see your current location on the map.

Constantly refreshing the map based on your location (Follow)
- Click the Locate button.
- In the displayed menu, choose Follow to constantly refresh your location, with the map being moved as required to ensure your location is always visible.
- Tip: The Locate button will turn blue to indicate that the Follow function has been activated.
- Click the arrow representing the location on the map to stop following the route.
Refreshing the map
Click Refresh map to download the map from the server again. This is a useful function, for example, when someone else is updating the file at the same time at another location.
Changing the map view – Map layers
With different map layers, various map objects can be displayed simultaneously or, alternatively, certain types of network objects can be hidden. Only one background map at a time can be selected for display.
- Click Layers
 .
. - On the Layers page, select the required layers.

The system’s admin user can limit and define the map layers that are available in the mobile user interface.
Distance
You can measure distance on the map by using the Distance function.
- Click Distance
 to start measuring.
 - Create the starting point and further points on the map. The distance from the starting point is displayed in the upper left corner of the map. The distance information is updated after adding each point. Tip: The Distance button will turn blue to indicate that the measuring tool is active.
- Click Distance again to stop measuring.

Adding external documents – Photo/File
You can upload photos and files from your mobile device to the application.
- Click Photo/File
 .
. - On the page that is displayed, click Take photo/Choose file.

- Select
- the device’s camera if you want to take a new picture
- the file browser if you want to upload an existing file.NOTE:
Note! Depending on the device and platform, the offered function may be taking a photo or (if no camera is available) selecting a file.
- Take a photo or select a file in accordance with the device’s instructions.
- Complete the form.
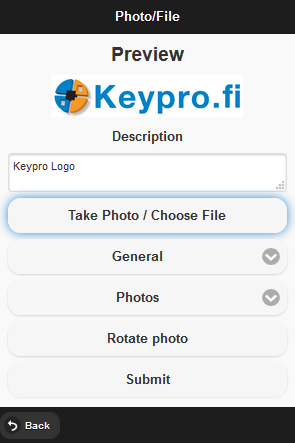
- Click Submit.
- If you are sending a photo, select the size you want to apply. Click the Original menu to view the available options.

- Click Upload.
- If you are sending a photo, select the size you want to apply. Click the Original menu to view the available options.
- If the location is inaccurate, you will be asked if you would like to adjust the location. Click Yes to pinpoint the photo/document location on the map.
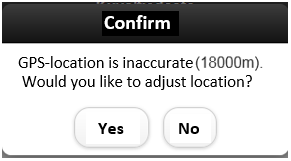 NOTE:The latest location available at the time the photo was taken will be used as the photo location.
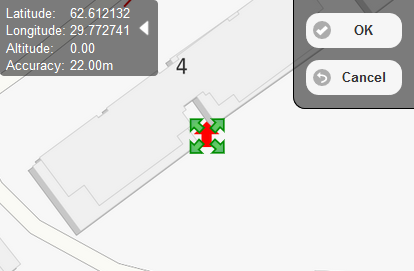
 - To adjust the location, drag the green arrows to the required location.
- Click OK to transfer the external document to the server and to the defined location on the map.
Click Cancel to stop document loading.
Viewing documents
If the Document layer is active, you will see the document symbol will be displayed on the map.
Activate the Info tool and click the symbol to view the external document. Further information is available in the Viewing objects – Info chapter.

Rotating documents on the map
- Select a document for viewing, as instructed in the Viewing objects – Info chapter.
- Click Rotate.
- Drag the green arrow to rotate the document.
- Click OK to save.

Modifying the location of a document
- Select a document for viewing, as instructed in the Viewing objects – Info chapter.
- Click Move.
- Drag the green arrows to move the document.
- Click OK to save.
