The Group display  function helps you view various object groups. You can use it to edit and highlight a group or its objects, or to combine a group with another group. In addition, you can open the group from the object form and the object forms lists.
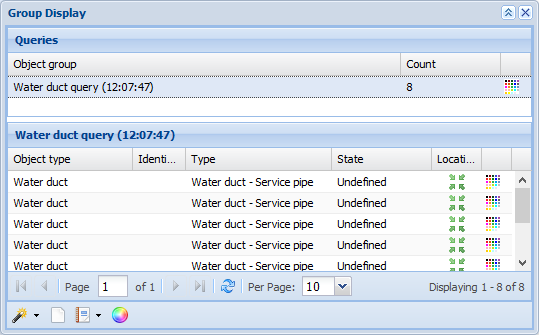
Groups are groups of searched objects or combinations of them.
Creating groups
Groups can be created in many ways:
- Add groups to a list using the Show in group display function in the drop-down menu for the List tool. Further information is available in the chapter Show in group display.
- Picking objects from the map with the Group display form. Use the Pick from map
 tool, with which you can, for example, define an area on the map and include the objects in that area.
 - View the results of the Info query in a Group display.
- Retrieve the objects of a Plan – see the chapter Show plan objects in a group display.
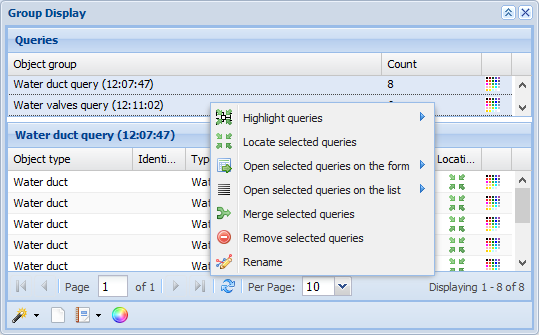
Merging object groups
- On the list, select the groups that you want to merge.
- In the context menu, select
 Merge selected queries.
Renaming an object group
- To rename a group, either double-click the object group or click the right mouse button and select
 Rename.
 - Enter the new name in the Object group field.
- Complete editing by clicking outside the field.
Highlighting groups
- Select the colours used for highlighting the groups.
- In the context menu, select
 Highlight queries to highlight the selected groups and groups for which you assigned a colour. Groups with no colour assigned are highlighted using the default colour. To apply a specific highlight colour for the selected groups, select the colour in the sub-menu. The items outside the selection are then highlighted using the default colour.
Locating queries
- Select the group(s) you want to locate.
- In the context menu, select
 Locate selected queries.
Opening groups on forms and lists
- Select the group or groups you want to open
- a) Open all search results by selecting
 Open selected queries on the form or
  Open selected queries on the list.
or:
b) In the sub-menu, open a single group of search results.
Removing groups
- Select the group you want to remove.
- In the context menu, select
 Remove selected queries.
Opening a group’s objects on forms and lists
- Select the objects.
- In the context menu, select
 Edit selected.
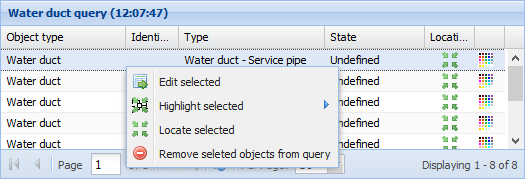
The selected objects are opened on their own forms.
Highlighting individual objects in a group display
Highlighting options: Select the highlight colour separately for each row, select the same colour for all, or use the default highlight colour.
- Select the objects you want to highlight
- a) In the context menu, select Highlight selected to highlight the objects using the default colour, unless you have defined a colour for the row in question.
b) Highlight all selected objects using the same colour by selecting the colour in the sub-menu.
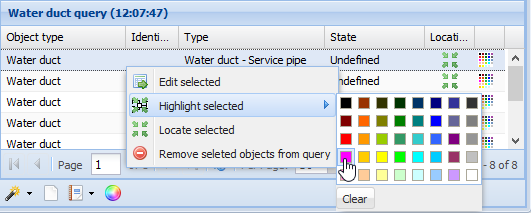
Note! The next time highlighting is applied, the current highlighting is removed. For this reason, if you want to highlight additional objects, you must include the currently highlighted objects in the selection.
Clearing the highlighting of group objects
To clear the highlighting of objects, select Clear in the context menu for Highlight selected. The highlighting of objects is cleared when you switch to another group or delete objects.
Locating individual objects in a group display
- Select the objects you want to locate.
- In the context menu, select
 Locate selected queries (the menu will be displayed when you click the right mouse button on the object list.
 - To locate a single object, click Locate
 in the Location column.
Removing an object from a group
- Select the objects you want to remove.
- In the context menu, select
 Remove selected objects from query.
Group reports and exporting a group to an external file format
To create an Excel report on the group opened on the object list, click Reports. In the drop-down menu, select Reports  Current query to Excel. A new browser window is opened. The Excel file is handled in accordance with the device and browser settings. Follow the instructions displayed.
In the drop-down menu for Reports, select Export  Export current query to... to export the current group to an external file format. This opens the Export settings dialogue box. Instructions are available in the chapter Exporting objects to external file formats (the Export function).
Creating user themes
- Create object groups in the Group display
 . For more information, see the chapter Creating groups.
 - Select the highlight colour for each group.
- Click Save as new theme
 .
. - In the dialogue box that is displayed, enter a name for the theme and click OK.
More information on user themes is provided in the chapter User themes.
User themes
Open the User themes form by clicking  in the toolbar at the top. First, plan the highlighting applied to the group display and save it as a User theme
 for later use (see the chapter Creating user themes).
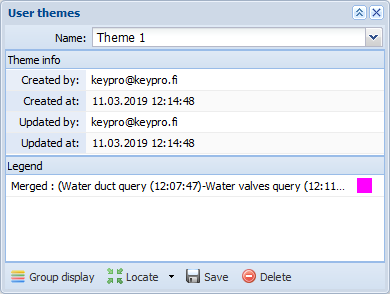
Viewing user themes
- Open the User themes form by clicking User themes
 in the toolbar.
 - In the Name menu, select the theme you created using the group display.
- Click
 Locate and
  Highlight to view the selected theme. The map is then centered on the theme and objects are highlighted using the selected colours.
 - To view the content of the theme, click
 Group list. In the group list, select the group whose content you want to view in more detail.
The functions of the Group display are described in the chapter Group display.
Editing user themes
- On the User themes form, on the list in the Name field, select the theme you want to edit.
- To change the highlight colour, click the Highlight colour icon and select the colour you want to use.
- Click Save
 to save the changes.
TIP: Change the contents of the theme by updating groups in the Group display and by saving the User theme again with the same name. The functions of the Group display are described in the chapter Group display.
Deleting user themes
- On the User themes form, on the list in the Name field, select the theme you want to delete.
- Click
 Delete. You will be asked to confirm the deletion of the theme. Click Yes to delete the theme.