Access area (this function is subject to a separate order)
Use the Access area tool to limit the network in which objects are displayed to various users or user groups. The right to use network objects can be defined, for example, based on area, the owner, or the creator of the object. You can also restrict the right of use to specific network objects, such as telecom premises or cables. The settings are discussed in more detail in the Admin user guide.
Click Access area to create a new permitted area on the map. Continue as instructed in the Adding an area chapter.

Use the List function to create a list report on permitted areas and to modify the access areas and the related addresses and apartments in the list view. Access areas can also be exported to a group display.
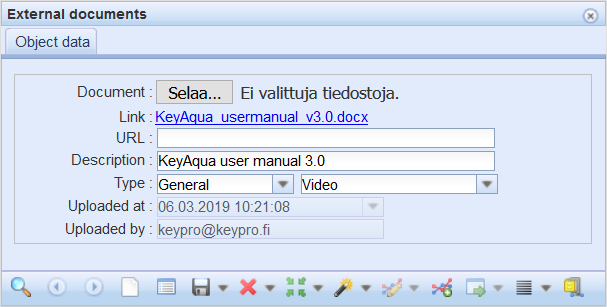
External documents
External documents can be files or URL links that can be positioned on the map and attached to network objects. To open the form, click External documents
  in the toolbar or on the Attachments tab on the forms. For more information, see the chapter Attached documents.
Viewing external documents
To open a document, click the link below the Choose files button. If the attachment is a URL link, it is opened on a new tab in your browser. The function for opening a file depends on your browser and browser settings. Usually, the browser asks whether you want to save or open the file.
TIP: If an external document includes both a file and a URL link, you can open the URL link by copying it to the address field in a new browser window.
Adding external documents
- If you want to add a file, click Choose files.
- Select the file or files that you want to attach as external documents.
- Save the information on the form (Type is a mandatory field).
- Click Save
 , or if you are attaching documents to an object, click Attach document
 .
.
If you selected several files, a separate external document is created for each file.
TIP: If you want to attach a web address, enter it in the URL text field or copy the address from the browser. If you also select a file, the URL is additional information to the document.
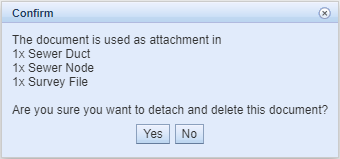
Deleting an external document
- Retrieve to the form the document you want to delete.
- Click
 Delete. If the document has been attached to an object, you will be asked to confirm the deletion.
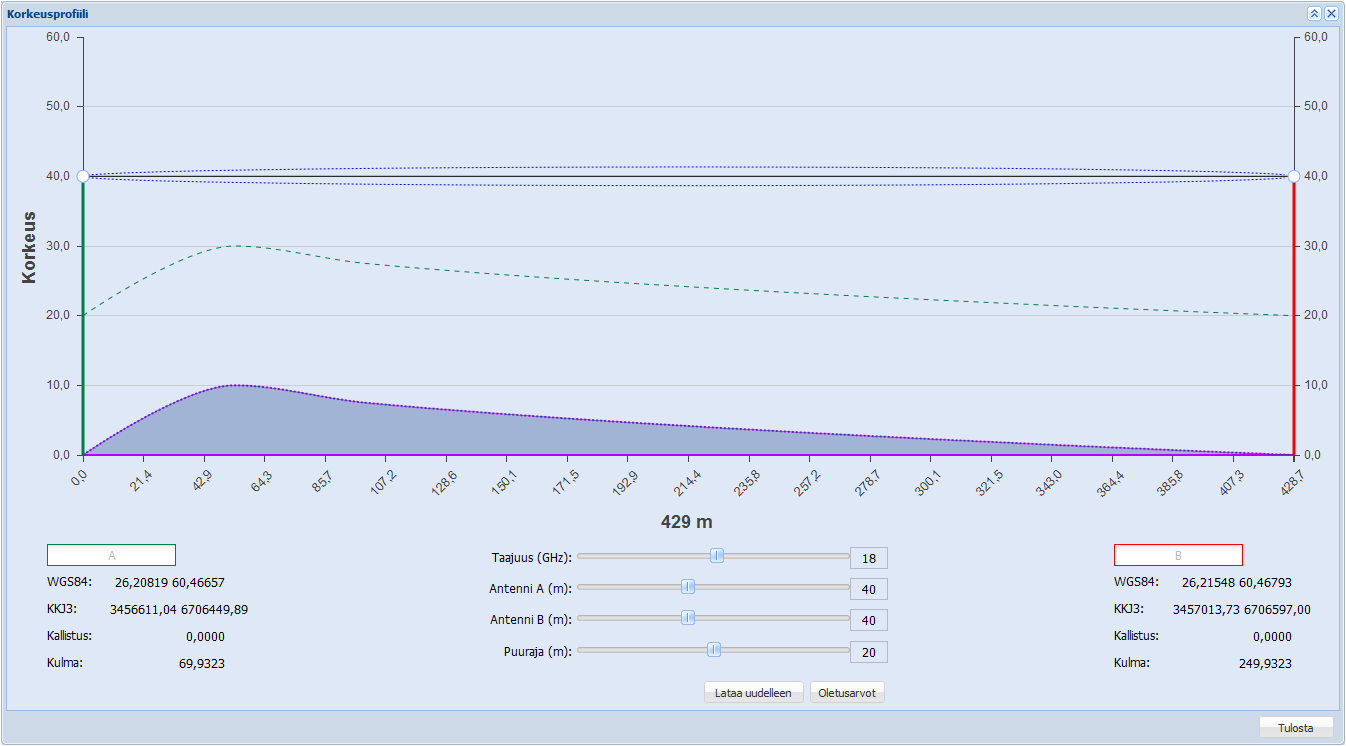
Line of sight tool (this function is subject to a separate order) – Duct height profile
The Line of sight  tool needs to be purchased separately. This function makes it possible to create a height profile on the form based on the contour lines in the database of the National Land Survey of Finland. The line of sight tool
  illustrates the radio link between masts and the ellipse illustrating the related first Fresnel zone for the selected frequency. This function includes the height profile of masts and the profile of trees at the given height above ground level. In addition, the curvature of the Earth is taken into account.
Creating a line of sight profile
Open the form by clicking Line of sight  in the toolbar at the top. The program then asks you to enter the start and end points of the profile. First, click to enter the location of the antenna A on the map and then enter the location of the antenna B. After you have entered the location information, the height profile is displayed.
Use the sliding controls on the form to modify the look of the automatically created height profile. Frequency controls the frequency applied to the profile. Antenna A, Antenna B, and Tree line are used to define the distance between these objects and the ground level in metres.
When you edit the original values of these sliding controls, click Reload to update the profile on the form. Click Reset if you want to restore the sliding controls to the original settings.
Click Print to create a printable version of the height profile.
Reports
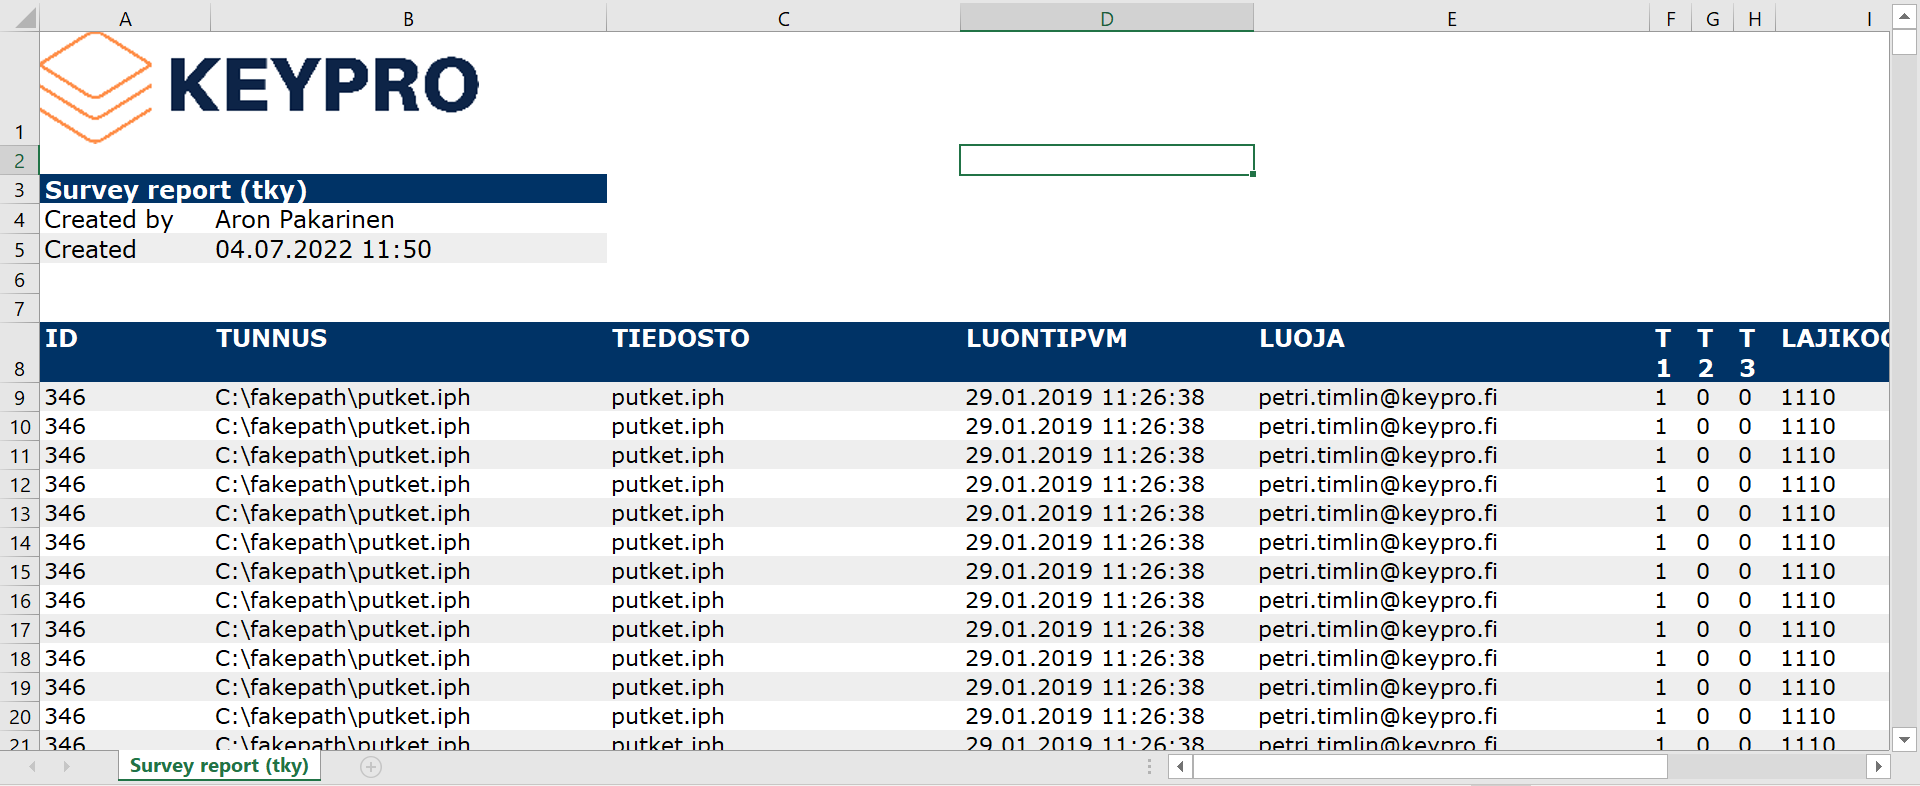
KeyHeat has an integrated reporting function, and separate report servers are therefore not required. This enables faster creation of information content for reporting. In addition to PDF, reports can be created in Excel format (xlsx). Reports in Excel format can be edited: For example, you can define column widths and add comments. In addition, you can save Excel reports as PDF files. Logos and identifiers for reports can be configured through the KeyHeat admin interface.
Open the Reports form by clicking Reports  in the main toolbar. On the Reports form, in the drop-down menu for Reports, select the required report.
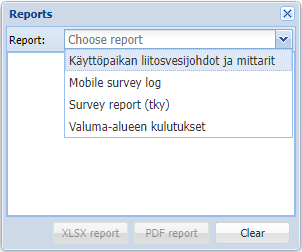
Fill in the search criteria.
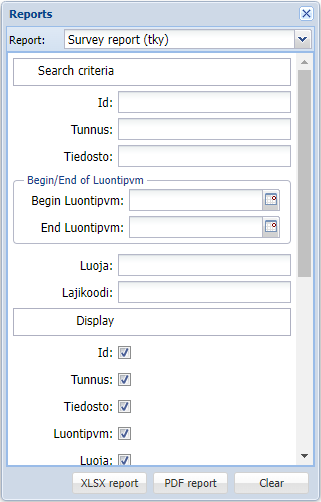
Click Create to download the report as an Excel file.
Asynchronous reports
When reports are created for a large number of search results, reporting is carried out asynchronously, that is, in a reporting mode that is run in the background when report creation exceeds the time limit specified for the environment in question. Typically, this time limit is defined to be one minute. The report will then be sent as an attachment to the email address specified for the username. The program will notify the user if the report has been sent to the user by email.
Customer-specific reports (a function to be ordered separately)
KeyHeat enables the creation of customer-specific reports if this function has been ordered separately. With the help of Keypro’s experts, the admin user interface is used to create a Report group that configures the fields to be displayed in the report and the applicable search criteria.
Customer-specific reports are available in the Reports menu in the main toolbar (Virhe. Viitteen lähdettä ei löytynyt.). A report is processed in the background and sent to the user's email.
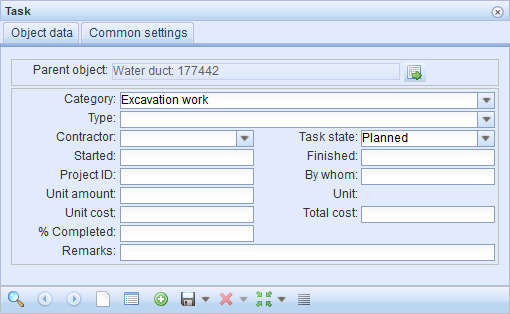
Tasks
Tasks  are, for example, work related to various construction phases or maintenance. You can define tasks for individual objects or a plan. Most of the Task
  form functions are the same as on other forms. More information is provided in the chapter Buttons on object forms.
TIP: You can define tasks, for example, in order to document in detail the work phases required for network building and to link them to the correct objects and plans.
Creating a task
- Open the required object on the object form, or click Show the parent object
 to open the parent object.
 - Follow the instructions provided in the chapter Adding a task for an object.
Locating and highlighting the parent object of a task
Click Locate parent object to highlight and locate the task’s parent object. This button functions in the same way as on any other form, but the location here is the location of the parent object. More information on locating is provided in the chapter Locating and highlighting an object.