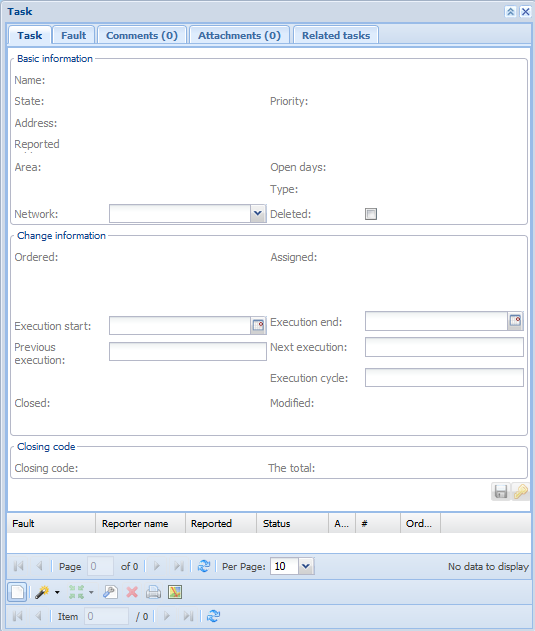
In KeyWork, tasks include faults, which are managed through the Task form. You can also access the form from the Task search
  form, which was discussed in the Task search chapter.
Creating tasks
Depending on your user role and rights, you can choose how to process tasks. The Task form has five tabs: Task, Fault, Comments, Attachments and Related tasks. To create a new task and to link a fault to it, select the Task form first. Alternatively, you can start creating a task from the KeyHeat network object form or from the Consumer point form. This is the recommended option for creating a task, as linking multiple network objects to a task is easier when using this approach. Both available methods for creating tasks are presented below.
Creating a task using the Consumer point form
You create tasks easily by using the Consumer point form. In this case, consumer point(s) loaded on the form are automatically transferred as faults related to a task. This functionality is useful especially when you want to add multiple consumer points to the same task.
- In the Customer/Consumer point tools, open the Consumer point form.
- Retrieve to the form the consumer point(s) want to add to the task.
From the drop-down menu for Other Tools  , select:
- Add to task
 to add a consumer point to a task.
 - Add all to task
 to add to the task all consumer points that you uploaded to the form.

The task that is active on the Taskform is loaded to the Task selection form that is displayed. You can link consumer point(s) to an existing task or select the required task from the Task menu.

Click Add to add the consumer point to an existing task.
OR:
When you create a new task for consumer points, select the Create new option to open a Create task options form.
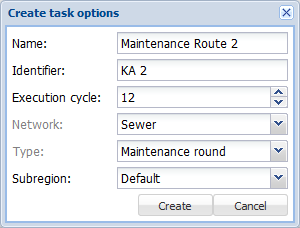
Enter the required data on the form and click Create.
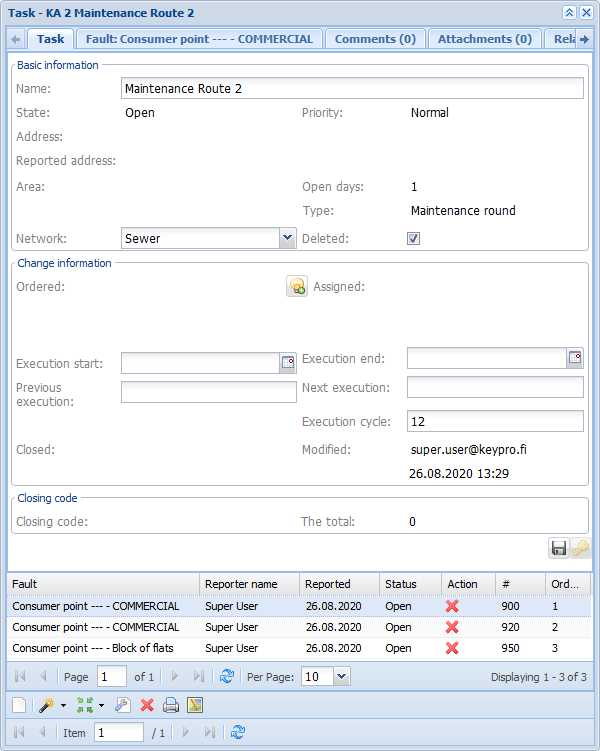
The Taskform has now been completed with the details of the task you created, and the Fault section now includes the consumer point (s) you added.
Creating tasks by using the Task form
- Open the Taskform and click Create task
 .
. - Complete the required information on the Create task options form that is displayed: Name, Identifier, Execution cycle, Network, Type and Subregion. The information you provided is saved in the basic information and change information sections on the Taskform.
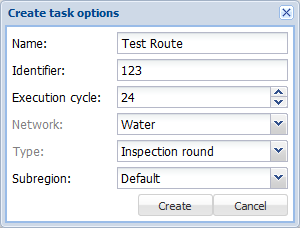
- Click Create.
- The Create task options form is closed and the Task
 form now includes the information you provided.
Assigning a new fault to an existing task
You can add a new fault to an existing task. For example, if the new fault is related to a water valve, take the following steps:
- Go to the Water valves form and select the valve(s) you want.
- In the Other tools
 menu, click Add to task
  (or) Add all to task
 .
. - From the list that is displayed, select the task to which you want to link the valve(s). You can browse the tasks in the drop-down menu or enter the name (or initial characters) in the Task field, in which case the application searches the names matching your criteria.

- Click Add.
- The selected valves are now displayed as faults for the task you selected.
Show task
Show task  shows the task in the map view.

Task information
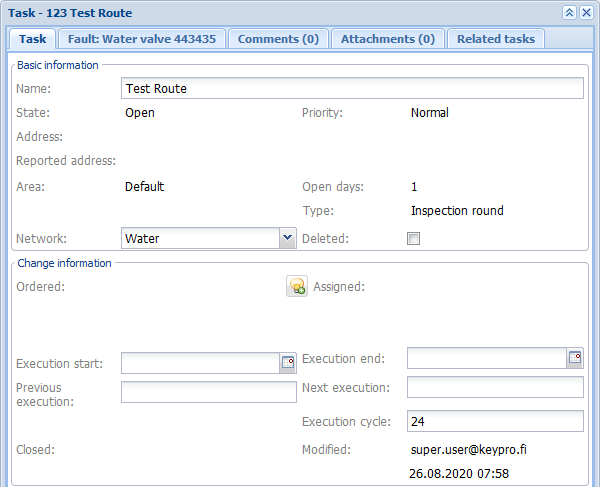
The Task tab includes detailed information, with the majority of the information based on the information content of the fault tab and other tabs related to the task. The locations and the proposed work order for the faults is shown in the map view. The name given to the task can be found in the title of the form and on the map.
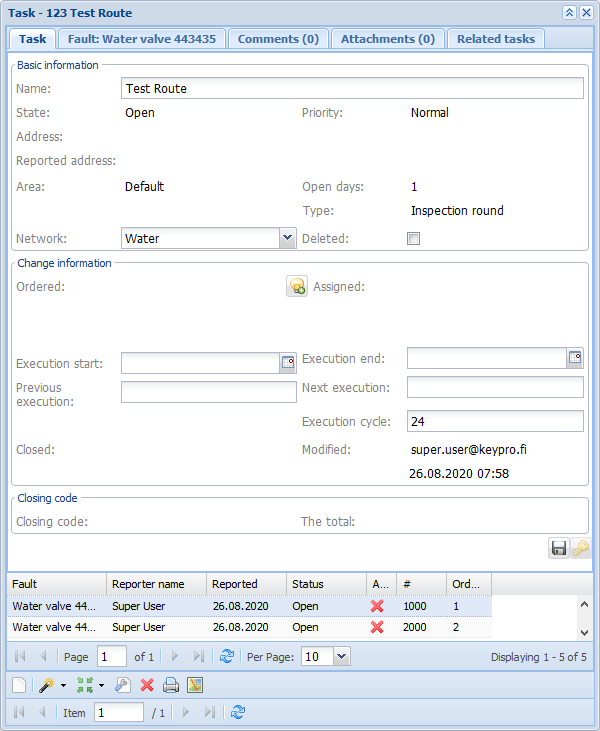
The following information is included in the Basic information section: Name, Status, Reported address, Area, Priority and Type. The Open days field indicates the number of days the task has been open. The Deleted checkbox is used to indicate that the task in question is no longer being performed.
Area information is generated when the fault’s location is provided if the area specifications are included in the database. The indicated address provides location information in free form and it can be provided when creating the fault.
The Change information section includes fields related to task execution and they are used to indicate the start and end (Execution start and Execution end) of the task execution and the dates for the upcoming execution (Previous execution and Next execution). The Execution cycle is a numerical field. You can choose to express the cycle in days, months, or years. This section also includes information on the person updating the task, including a timestamp and it may also include task-related order information.
State information
The process phase for the task is stated in the State field. After a task has been created, its state is Open. When all faults have been marked as completed, the task status will also be updated to Completed.
You can change the information in the State field of tasks whose state is Completed. The state can be In work program if work on the task and the related faults is ongoing. You can reject a task by setting its state to Rejected. It is also possible to change a task’s state to a development proposal.
Priority
As a rule, users themselves define the priority. In addition, the subregion of the task also affects priority. Priority can be Critical, High, Normal or Low. You cannot change the priority of related tasks (more information is available in the Related tasks chapter).
Rules for the determination of priority:
- The priority assigned to a subregion will also be used for tasks located in the same area.
- Priority is automatically set to Normal if no property attributes, but a mere map location is given for the fault.
After you have retrieved the required task on the Task search form, you can change the task’s priority. Instruction for changing the priority are provided in the Editing functions chapter.
Please remember that you may have limited user rights.
Closing code (This feature is subject to separate activation)
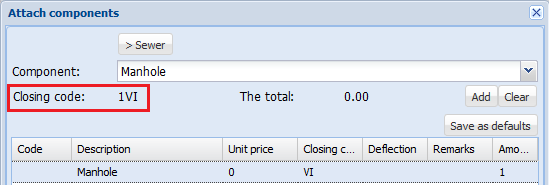
The Closing code section includes the Closing code and Total fields. A Closing code is generated when components are defined for faults. Each material that is added has its own closing code, and the volume of replaced components is also included in the closing code. The total field displays the total costs of components used for faults.
Generating the closing code
A task’s closing code is generated based on the components specified for faults and the related network elements. The adding of components is discussed in the Components chapter.

The closing code specified for an individual fault can be viewed by clicking  Add components to object, which you can find on the Fault tab.
Fault
All faults linked to a task are listed in the bottom section of the Task form.

TIP: Click a fault row to activate the fault in question on the next tab. Double-click the row to go directly to the tab that includes the fault’s information.
Open the fault on its own tab to view and edit the details of the fault.
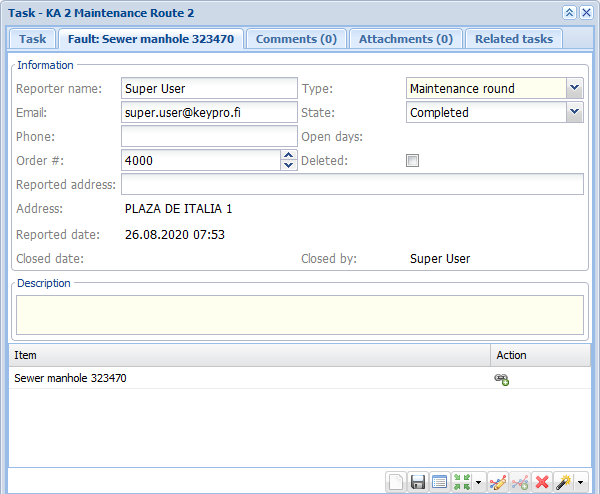
You can edit the Reporter name information and add an email address and phone number. The Fault tab also includes the following fields:
- Type indicates the type of the fault, for example, Maintenance round or Inspection round.
- State indicates the status of the fault, for example, Open, Ordered, In work program, Completed or Rejected. When a task has been ordered from a contractor, the state of the field is changed to Ordered. Faults that are In progress have been assigned to a mechanic for execution. When a task is completed by a mechanic, the state will be changed to Completed.
- Order # is a number assigned to a fault, with the number referring to the execution order. You can modify the order number and thus change the order of faults.
- The Deleted checkbox is used for archiving, and it indicates whether the fault has been removed from a task.
- Reported address is free-form location information provided by the user.
- Address is determined based on the fault’s location, and you cannot edit it.
- Reported date indicates the time the fault was created.
- Closed date and Closed by indicate when the fault was closed and who closed it.
- You can enter more details of the fault in the Description field.
Adding network objects
You can add network objects, such as sewer manholes and consumer points, for existing faults in the KeyWork work management system.
- Find the required task by using either the separate Task search form or by picking it from the map by clicking Pick from map
 at the bottom of the Task form.
 - If the task includes multiple faults, select the required fault by double-clicking the fault row in question.

- On the Fault tab, click Pick network objects from map to fault
 or the Free area option in the button’s drop-down menu to pick the fault from a freely drawn map area.
- In the Selection options window that is displayed, select the required network object type(s).
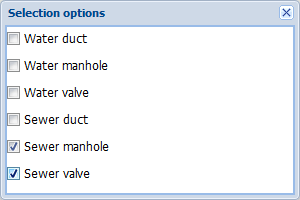
- Pick network objects from map to fault
 : Select a rectangular area on the map or freely draw an area on the map to search, for example, sewer valves within the specified area.
 - The network objects you pick from the map are listed in the Item section on the Fault tab.

TIP: To view, for example, the information on a sewer valve added as a fault, click the item in question.
Deleting faults
To delete a fault, click Delete fault  on the Fault tab OR in the list of faults. The application will ask you to confirm the deletion of the fault.

To detach a network object, click Detach object  .
.

Modifying the location of a fault
To modify the location of a fault, take the following steps:
- In the list of faults, double-click the required fault to select it. The Fault tab is opened and displays the fault information.
- Click Modify location
 to activate the function ( a red square is displayed on the map
  ).
). - Drag the red square (the fault) to the desired location on the map.
Use the Shift button to snap to an existing object or place the fault freely on the map. The fault’s address is updated automatically.
Components
You can attach components to objects.
Attaching components
To attach materials and work hours to objects:
- In the Item section on the Fault tab, select the required fault and click
 Attach components to objects.
- On the Attach components form, you can add components to the selected fault. Please note that the contents of the form and the lists may vary depending on your operating environment and permissions.
- First, select the component type in the drop-down menu for Component. The content of the Component drop-down menu is updated in accordance with your selection. The number of component levels is defined by the administrator.
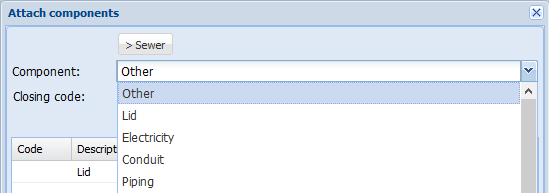
- Select the details you want and click Add. This creates a row containing the information on the added components to the Attach components form. The Closing code and The total fields are also updated if they have been specified in the database.
- To update the number of the component you added, double-click the number in the Amount field.
- When you have specified all the components used for the object, click Save to save the information.
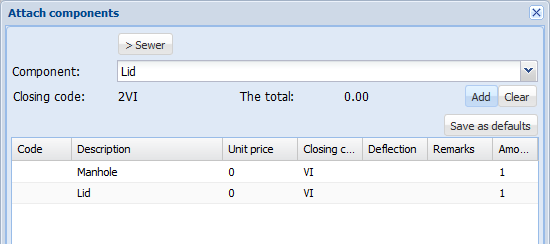
Note! If you have added components to a fault, you cannot delete the fault from the Task form unless you remove the added components.
Removing components
In the Component menu, go back to the upper level by clicking the component button that is displayed at the top of the form:
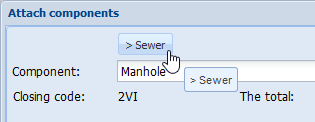
Click Clear at the top of the form to clear the entire form. This removes all components from the object.

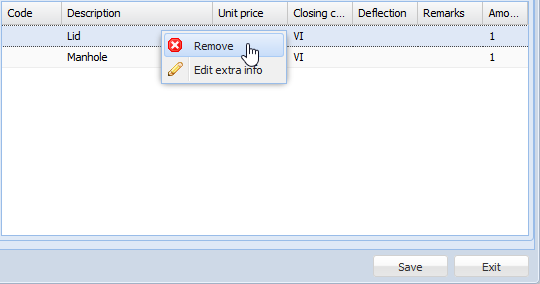
To delete a single component, right-click the component row in question and select Remove. Click Save to save changes.
Deflection
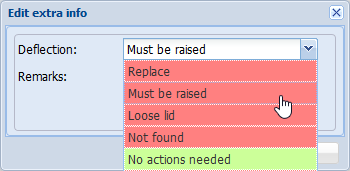
To add a deflection for a component, click  Edit extra info on the selected component row. In the window that is displayed, select Deflection and add a Comment as necessary. Click OK to add the deflection. Note! Colour coding for severity.
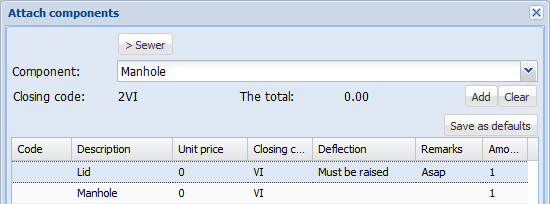
The deflection is displayed in the Attach components window on the row for which you added the extra information. Do not forget to click Save.
Note! The deflection you added will be displayed on the KeyHeat network object forms and on the Consumer point form’s Maintenance history tab.
Closing a task
Note! Tasks that are open are completed when the related faults have been marked completed.
Closing a fault
Before a task is marked to be Completed, you must mark all the related faults as completed.
- Open the task that you want to close on a separate form and go to the Fault tab.
- Change the State to Completed.

- Click Save.
The updated state information for the Fault is displayed in the bottom section of the Task form.

Closing a task
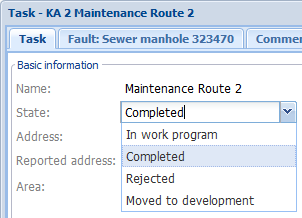
When all faults for a task have been closed, its state will automatically change to Completed. You can further edit the task state to In work program, Rejected or Moved to development. After the selection, click Save to update the information on the form.
Note! You cannot close tasks that are related tasks to some other tasks. Such tasks will be closed automatically when the task above it in the hierarchy is closed.
Opening closed tasks
To reopen closed tasks, click Open task  , if it has been enabled for your user role.
The application will ask you to confirm the opening of the task. Click Yes to change the State of the task to open.
Note! When you reopen a closed task, the closing code is deleted from the system and the state of the task and the related faults is set to Open.
Comments and attachments to tasks
Adding comments
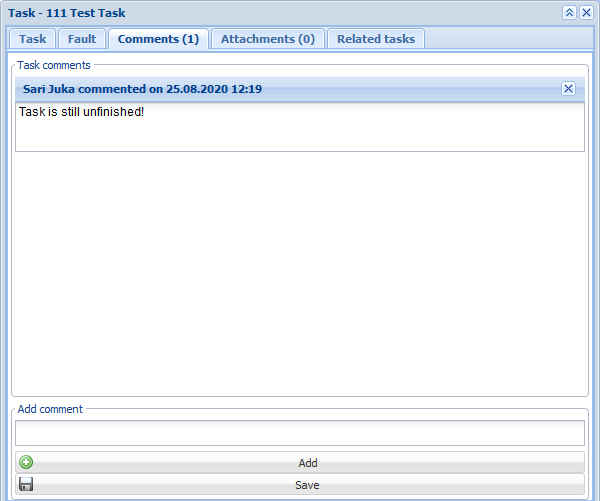
To add a comment in free form for a task, go to the Comments tab. Write your comment in the Add comment field and click Add  . Click Save
  to save the comment. The number of comments is displayed in brackets in the tab header. Click
  to delete your comment.
Adding attachments
You can view external task documents on the Attachments tab. You can use the Attachments tab to add, remove and modify attachments and to send them to zip files.
- To add documents, click Add
 .
. - On the External Documents form that opens, you can click Search
 to search for attachments that have been added to the form.
 - Click Attach document
 to attach a document to a task. In the drop-down menu for the button, select Attach Selected Documents to attach multiple documents at once.
 - Click Delete
 to delete attachments. Click Edit
  to go to the External documents form and to edit an attachment. Click Download all as zip
  to compress the attachments to a zip file.

Related tasks
Go to the Related tasks tab to attach a task to another task.
In the Attach to task field, enter the name/identifier of the task that you want to assign as the parent task for the task that is open on the form. Click Attach  . The parent task and the identifier you entered are now displayed in the Task relations field. Click Detach
  to delete the parent task.
In the figure below has been assigned as the parent task for “111 Test Task”.

Printing
To print a task, click Print  in the toolbar at the bottom of the Task form. The printout opens in a new tab. The printout includes a map image and information on the task.