Supply interruption - SMS - Alert
This use case describes how a new alert is created from the Supply interruption form, including sending a text message to the area via the SMS Sending
 form.
form.
To begin creating the alert, open the Supply interruptionform from the main toolbar of the environment under Reports tools. The button is visible if the Alert
 functionality is enabled in the environment.
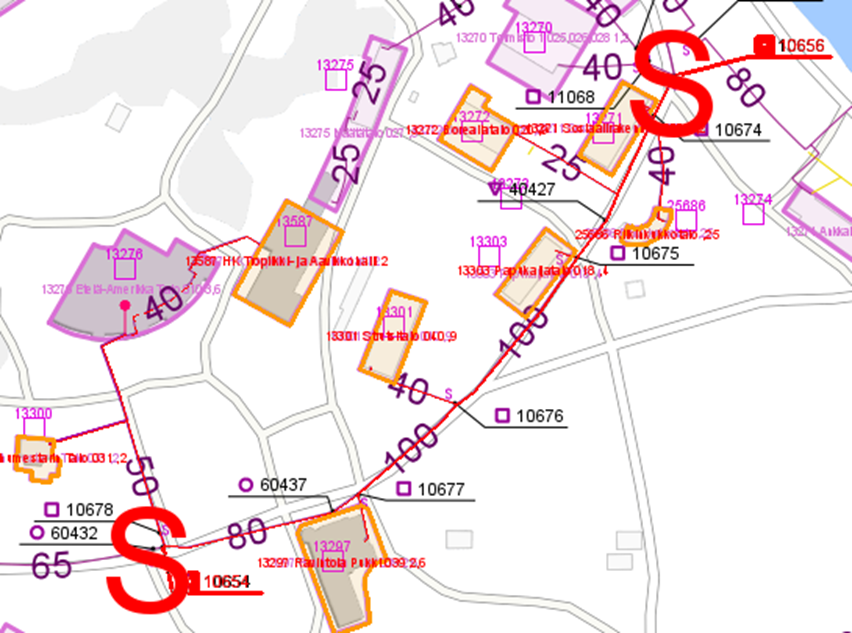
On the Supply interruptionform, you can calculate and view the affected areas of the interruption along with the network objects. Supply interruptionform helps you identify which customers are affected by the outage and how large the affected area is. The form is also a useful tool during maintenance and modification work. Additionally, it provides information on which valves must be closed during the outage.
Creating a supply interruption
- To create a new supply interruption, select a conduit or valve on the Supply interruptionform using the Target selection
 button.
 - Then, select the desired valve or conduit on the map.
- After the selection, the system automatically performs the calculation, and the supply interruption area—with its consumer points and the valves that need to be closed (S)—is highlighted on the map.
Note! When the Supply interruption layer is active, you can view previously created interruptions. In that case, use the Pick supply interruption option from the form's toolbar.
Supply interruption details
The Supply interruptionform is divided into five different information sections, where you can document information related to the supply interruption. For a successful save, all fields in the Supply interruption section (Identification, In charge, Planner, Network type, Job, and Type) are mandatory. The structure and functionality of the form follow the same rules as other KeyAqua forms.
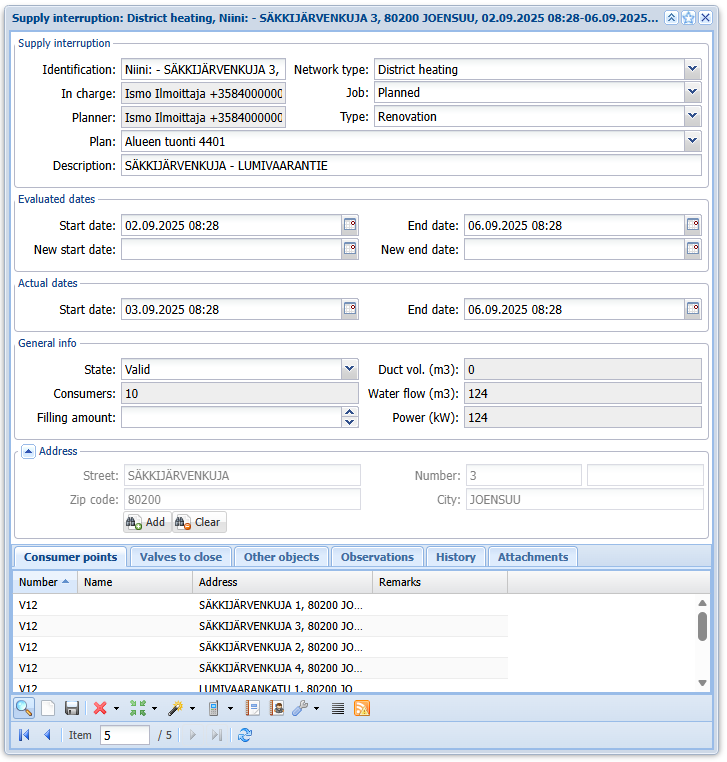
The Supply interruptionform automatically generates an Identifier based on the nearest address after the calculation has been completed. The Identifier can be edited afterwards. In addition, the Network type field is automatically filled in according to the information of the object selected on the map.
- The Job field allows you to select whether the supply interruption is planned or unplanned.
- In the Type field, you specify what type of supply interruption work it is.
- The Description field can be used to enter additional information describing the supply interruption.
- In the Evaluated dates section, you indicate the estimated time of the supply interruption.
- In the Actual dates section, you enter the actual time when the supply interruption occurred.
Both dates sections include a calendar function: by clicking the field, a calendar opens where you can select both the date and time, then press the OK button. By double‑clicking the field, you can select two dates between which, for example, the estimated start date may fall.

In the General info section, the consumers in the affected area, duct volume, water flow, and power are calculated automatically. The section also includes a State field, where you can define the state of the supply interruption.
The Address section is automatically filled in according to the address of the object selected on the form.
The bottom part of the Supply interruptionform contains the following tabs:
- Consumer points: A list of all consumer points included in the supply interruption.
- Valves to close: This tab lists all manholes and their valves that must be closed during the supply interruption.
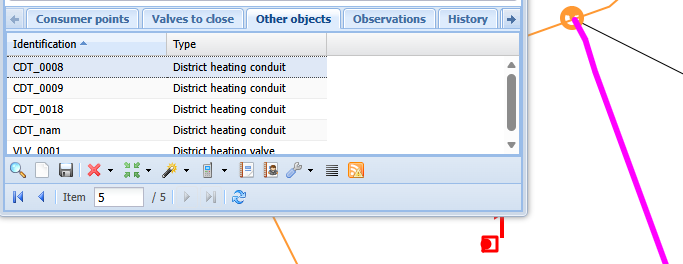
- Other objects: Other objects that are included in the supply interruption.
- Observations: Observations related to the objects affected by the supply interruption. The information is collected from the Investigation
 form.
form. - History: The History tab displays information about previous supply interruptions affecting the same consumer points that are included in the supply interruption currently open on the form.
- Attachments: You can add attachments to the supply interruption, such as photos or documents.
Adding valves and conduits to an existing supply interruption
It is possible to add new valves and conduit to a previously created and saved supply interruption.
- Start adding a new object by clicking the Add object
 button from the form’s toolbar.
 - From the dropdown menu, select Add valve
 or Add conduit
 .
. - Create or pick the correct network object on the object form that opens, and then click the Update / Export to form
 to form button located at the bottom right corner of the form.
 - The object will now appear on its own tab within the Supply interruptionform.
Adding a contact person
- Add contact persons to the supply interruption using the Contact person
 button at the bottom of the form.
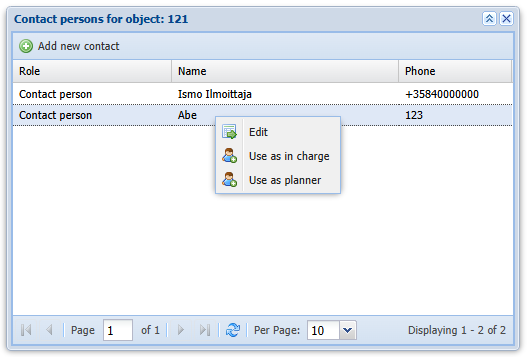
 - On the Contact persons for object form that opens, you can view existing contact persons and add new ones.
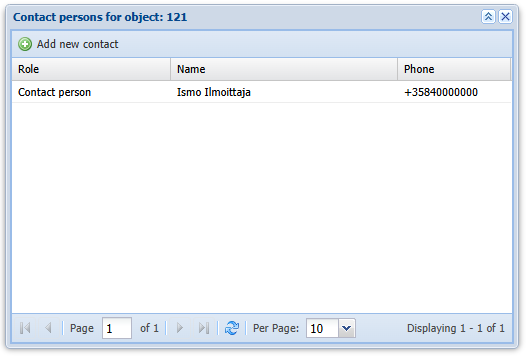
- Add a new contact person to the object by clicking the Add new contact
 button.
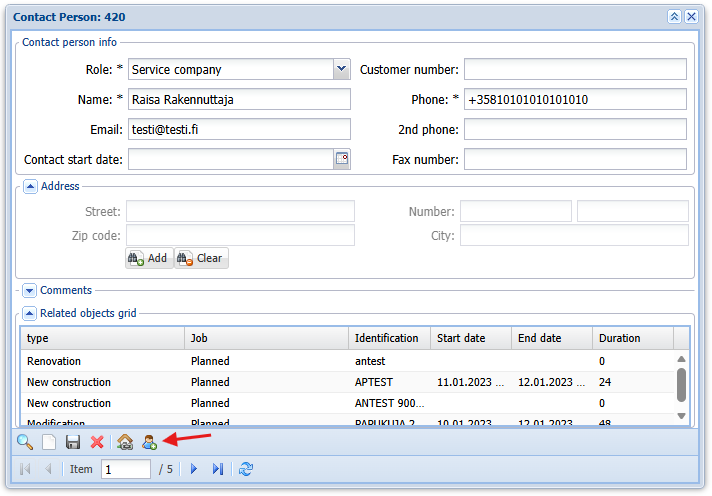
 - On the Contact person form that opens, you can search for existing contact persons and save new ones.
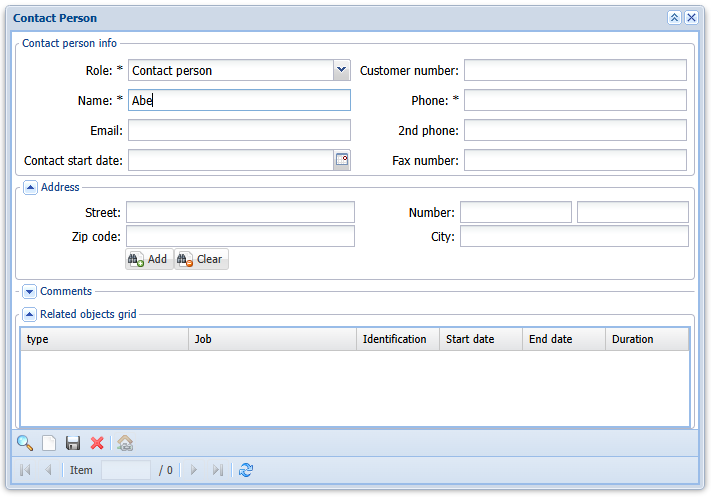
- When adding a new person, fill in at least the required fields on the form and click the Save
 button.
You can also add an address for the contact person using the Add
 button.
If you want to link the contact person on the form to your object:
- Click the Add this contact to the active object
 button.
 - The system will ask for confirmation before adding the contact person to the object. By selecting Yes, the contact person is added to the supply interruption’s contact list.
- Finally, click the Refresh
 button to update the view on the Contact persons for object form.
The contact persons listed can be edited on their own form, and you can set a contact person as In charge or Planner. Right‑click on the contact person’s row and select the desired action.
Creating a new contact person from the In charge and Planner fields
Next to the In charge and Planner fields, you can either select an existing contact person from the dropdown menus or create a completely new person by clicking the Add button next to the field. This opens the Contact person form.
- Search
 for an existing contact person, or create a new one.
 - Before creating a new contact person, clear the form using the Clear
 function.
 - Fill in at least the fields marked with an asterisk (*) on the empty form. You can also add an address for the contact person using the Add/change address
 button.
 - Click the Savebutton in the form’s toolbar.
- After entering all necessary information, click the Add contact to fields
 button in the toolbar.
Highligting an object on the map
You can select and highlight objects on the map by clicking the associated network objects on their respective tabs.
Handout
Click the Handout button to create a notice based on the information in the Supply interruptionform. The system generates the notice in Excel format, where you can edit the content of the notice, and save or print the form.

Exporting information to the SMS Sending form
It is possible to send a text message to the customers of the consumer points located in the supply interruption area. To successfully send a text message, the customer must have a mobile phone number saved in the system.
- Retrieve the supply interruption — or multiple supply interruptions — onto the form, and click the SMS Service
 button.
 - The SMS Sendingform opens pre‑filled with the contact information of the customers belonging to the supply interruption.
Note! The SMS Service button is not automatically enabled in the Supply interruptionform's toolbar. From the dropdown menu of the Add object button in the toolbar, you need to add valves, conduits, or consumer points to the form as needed.
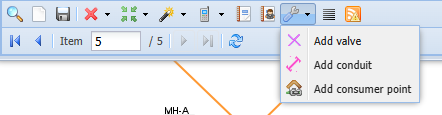
To transfer information from the Supply interruptionform to the SMS Sending form, add all relevant consumer points to the Consumer point tab using the Add consumer point
 option in the Add objectdropdown menu. Export the desired consumer point to the Supply interruptionform using the Update /Export to form
 button.
Once you have added at least one consumer point, the SMS Servicebutton becomes active in the form’s toolbar. Click the button to transfer the consumer points to the SMS Sendingform.
Supply interruption calculation
The system calculates the network objects included in the supply interruption already on the Supply interruptionform. To speed up this calculation, the system performs an automatic background process every night.
If the connections of the network objects are modified and you want to see how these changes affect the supply interruption area within the same day, you can start the supply interruption calculation (background task) manually.
Click the Start supply interruption calculation button to manually trigger the calculation. The user will receive an email notification once the supply interruption calculation has been completed.
Review supply interruption area
The Review supply interruption area is a feature developed for the quick visualization of supply interruption areas.
- Click the Review supply interruption areabutton and, in the window that opens, select the Pick a target on the map
 .
. - Then, select an object (conduit/valve) on the map.
- The network objects belonging to the supply interruption area will be highlighted on the map.
- Use the Clear
 button to remove the supply interruption area highlighting from the map.
Creating an alert from the Supply interruption form
The Alerts button becomes active on the Supply interruptionform once a supply interruption has been saved or an existing one has been loaded onto the form.
When clicking the button, the Alertsform opens, and the text field is automatically pre-filled with the information Supply interruption.
- If a disruption notice has already been created for the selected supply interruption, its details are automatically loaded into the form.
- If no disruption notice has been created previously, the form will be pre‑filled with the information described later in this guide.
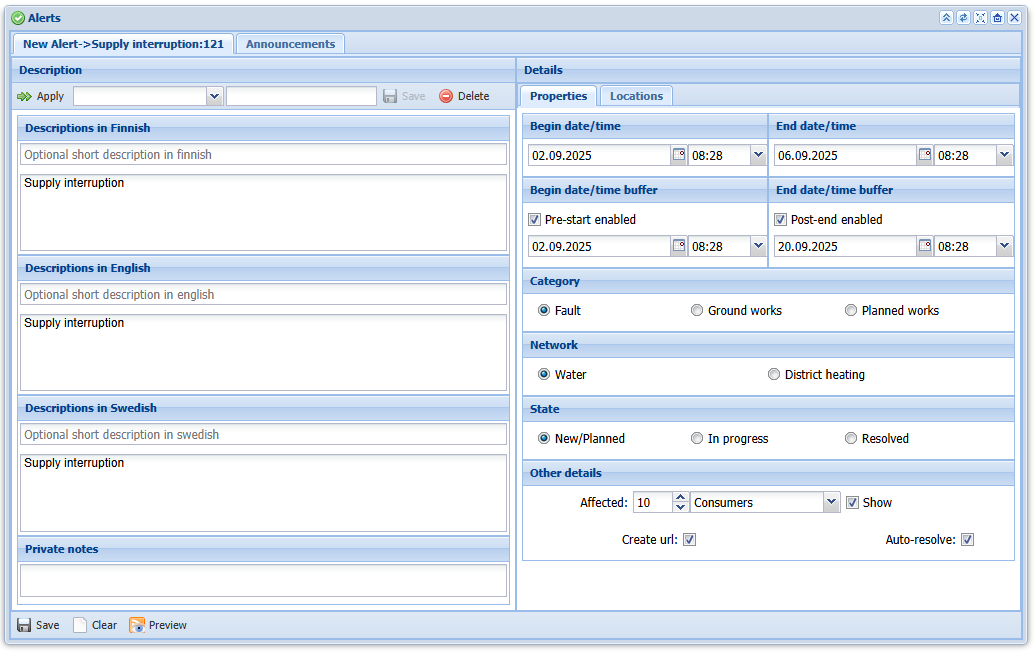
Creating a new alert
When an alert is created directly from the Supply interruptionform, the following information is automatically filled on the new alert:
- Start date and time, based on the following rules:
- Supply interruption Start date, if the New start date is empty
- Supply interruption New start date, if it has been entered
- Pre-notice is activated, and the date and time are set according to the creation time.
- End date and time, based on the following rules:
- Supply interruption End date, if the New end date field is empty
- Supply interruption New end date, if it has been entered
- Post‑notification is set to 2 weeks after the defined end date. This setting must be configurable per system, expressed in days.
- The Category is determined according to the type of work in the supply interruption as follows:
The supply interruption job | Alert category |
Planned | Planned works |
Unplanned | Fault |
- Network: The Network is determined according to the supply interruptions network type.
- State: The alert's state is determined according to the following rules:
Supply interruption state | Alert state |
Not valid | New/Planned |
Valid | In progress |
Complete | Resolved |
- Other details: The number of consumer points included.
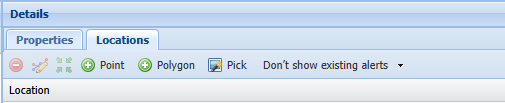
- Locations: Areas are created for the alert based on the geometry of the supply interruption. For each consumer point related to the supply interruption, the linked consumption area is retrieved, and a separate area‑type object is created for it.
Please refer to the SMS SENDING AND ALERTS (these functions are subject to a separate order) chapter in the KeyAqua User's manual for more information on creating a new alert.
Updating a supply interruption
When the supply interruption is completed, the actual start and end dates must be entered into the Alertform.
When the form is saved, these details are updated in the previously created alert.
The advance and post‑notification times are determined according to the previously described rules, based on the updated dates
Correspondences
The correspondences for category, type, and state between supply interruptions and alerts can be configured by Keypro Oy for each system environment.
The activation of advance and post‑notifications (defined in days, 0–n) can also be configured on a per‑environment basis.