General info
The forms intended for processing objects and tasks are identical in their structure and functions. Only the information content of the forms varies based on the type of object being edited at the given time. Therefore, each form can only process items according to the form type, for example electric cables in the Electric cable form and electric poles in the Electric pole form.
.png)
Retrieving information to a form
You can retrieve information about all items by clearing the form with the Clear button and pressing the Search button. If you want to search the form for information about a certain type of objects, you can search using the search criteria. For example, if you want information about all the items in the Electric Cable form which Installation type is Buried, select Buried from the drop-down menu in the Installation type field and press the Search button.
.png)
Functions of the toolbar
The More menu functions are always the same even though the information content of the forms may vary. In other words, the buttons always function in the same way for all network objects and on all forms. The buttons that are displayed depend on the user’s privileges. For example, read-only users cannot update information. If the button is dimmed, it is not available. The button functions are introduced in the next chapters.
Navigate: Opens the map view in Google maps and allows user to navigate to certain point.
New picture: upload images and files from your mobile device to the application.
Materials: select the desired materials and maintenance tasks for the work site of the task.
Mark as completed/Reopen: mark a task as completed or reopen a task.
Set active: set the task as active. A toolbar is opened for the active task in the map view. Read more in Tools of an active task.
Pick fault/s on map: select an object related to the task from the map and open the information on the Faults tab.
Pick fault/s by device location: select the work it from the device location.
Add New Fault: Adds a new fault for task.
Delete Fault: Deletes the selected fault which information is shown in the Fault info tab.
Remove Highlight: Stops highlighting the network object on the map.
.png)
Determining the location of network object
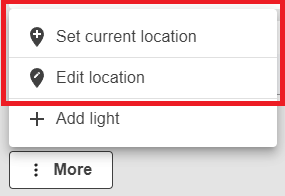
Always select the correct form for the situation, for example, an electric able is created on the Electric cable form, an electric pole on the Electric pole form, etc. The mandatory information fields must always be entered on the forms in order to create an object. Other property information can be added either before or after the object is created. Use the Save button on the form to save the item information. Then open the More menu, where you will find tools for specifying the location.
Location of point object
The position of a point object can be determined in two different ways. Before specifying the location, add at least its mandatory information to the object:
Option 1: With the Set current location function, you can set the location of that point object on the map according to your own location.
Option 2: Edit location allows you to manually set and edit the location of an object. To specify the location of the object for a delayed object, use the Edit Location function.

Location of line object
To determine the location of a line object, use the Edit location function.
Determine the geometry of the line object by creating corner points by moving the map.
Press the ✔ symbol to complete. Cancel with the Arrow
.png) symbol and delete the object’s geometry with the Trash can symbol.
symbol and delete the object’s geometry with the Trash can symbol.Creates a corner point for the line object.
This function locks the map view. Press again to unlock.
.png)
Updating object data
You can edit the object data in the form and update it by pressing the Save button. When you want to change, for example, the usage status of the device mode and add the year of installation to it: Open the device mode on the Device mode form, select the Enabled option from the Usage mode menu and enter 2017 in the Year of installation field, for example. Press the Save button.